Chia seeds have garnered significant attention as a nutrient-dense superfood in recent years. This article delves into the essential steps and tips for cultivating chia seeds, guiding you from soil preparation to harvesting, ensuring you can grow your own healthy supply.
Chia seeds are tiny, yet powerful, packed with omega-3 fatty acids, fiber, protein, and antioxidants. These seeds are known for their ability to absorb water, expanding to form a gel-like substance, which can aid in hydration and digestion. Incorporating chia seeds into your diet can promote heart health, support weight management, and enhance overall wellness.
Selecting the right variety of chia seeds is crucial for successful cultivation. There are primarily two types: white chia and black chia. Both varieties have similar nutritional profiles, but they may have slight differences in growth habits and yield. Research the specific needs of each variety to ensure optimal growth.
Chia seeds thrive in well-drained, nutrient-rich soil. Aim for a pH level between 6.0 and 8.0 for optimal growth. Incorporating organic matter, such as compost, can enhance soil fertility and structure, providing the necessary nutrients for your chia plants to flourish.
Timing is essential when planting chia seeds. The best planting season is typically in spring after the last frost, as chia plants prefer warm temperatures. Ensure that the soil temperature is consistently above 60°F (15°C) for optimal germination.
For successful planting, follow these steps:
- Prepare your soil by loosening it to a depth of at least 12 inches.
- Sow chia seeds at a depth of 1/4 inch, spacing them about 12 inches apart.
- Water gently to avoid displacing the seeds.
Proper watering is crucial for chia cultivation. During the germination phase, keep the soil consistently moist but not waterlogged. As the plants grow, reduce watering frequency, allowing the soil to dry out between waterings to prevent root rot.
Pest and disease management is vital for a healthy crop. Common pests include aphids and spider mites. Use organic methods such as insecticidal soap or neem oil to protect your chia plants. Regularly inspect your plants for signs of disease, such as wilting or discoloration, and remove affected leaves promptly.
Nutrient management is essential for optimal growth. Chia plants require adequate levels of nitrogen, phosphorus, and potassium. A balanced organic fertilizer can help meet these needs, promoting healthy plant development throughout the growing season.
Harvesting chia seeds at the right time is crucial for yield. Look for signs of maturity, such as the flowers turning brown and the seed heads becoming dry. To harvest, cut the seed heads and place them in a paper bag to allow them to dry further. Once fully dry, shake the bag to release the seeds.
Proper storage extends the shelf life of chia seeds. Store your harvested seeds in an airtight container in a cool, dark place. Chia seeds can be added to smoothies, baked goods, or used as a thickening agent in various recipes, providing a nutritious boost to your meals.
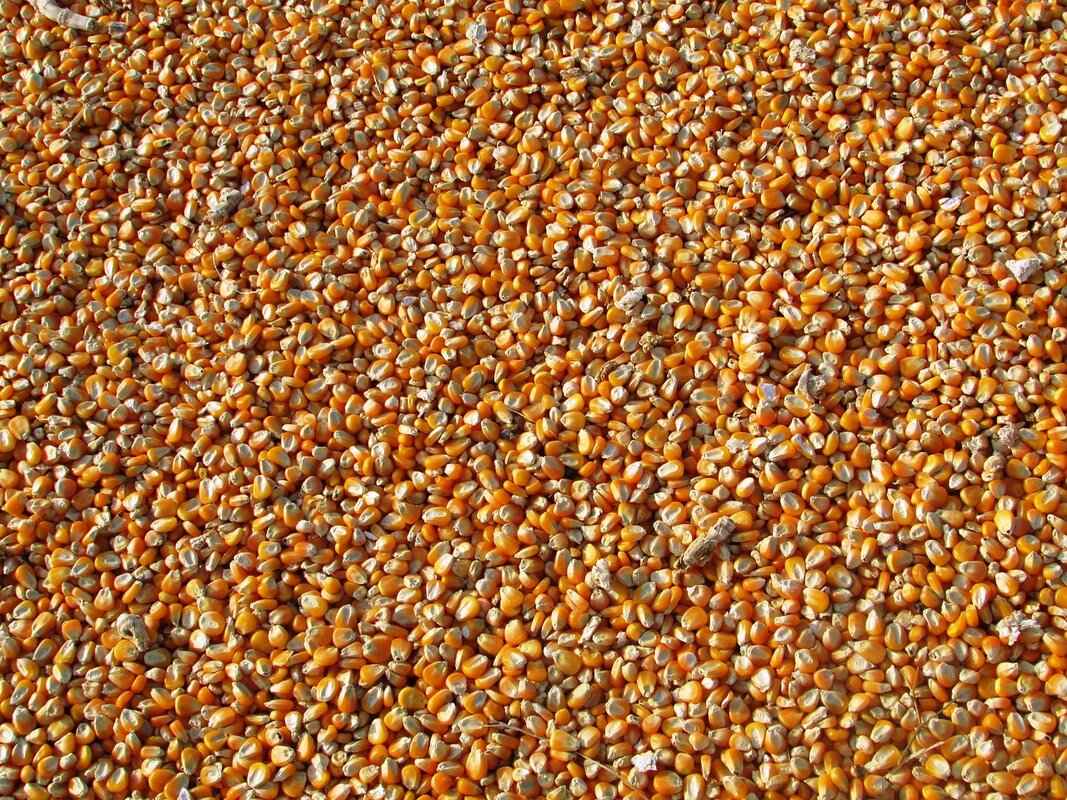
What Are Chia Seeds and Their Benefits?
Chia seeds are small yet powerful seeds derived from the Salvia hispanica plant, native to Mexico and Guatemala. These tiny seeds have gained immense popularity due to their impressive nutrient profile and numerous health benefits. Rich in omega-3 fatty acids, fiber, and antioxidants, chia seeds are often hailed as a superfood that can easily be incorporated into various diets.
One of the standout features of chia seeds is their high content of omega-3 fatty acids, which play a crucial role in heart health. These essential fats help reduce inflammation, lower cholesterol levels, and support overall cardiovascular function. Additionally, chia seeds are a fantastic source of dietary fiber, which aids in digestion, promotes a feeling of fullness, and helps regulate blood sugar levels.
Moreover, chia seeds are packed with antioxidants, which combat oxidative stress and protect the body from free radical damage. This can lead to a reduced risk of chronic diseases, including certain cancers and heart disease. The combination of these nutrients makes chia seeds an excellent addition to a balanced diet.
Incorporating chia seeds into your meals is incredibly easy. They can be added to smoothies, yogurt, oatmeal, and baked goods, or even used to create a nutritious pudding. When soaked in water or milk, chia seeds expand and form a gel-like consistency, which can enhance the texture of various dishes.
Understanding the numerous health benefits of chia seeds can be a motivating factor for many to consider cultivating their own chia plants. By growing your own chia seeds, you not only gain access to a fresh and organic source of these nutrient-dense seeds but also engage in a rewarding gardening experience.
In summary, chia seeds are more than just a trendy health food; they are a powerhouse of nutrients that can significantly contribute to overall well-being. Their versatility in the kitchen and numerous health benefits make them an ideal candidate for anyone looking to enhance their diet. Whether you choose to buy them from the store or grow your own, incorporating chia seeds into your daily routine can lead to a healthier lifestyle.
How to Choose the Right Variety of Chia Seeds?
When it comes to cultivating chia seeds, selecting the right variety is essential for achieving a successful harvest. With numerous strains available, each with unique characteristics and growing requirements, understanding these differences can significantly influence your cultivation experience.
Each variety of chia seed has distinct traits that affect growth, yield, and adaptability to specific climates. By choosing the most suitable strain, you can optimize growth conditions and enhance the nutritional quality of your harvest. This decision impacts everything from planting to harvesting, making it a critical first step in your chia cultivation journey.
- Salvia hispanica: The most commonly cultivated variety, known for its high omega-3 content and adaptability to various climates.
- White Chia: A less common strain, prized for its milder flavor and appealing appearance, perfect for health-conscious consumers.
- Black Chia: This variety is known for its robust growth and is often favored for its nutritional density.
Each chia seed variety has its own set of growing requirements. Here are some key factors to consider:
- Climate: Most chia varieties thrive in warm, temperate climates with ample sunlight. They prefer temperatures between 70°F to 85°F (21°C to 29°C).
- Soil Type: Well-drained, sandy loam soils are ideal. Ensure the soil is rich in organic matter to promote healthy growth.
- Watering Needs: Chia plants require consistent moisture, especially during germination. However, overwatering can lead to root rot, so balance is key.
Before selecting a chia seed variety, assess your local growing conditions. Consider factors such as:
- Soil pH: Chia seeds prefer a pH range of 6.0 to 8.0. Conduct a soil test to determine your soil’s acidity or alkalinity.
- Sunlight Exposure: Ensure your planting area receives at least 6 hours of direct sunlight daily for optimal growth.
- Frost Dates: Chia plants are sensitive to frost. Check your local frost dates to avoid planting too early in the season.
When sourcing chia seeds, consider the following:
- Seed Quality: Opt for organic, non-GMO seeds from reputable suppliers to ensure the best growth potential.
- Freshness: Check the packaging date. Fresh seeds have a higher germination rate, leading to a more successful crop.
- Varietal Information: Ensure the seeds are clearly labeled with their variety and specific growing requirements to match your conditions.
By taking the time to choose the right variety of chia seeds and understanding their specific needs, you can set yourself up for a successful and rewarding cultivation experience. With the right preparation and care, your chia plants can thrive and provide you with a bountiful harvest of this nutrient-dense superfood.
What Soil Conditions Are Ideal for Chia Seeds?
When it comes to cultivating chia seeds, understanding the ideal soil conditions is crucial for achieving healthy plant growth and maximizing yield. Chia plants, known for their resilience, thrive best in environments that provide the right balance of nutrients, moisture, and drainage.
Chia seeds flourish in well-drained, nutrient-rich soil. The following characteristics are essential:
- Soil Type: Sandy loam or loamy soil is preferable as it allows for excellent drainage while retaining necessary moisture.
- pH Level: The optimal pH range for chia cultivation is between 6.0 and 7.5. This slightly acidic to neutral pH level promotes nutrient availability.
- Organic Matter: Incorporating organic matter, such as compost or well-rotted manure, enhances soil fertility and improves moisture retention.
Chia seeds are sensitive to waterlogged conditions. Poor drainage can lead to root rot and other diseases. Ensuring that your soil drains well is vital. You can achieve this by:
- Adding perlite or sand to improve aeration.
- Creating raised beds to facilitate drainage.
Chia plants require a balanced supply of nutrients for optimal growth. Key nutrients include:
- Nitrogen: Essential for leaf development and overall plant vigor.
- Phosphorus: Important for root development and seed formation.
- Potassium: Helps in water regulation and enhances drought resistance.
Conducting a soil test can help determine nutrient levels and guide you in amending your soil accordingly.
Proper soil preparation sets the foundation for successful chia cultivation. Here are some best practices:
- Soil Testing: Test your soil to assess pH and nutrient levels, allowing for targeted amendments.
- Amendments: Based on test results, add lime to raise pH or sulfur to lower it. Incorporate organic matter to boost nutrient content.
- Tilling: Till the soil to a depth of at least 12 inches to ensure good aeration and mix in amendments thoroughly.
Yes, chia seeds can be successfully grown in containers. Ensure that the containers have adequate drainage holes and use a high-quality potting mix that meets the aforementioned soil conditions. Regular monitoring of moisture levels is essential, as container plants may dry out faster than those planted directly in the ground.
Identifying poor soil conditions early can save your chia crop. Watch for these signs:
- Stunted Growth: Indicates nutrient deficiencies or poor soil structure.
- Yellowing Leaves: Often a sign of nitrogen deficiency or poor drainage.
- Wilting: Can indicate either overwatering or underwatering depending on soil conditions.
Addressing these issues promptly can help restore your chia plants to health.
By understanding and implementing the ideal soil conditions for chia seeds, you can create a thriving environment that supports healthy growth and abundant yields. With the right preparation and care, your chia cultivation journey can be both rewarding and fruitful.
When Is the Best Time to Plant Chia Seeds?
When it comes to cultivating chia seeds, timing is essential. The right planting season and climatic conditions can significantly influence the growth and yield of your chia plants. Understanding these factors will help ensure a bountiful harvest.
Chia seeds thrive in warm climates, making spring and early summer the ideal planting seasons. In most regions, the best time to sow chia seeds is between March and June. This period provides the necessary warmth and sunlight that chia plants require for optimal growth. It’s important to wait until after the last frost, as chia plants are sensitive to cold temperatures.
Climatic conditions play a crucial role in the successful cultivation of chia seeds. Chia plants prefer temperatures ranging from 60°F to 100°F (15°C to 38°C). They flourish in areas with full sun exposure, which helps them develop strong, healthy growth. Additionally, chia plants require moderate rainfall; they thrive with about 12 to 20 inches of water annually. If you live in a region with high humidity or excessive rainfall, consider planting chia seeds in raised beds to improve drainage and prevent root rot.
Soil temperature is another important factor to consider. Before planting, ensure that the soil temperature is at least 70°F (21°C) for optimal germination. Chia seeds can take anywhere from 7 to 14 days to germinate, depending on soil conditions and moisture levels. Maintaining consistent soil moisture during this period is crucial to encourage healthy sprouting.
For those in cooler climates, starting chia seeds indoors can be an effective strategy. By sowing seeds in pots or trays indoors around 6 to 8 weeks before the last expected frost, you can give your plants a head start. Once the danger of frost has passed and outdoor conditions are favorable, transplant the seedlings into the garden.
In summary, the best time to plant chia seeds is during the warm months of spring and early summer. Ensure that you monitor soil temperatures, moisture levels, and climatic conditions to create an environment conducive to growth. By timing your planting correctly, you can enjoy a successful harvest of this nutrient-rich superfood.
How to Properly Plant Chia Seeds?
Planting chia seeds correctly is crucial for achieving a healthy and productive crop. The techniques you employ during the planting process can significantly influence the growth and yield of your chia plants. In this section, we will go through a detailed, step-by-step process for sowing chia seeds, focusing on the essential aspects of spacing and depth to ensure optimal germination and growth.
- Preparation of the Soil: Before planting, ensure that the soil is well-drained and rich in organic matter. Chia seeds prefer a pH level between 6.0 and 8.0. You can amend the soil with compost to enhance its nutrient content.
- Choosing the Right Time: The best time to plant chia seeds is during the warm season, ideally when temperatures are consistently above 70°F (21°C). This ensures that the seeds have the right conditions for germination.
- Spacing: When sowing chia seeds, it is important to maintain adequate spacing to allow for proper air circulation and growth. A recommended spacing is approximately 3 to 4 inches (7.5 to 10 cm) between seeds. This spacing helps prevent overcrowding and competition for nutrients.
- Depth: Chia seeds are small and should be planted at a shallow depth. A depth of about 1/4 inch (0.6 cm) is ideal. Planting too deep can hinder germination, while planting too shallow may expose the seeds to drying out.
- Watering: After planting, lightly water the area to ensure the seeds are settled into the soil. Be careful not to overwater, as chia seeds are susceptible to rot. Maintain consistent moisture in the soil, especially during the germination phase.
- Mulching: Applying a thin layer of mulch can help retain moisture and suppress weeds. Organic materials like straw or shredded leaves work well.
Once the chia seeds have germinated, typically within 7 to 14 days, thin the seedlings to ensure they have enough space to grow. This involves removing weaker plants, leaving the strongest ones spaced adequately apart.
In summary, the proper planting of chia seeds involves careful attention to soil preparation, timing, spacing, depth, and watering. By following these steps, you can set the foundation for a thriving chia garden, leading to a bountiful harvest of this nutrient-packed superfood.
What Are the Watering Requirements for Chia Plants?
Chia plants require careful attention to their watering needs throughout different growth stages to thrive and produce healthy seeds. Understanding these requirements is essential for preventing issues such as overwatering or drought stress, both of which can significantly affect the plants’ overall health and yield.
During the initial germination phase, chia seeds need consistent moisture to ensure successful sprouting. It is advisable to keep the soil slightly damp but not saturated. Watering should be done gently to avoid displacing the seeds. A fine mist spray can be effective during this stage.
As the seedlings emerge, typically within 7 to 14 days, the watering frequency can be adjusted. At this stage, it is crucial to allow the top layer of soil to dry out slightly between waterings. This approach encourages the roots to grow deeper in search of moisture, leading to stronger plants. Aim for watering every 2 to 3 days, depending on the climate and soil conditions.
Once the chia plants are established and begin to grow vigorously, their water requirements will increase. During this phase, particularly in warmer months, it is essential to provide adequate moisture to support their rapid growth. Watering deeply and less frequently is recommended, promoting deep root development. A good rule of thumb is to water once a week, ensuring that the soil is thoroughly soaked.
However, it is important to monitor the weather conditions closely. In periods of prolonged heat or drought, more frequent watering may be necessary. Conversely, during rainy seasons, it is crucial to ensure that the soil does not become waterlogged, as chia plants are susceptible to root rot. Implementing proper drainage measures can help mitigate this risk.
As the plants approach maturity, their water needs will stabilize. At this stage, maintaining consistent moisture is vital, especially as they prepare to flower and set seed. Reducing watering slightly during the flowering phase can encourage the plants to focus their energy on seed production rather than excessive foliage growth.
In summary, understanding the watering requirements of chia plants at each growth stage is fundamental for successful cultivation. By adjusting your watering practices according to the plants’ needs, you can help ensure a healthy and productive crop. Regularly check soil moisture levels and adjust your watering schedule to create the best conditions for your chia plants to thrive.
How to Manage Pests and Diseases in Chia Cultivation?
Pest and disease management is crucial for ensuring the health and productivity of your chia plants. These plants can be susceptible to a variety of pests and diseases that can hinder growth and reduce yield. Implementing effective organic methods not only protects your crops but also maintains the integrity of your gardening practices. Below are some effective strategies for managing pests and diseases in chia cultivation.
Chia plants may encounter several pests, including:
- Aphids: These small insects suck the sap from plants, leading to stunted growth.
- Spider Mites: These pests can cause yellowing leaves and webbing, indicating a severe infestation.
- Whiteflies: Similar to aphids, whiteflies can weaken the plant by feeding on its sap.
Recognizing the signs of disease early can save your chia crop. Common symptoms include:
- Leaf Spot: Dark lesions on leaves can indicate fungal infections.
- Wilting: This may result from root rot or other soil-borne pathogens.
- Powdery Mildew: A white, powdery substance on leaves can signify fungal issues.
Utilizing organic methods not only protects your chia plants but also promotes a healthy ecosystem. Here are some effective strategies:
- Neem Oil: This natural pesticide disrupts the life cycle of pests and is safe for beneficial insects.
- Insecticidal Soap: Effective against soft-bodied insects like aphids and spider mites, it can be easily made at home.
- Companion Planting: Planting garlic or marigolds nearby can deter pests naturally.
Prevention is better than cure. Here are some preventive measures:
- Crop Rotation: Changing the location of your chia plants each season can reduce the risk of soil-borne diseases.
- Proper Spacing: Ensuring adequate spacing allows for air circulation, reducing humidity and the risk of fungal diseases.
- Healthy Soil: Enriching your soil with organic matter can enhance plant resilience against diseases.
Timing is essential when managing pests and diseases. Regular monitoring of your chia plants will help determine the right time for intervention. Early detection allows for quick action, minimizing damage. Consider applying organic treatments during the early morning or late afternoon to avoid harming beneficial insects.
Encouraging beneficial insects, such as ladybugs and lacewings, can significantly reduce pest populations. These natural predators feast on harmful pests, providing a natural balance in your garden.
In conclusion, managing pests and diseases in chia cultivation is essential for a successful harvest. By employing organic methods and preventive measures, you can protect your chia plants effectively while promoting a sustainable gardening environment. Remember, a healthy plant is your best defense against pests and diseases.
What Nutritional Needs Do Chia Plants Have?
Nutrient management is crucial for the optimal growth of chia plants. These remarkable seeds are not only a superfood but also require a balanced mix of nutrients to thrive. Understanding the essential nutrients needed by chia plants and how to amend your soil accordingly can significantly enhance their growth and yield.
Chia plants benefit from a variety of nutrients, each playing a vital role in their development:
- Nitrogen (N): This nutrient is essential for leaf growth and overall plant vigor. A nitrogen-rich soil supports robust foliage, which is crucial for photosynthesis.
- Phosphorus (P): Important for root development and flower formation, phosphorus enhances the plant’s ability to absorb other nutrients effectively.
- Potassium (K): This nutrient aids in water regulation and improves drought resistance, making it vital for chia plants that may face varying moisture levels.
- Calcium (Ca): Calcium helps in cell wall structure and stability, preventing diseases and promoting healthier growth.
- Magnesium (Mg): As a core component of chlorophyll, magnesium is essential for photosynthesis and energy transfer within the plant.
- Sulfur (S): This nutrient is important for protein synthesis and enzyme function, contributing to the overall health of the plant.
To meet the nutritional needs of chia plants, soil amendment is often necessary. Here are some effective methods:
- Organic Matter: Incorporating compost or well-rotted manure can improve soil structure, enhance nutrient retention, and provide a slow release of essential nutrients.
- Soil Testing: Conduct a soil test to determine nutrient levels and pH. This will help you identify specific deficiencies and adjust accordingly.
- Fertilizers: Use balanced fertilizers that contain all essential nutrients. Look for organic options like fish emulsion or bone meal to provide nutrients without harmful chemicals.
- Crop Rotation: Practicing crop rotation with legumes can naturally enhance soil nitrogen levels, benefiting subsequent chia crops.
Regular monitoring of your chia plants is essential to ensure they receive adequate nutrients. Signs of nutrient deficiency can include:
- Yellowing Leaves: This may indicate a nitrogen deficiency.
- Poor Growth: Stunted growth could signal a lack of phosphorus or potassium.
- Leaf Curling: This might be due to a calcium deficiency.
By keeping a close eye on your plants and their growth patterns, you can make timely adjustments to your nutrient management practices.
In summary, effective nutrient management is vital for cultivating healthy chia plants. By understanding their specific nutritional needs and amending your soil accordingly, you can ensure optimal growth and a bountiful harvest of this nutritious superfood.
When and How to Harvest Chia Seeds?
Harvesting chia seeds at the right time is crucial for ensuring maximum yield and quality. Chia plants typically take about 3 to 4 months from planting to reach maturity, depending on the growing conditions. Understanding the signs of maturity and employing the best harvesting techniques can significantly impact the quality of your seeds. This section will guide you through the process of identifying when to harvest and how to effectively gather and process your chia seeds.
Recognizing when your chia plants are ready for harvest is essential. Here are some key indicators:
- Flowering Stage: Chia plants produce beautiful purple or white flowers, which usually bloom in clusters. Once the flowers begin to wilt and fall off, this indicates that the seeds are developing.
- Seed Color Change: As the seeds mature, they transition from green to a dark brown or black color. This color change is a clear sign that it’s time to consider harvesting.
- Drying of the Plant: The plant itself will start to dry out, and the leaves may turn yellow. This is a natural part of the maturation process.
When you’ve determined that your chia plants are mature, follow these steps for a successful harvest:
- Prepare Your Tools: Gather necessary tools such as scissors or garden shears, a large container or bucket, and gloves to protect your hands from any debris.
- Cut the Flowering Heads: Use your scissors to cut the flowering heads of the chia plants, ensuring to leave a few inches of stem attached. This allows for easier handling and reduces seed loss.
- Dry the Cuttings: Place the cuttings in a dry, well-ventilated area out of direct sunlight. Allow them to dry for about 1 to 2 weeks until the seeds are fully dry and can be easily separated.
After harvesting, it’s important to properly process your chia seeds:
- Threshing: Once the cuttings are dry, gently shake or rub the flower heads to release the seeds. This process is known as threshing.
- Cleaning: After threshing, you may notice some plant debris mixed with the seeds. Use a fine mesh sieve or a screen to separate the seeds from the debris.
- Storage: Store your cleaned chia seeds in an airtight container in a cool, dark place. Proper storage can extend their shelf life significantly.
To maximize your yield and ensure high-quality seeds, consider these best practices:
- Harvest in Dry Conditions: Choose a dry day for harvesting to minimize moisture, which can lead to mold and spoilage.
- Timing is Key: Harvesting too early can result in immature seeds, while waiting too long may lead to seed loss as they can fall from the plant.
- Regular Monitoring: Keep an eye on your plants as they approach maturity. Regular checks will help you catch the right moment for harvesting.
By understanding the signs of maturity and employing effective harvesting techniques, you can enjoy a bountiful yield of nutritious chia seeds. This superfood not only enhances your diet but also provides a rewarding gardening experience.
How to Store and Use Your Homegrown Chia Seeds?
Proper storage is essential for extending the shelf life of chia seeds. These tiny superfoods can provide numerous health benefits, but only if they are stored correctly. Here, we will explore effective methods for storing your harvested seeds and creative ways to incorporate them into your diet.
1. Optimal Storage Conditions
To keep your chia seeds fresh, store them in a cool, dark place. Exposure to light, heat, and moisture can lead to rancidity. Here are some effective storage methods:
- Airtight Containers: Use glass jars or vacuum-sealed bags to prevent air from entering. This keeps the seeds dry and fresh.
- Refrigeration: For long-term storage, consider refrigerating or freezing your chia seeds. This can extend their shelf life up to two years.
- Labeling: Always label your containers with the date of storage. This helps you keep track of freshness.
2. How to Check for Freshness
Before using your stored chia seeds, check for freshness. Fresh seeds should have a mild, nutty aroma. If they smell off or have a bitter taste, it’s best to discard them.
3. Creative Ways to Incorporate Chia Seeds into Your Diet
Incorporating chia seeds into your meals can be both fun and nutritious. Here are some ideas:
- Chia Pudding: Soak chia seeds in almond milk or coconut milk overnight. Add sweeteners and toppings like fruits or nuts for a delicious breakfast.
- Smoothies: Blend chia seeds into your favorite smoothies for added fiber and omega-3 fatty acids.
- Baking: Include chia seeds in muffins, bread, or energy bars for an extra nutritional boost.
4. Health Benefits of Chia Seeds
Chia seeds are not only versatile but also packed with health benefits. They are a rich source of omega-3 fatty acids, which are essential for heart health. Additionally, they are high in fiber, aiding in digestion and promoting a feeling of fullness.
5. Conclusion
By properly storing your homegrown chia seeds, you can enjoy their benefits for an extended period. With a variety of ways to incorporate them into your diet, chia seeds can easily become a staple in your meals, enhancing both flavor and nutrition.
Frequently Asked Questions
- What are chia seeds and why should I grow them?
Chia seeds are tiny powerhouses of nutrition, loaded with omega-3 fatty acids, fiber, and antioxidants. Growing them at home means you have a fresh, organic superfood right at your fingertips!
- How do I choose the right variety of chia seeds?
Choosing the right variety is crucial. Look for strains that are well-suited to your climate and soil conditions. Researching local growing tips can lead you to the perfect type for your garden.
- What kind of soil do chia seeds need?
Chia seeds thrive in well-drained, nutrient-rich soil with a pH of 6.0 to 8.0. Adding organic matter can boost your soil’s health, making it the ideal environment for these plants.
- When is the best time to plant chia seeds?
The best time to plant chia seeds is in the spring when the soil is warm. They love sunny conditions, so aim for a spot that gets plenty of sunlight throughout the day!
- How should I water my chia plants?
Watering is key! Keep the soil consistently moist but not soggy. As your plants grow, adjust your watering schedule according to their needs—less during dry spells and more when they’re young.
- How can I manage pests and diseases?
Organic methods are your best friend! Use neem oil or insecticidal soap to tackle pests. Regularly inspecting your plants can help catch any issues before they become serious.
- When should I harvest my chia seeds?
Harvest when the flowers have dried and the seeds rattle in the pods. This ensures you’re getting the most nutritious seeds possible—timing is everything!
- How do I store my harvested chia seeds?
Store your chia seeds in a cool, dry place in an airtight container. This keeps them fresh for longer, so you can enjoy their health benefits for months to come!

