Explore the essential GoPro accessories that enhance your travel vlogging experience. This comprehensive guide covers everything from mounts to lighting, ensuring you capture stunning footage on your adventures.
Understanding the importance of GoPro accessories can significantly enhance your vlogging capabilities. The right tools not only improve video quality but also provide versatility in capturing various angles and perspectives. Whether you’re hiking through rugged terrain or filming underwater, having the appropriate accessories can make all the difference in your content.
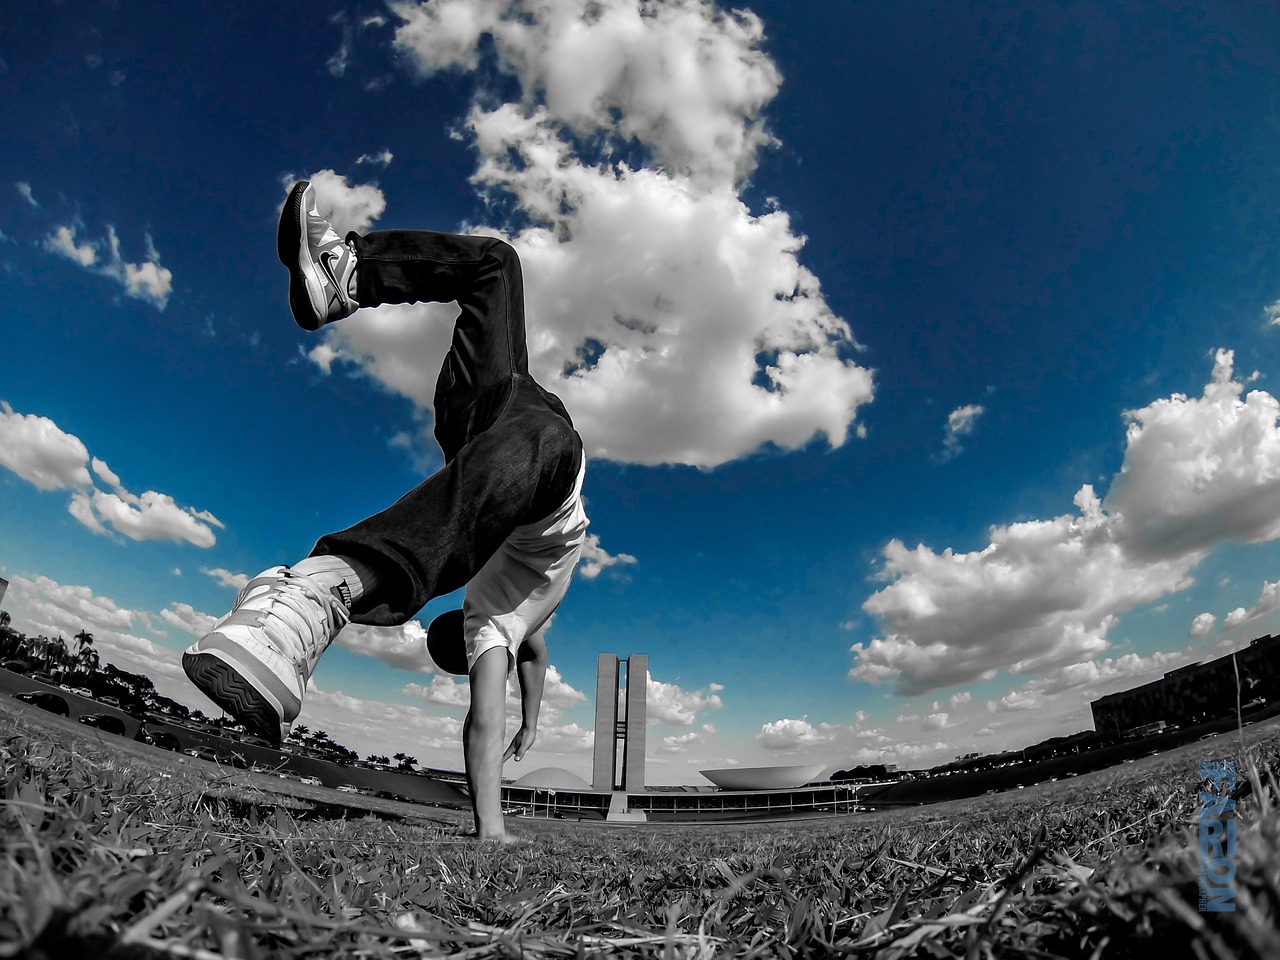
Mounts are crucial for stabilizing your shots. Here, we explore various types of mounts, including chest mounts, helmet mounts, and more, to help you choose the best option for your needs.
Chest mounts provide a unique perspective while keeping your hands free. They are particularly useful for activities like biking or hiking, allowing you to capture immersive footage without any hassle.
Helmet mounts are perfect for adventure enthusiasts. Discover how they can help you capture thrilling moments while biking, skiing, or engaging in other activities. They offer a first-person view that is exhilarating for your audience.
Tripods are essential for stable shots and creative angles. We review the top tripods that are lightweight and travel-friendly, ensuring you never miss a moment.
Mini tripods are ideal for travel due to their portability. Learn how these compact tools can enhance your filming experience, allowing for steady shots in various environments.
Selfie sticks allow you to include yourself in your vlogs. This section highlights the best options that are easy to carry and use, making it simple to document your adventures while still engaging with your audience.
Good lighting can dramatically improve your video quality. Here, we examine portable lighting options that are perfect for travel vloggers.
LED lights are a popular choice for enhancing visibility. Explore the best portable LED lights designed for GoPro cameras, which can help you achieve professional-looking footage, even in low-light conditions.
Light diffusers help create a more flattering light. This section discusses how they can improve your footage in challenging lighting conditions, ensuring your videos look polished and inviting.
Audio quality is just as important as video quality. This section covers essential audio accessories that can enhance your vlogging experience.
External microphones can significantly improve sound quality. Learn about the best options compatible with GoPro cameras for capturing clear audio, ensuring your commentary and ambient sounds are crisp and engaging.
Wind can ruin your audio. Discover how windshield accessories can help mitigate unwanted noise during outdoor shoots, allowing your viewers to fully immerse themselves in your content.
Traveling can be tough on your equipment. This section discusses protective gear to keep your GoPro safe from damage while on the go.
Waterproof cases are essential for aquatic adventures. Explore the best options to keep your GoPro safe while enjoying water activities, ensuring your camera is protected from moisture and impact.
Screen protectors are vital for maintaining your camera’s display. Learn about the top screen protectors that offer durability and clarity, keeping your GoPro in pristine condition throughout your travels.
Editing software can elevate your travel vlogs. This section reviews popular editing tools that help you create polished videos.
For those new to editing, beginner-friendly software is key. Discover the best options that offer simplicity without compromising quality, allowing you to focus on storytelling.
Advanced software provides more features for experienced vloggers. Learn about the tools that can take your editing to the next level, offering flexibility and creative options to make your videos stand out.

Why Are GoPro Accessories Essential for Travel Vlogging?
When embarking on a travel vlogging journey, the right accessories can be the difference between capturing stunning visuals and missing out on incredible moments. Understanding the significance of these tools can enhance your vlogging capabilities immensely. This section explores how specific accessories can not only improve video quality but also offer versatility in various shooting conditions.
First and foremost, video quality is paramount in travel vlogging. A GoPro camera, while excellent on its own, can be significantly enhanced with the right accessories. For instance, using a quality lens filter can help manage glare and improve color saturation, ensuring your footage looks vibrant and professional. Similarly, a gimbal stabilizer can eliminate shaky footage, allowing you to present smooth, cinematic shots that engage your audience.
Moreover, accessories provide versatility in how you capture your adventures. Different mounts, such as chest or helmet mounts, allow for unique perspectives that handheld shots cannot achieve. This variety keeps your content fresh and engaging, appealing to a broader audience. Additionally, using a tripod can open up creative possibilities, enabling you to explore time-lapse photography or stable shots from various angles.
Lighting is another critical aspect of video production. Natural light can be unpredictable, especially in outdoor settings. Having portable LED lights or reflectors in your kit ensures that you can illuminate your subjects effectively, regardless of the environment. This adaptability not only enhances the visual appeal of your vlogs but also helps maintain consistent quality across different locations and times of day.
Audio quality is often an overlooked element in vlogging. While video captures the visuals, sound quality is essential for storytelling. Investing in external microphones can dramatically improve audio clarity, making your vlogs more enjoyable to watch. Windshields for microphones are also crucial when filming outdoors, as they reduce wind noise that can be distracting to viewers.
Protecting your gear is equally important. Travel can be rigorous, and your GoPro is susceptible to damage. Accessories like waterproof cases and screen protectors safeguard your equipment, ensuring it remains functional throughout your journey. This protection allows you to focus on creating content without worrying about the safety of your gear.
Lastly, editing software plays a vital role in the post-production process. Even the best footage can benefit from a little enhancement. Utilizing editing tools can help you add effects, transitions, and music that elevate your vlogs to a professional level. Whether you prefer user-friendly options or advanced software, having the right editing tools can make a significant difference in the final product.
In conclusion, the importance of GoPro accessories in travel vlogging cannot be overstated. From improving video and audio quality to providing protective measures and enhancing creative possibilities, these tools are essential for any serious vlogger. By investing in the right accessories, you can ensure that every adventure is captured beautifully, allowing your audience to experience the journey alongside you.

Top GoPro Mounts for Travel Vloggers
When it comes to capturing breathtaking travel moments, having the right mounts for your GoPro can make all the difference. These accessories not only stabilize your shots but also provide unique perspectives that can enhance your storytelling. In this section, we will delve into the various types of mounts available, including chest mounts, helmet mounts, and more, to help you select the best option for your travel vlogging needs.
Using the right mount is essential for achieving the best footage possible. Different mounts serve different purposes, allowing you to capture a variety of angles and perspectives. This versatility can significantly improve your video quality and storytelling capabilities.
Chest mounts are ideal for those who want to keep their hands free while capturing immersive footage. By attaching your GoPro to your chest, you can achieve a first-person perspective that engages viewers like never before. This mount is particularly beneficial for activities such as hiking, biking, or any adventure where you want to showcase your surroundings.
- Advantages: Provides a stable view, hands-free operation, and captures your body movements.
- Best For: Action sports, travel vlogs, and immersive storytelling.
If you’re an adventure enthusiast, a helmet mount is a must-have accessory. This mount allows you to capture thrilling moments while skiing, biking, or engaging in other high-octane activities. The helmet mount provides a unique perspective that can make your footage more dynamic and exciting.
- Advantages: Secure attachment, captures a wide field of view, and is less intrusive.
- Best For: Extreme sports, biking, and outdoor adventures.
In addition to chest and helmet mounts, there are several other options worth considering:
- Handlebar Mounts: Perfect for cyclists, allowing you to capture the road ahead.
- Tripod Mounts: Ideal for stable shots and creative angles, especially for time-lapse videos.
- Selfie Stick Mounts: Great for including yourself in the action while maintaining a distance.
When selecting a mount, consider the type of activities you will be engaging in and the perspective you wish to achieve. Each mount has its strengths and weaknesses, so it’s crucial to choose one that aligns with your vlogging style. Whether you opt for a chest mount for hands-free convenience or a helmet mount for action shots, the right accessory can elevate your travel vlogs to new heights.
Ultimately, investing in high-quality mounts tailored to your specific needs will ensure that your GoPro captures stunning footage, allowing you to share your adventures with the world in the most engaging way possible.
Chest Mounts: Hands-Free Convenience
When it comes to capturing breathtaking travel moments, chest mounts offer a distinctive perspective that can elevate your vlogging experience. Unlike traditional handheld methods, chest mounts allow you to keep your hands free while recording, making them an ideal choice for adventure enthusiasts and travel vloggers alike.
Why Choose Chest Mounts for Travel Vlogging?
- Unique Perspective: Chest mounts position the camera at the center of your body, providing a first-person view that immerses your audience in the action. This angle is particularly effective for activities like hiking, biking, or any adventure where your hands are engaged.
- Stability: The chest mount secures the camera close to your body, reducing shake and providing smoother footage compared to handheld shots. This stability is crucial for maintaining video quality during dynamic movements.
- Hands-Free Operation: With a chest mount, you can easily navigate your surroundings, interact with your environment, or even capture spontaneous moments without needing to hold the camera. This flexibility enhances your ability to document experiences as they happen.
Ideal Use Cases for Chest Mounts
Chest mounts shine in various scenarios:
- Adventure Sports: Whether you’re skiing down a slope, mountain biking through rugged terrain, or zip-lining through a forest, chest mounts capture thrilling action from an engaging viewpoint.
- Travel Exploration: When exploring new cities or natural wonders, a chest mount allows you to share your journey authentically. Viewers can see not only the sights but also your reactions and interactions with the environment.
- Hands-On Activities: If your travels include activities like cooking local dishes or crafting, a chest mount lets you film your process without interrupting your workflow.
Tips for Using Chest Mounts Effectively
- Adjust the Camera Angle: Ensure the camera is angled correctly to capture the best view. Experiment with different angles before starting your shoot to find what works for you.
- Check the Fit: A well-fitted chest mount is essential for stability. Make sure the straps are secure but comfortable to avoid distractions during your activities.
- Combine with Other Gear: Consider using additional accessories like external microphones for better audio quality or portable lighting solutions to enhance your footage.
In summary, chest mounts are an invaluable accessory for travel vloggers seeking to capture immersive and engaging content. Their hands-free convenience, unique perspective, and stability make them an essential tool for documenting adventures and experiences. Whether you’re navigating bustling streets or conquering the great outdoors, a chest mount can help you create stunning videos that resonate with your audience.
Helmet Mounts: Capture the Action
For adventure enthusiasts, helmet mounts are indispensable tools that elevate your ability to capture exhilarating moments during activities like biking, skiing, and rock climbing. These mounts allow you to securely attach your GoPro camera to your helmet, providing a unique perspective that is both immersive and dynamic.
Why should you consider using a helmet mount? Here are several compelling reasons:
- First-Person Perspective: Helmet mounts offer a first-person view of your adventures, allowing viewers to experience the thrill as if they were right there with you.
- Hands-Free Operation: With a helmet mount, your hands are free to navigate challenging terrains or perform stunts, ensuring you can focus on the activity without worrying about holding a camera.
- Stability: Unlike handheld shots, helmet mounts provide a stable platform that minimizes shakes and vibrations, resulting in smoother footage.
- Versatility: Helmet mounts are not just for helmets; they can be adapted for various surfaces, making them suitable for a range of activities beyond just biking or skiing.
When choosing a helmet mount, consider the following features:
- Adjustability: Look for mounts that allow for angle adjustments, enabling you to capture different perspectives.
- Compatibility: Ensure the mount is compatible with your specific helmet type and GoPro model to avoid any issues during your adventures.
- Durability: A high-quality helmet mount should withstand harsh conditions, including rain, snow, and impacts.
Additionally, investing in accessories such as anti-fog inserts and lens protectors can enhance your filming experience by ensuring clear visibility in various weather conditions. These small additions can make a significant difference in the quality of your footage.
Many adventure vloggers have shared their experiences using helmet mounts, emphasizing how these accessories have transformed their content. For instance, a mountain biker might showcase breathtaking downhill runs, while a skier can capture the beauty of untouched powder. The ability to share these experiences through a captivating first-person perspective not only engages viewers but also inspires them to embark on their own adventures.
Incorporating helmet mounts into your travel vlogging toolkit can elevate your storytelling and provide your audience with a more authentic experience. Whether you are soaring down a mountain or navigating rugged trails, the footage captured with a helmet mount will resonate with viewers, allowing them to feel the thrill of the ride.
In conclusion, helmet mounts are a vital accessory for anyone looking to document their adventures. By providing a hands-free, stable, and immersive filming experience, they allow you to focus on the action while capturing stunning footage that tells your story. Embrace the excitement and let your adventures shine through your videos!

Best GoPro Tripods for Stability and Versatility
When it comes to capturing stunning travel footage, tripods play a crucial role in ensuring stability and versatility. Whether you’re shooting a breathtaking landscape or a dynamic action scene, having the right tripod can make all the difference. In this section, we will explore the best GoPro tripods that are not only lightweight but also travel-friendly, so you can take them anywhere without hassle.
Why Are Tripods Important for Travel Vlogging?
Tripods provide a stable base for your camera, reducing the risk of shaky footage and allowing for greater creative control. They enable you to experiment with different angles and perspectives, which can enhance the storytelling aspect of your vlogs. In addition, a good tripod can help you achieve long exposure shots and time-lapses, capturing moments that would otherwise be missed.
Key Features to Consider When Choosing a Tripod
- Weight: A lightweight tripod is essential for travel, as it won’t add unnecessary bulk to your gear.
- Height: Consider how tall the tripod extends. A versatile height range allows for various shooting angles.
- Stability: Look for tripods with sturdy legs and a reliable locking mechanism to ensure your camera stays secure.
- Portability: A compact design is ideal for travel, making it easy to pack and carry.
Top Lightweight Tripods for GoPro
Here’s a selection of some of the best tripods that cater to travel vloggers:
| Tripod Model | Weight | Max Height | Key Features |
|---|---|---|---|
| Joby GorillaPod 3K | 0.6 lbs | 15.75 inches | Flexible legs, versatile mounting options |
| Manfrotto BeFree Compact | 3.1 lbs | 59 inches | Quick setup, sturdy aluminum construction |
| Benro Travel Angel | 3.5 lbs | 64.2 inches | Multi-angle center column, lightweight design |
Mini Tripods: Compact and Convenient
For those who prioritize portability, mini tripods are an excellent choice. These compact devices can easily fit into your backpack and provide stable support for your GoPro. They are perfect for capturing quick shots or setting up time-lapses without the bulk of a full-sized tripod.
Selfie Sticks: Capture Yourself in the Action
In addition to traditional tripods, consider using a selfie stick. These versatile tools allow you to include yourself in your travel vlogs while maintaining stability. Many selfie sticks are designed to extend, giving you the ability to capture wider angles and unique perspectives.
Conclusion
Investing in a quality tripod is essential for any travel vlogger looking to enhance their footage. With the right tripod, you can achieve stunning, stable shots that elevate your content. Whether you opt for a compact mini tripod or a versatile full-sized option, the key is to choose a model that fits your travel style and filming needs.
Mini Tripods: Compact and Convenient
Mini tripods have become a staple for travel vloggers and photographers alike, thanks to their compact size and lightweight design. These versatile tools not only provide stability but also enhance your filming experience by allowing for creative angles and steady shots. In this section, we will explore the benefits of mini tripods and how they can transform your travel vlogging.
One of the main advantages of mini tripods is their portability. Unlike traditional tripods, which can be bulky and cumbersome, mini tripods easily fit into your backpack or camera bag. This makes them perfect for on-the-go filming, whether you’re hiking through a national park or exploring a bustling city. Their lightweight nature ensures that you won’t be weighed down by your gear, allowing you to focus on capturing stunning footage.
Another significant benefit of mini tripods is their stability. Many travel vloggers struggle with shaky footage, which can detract from the overall quality of their videos. Mini tripods provide a stable base for your GoPro, enabling you to achieve smooth, professional-looking shots. Whether you’re filming a scenic landscape or a bustling street scene, a mini tripod can help you maintain control over your camera, resulting in clearer and more visually appealing footage.
Moreover, mini tripods often come with adjustable legs and heads, allowing you to achieve various angles and perspectives. This flexibility is crucial for travel vloggers who want to showcase their adventures creatively. For instance, you can easily set up your mini tripod on uneven surfaces, such as rocky terrains or sandy beaches, ensuring that you can film from the perfect height and angle without compromising stability.
In addition to their practical benefits, mini tripods can also enhance your storytelling. By using a tripod, you can include yourself in the frame while filming, allowing for more engaging and personal content. This is particularly useful for travel vlogs, where connecting with your audience is essential. You can easily set up the tripod, frame yourself in the shot, and capture your reactions and experiences as you explore new destinations.
When choosing a mini tripod, consider factors such as height, weight capacity, and material. Some mini tripods are made from durable materials like aluminum, providing a sturdy option for heavier cameras. Others may be made from lightweight plastic, making them easier to carry but potentially less stable. Look for models that offer quick-release plates for easy camera attachment and detachment, as this will save you time during your shoots.
In summary, mini tripods are an essential accessory for travel vloggers seeking to improve their filming experience. Their portability, stability, and versatility allow for creative storytelling and high-quality footage. As you embark on your next adventure, consider investing in a mini tripod to elevate your vlogging game and ensure you capture every memorable moment with ease.
Selfie Sticks: Capture Yourself in the Action
In the world of travel vlogging, capturing every moment is essential, especially when it comes to including yourself in the narrative. One of the most effective tools for achieving this is the selfie stick. This accessory not only helps you frame yourself perfectly in your shots but also allows for a wider perspective, giving your audience a more immersive experience. Below, we will explore the best selfie sticks available, focusing on their portability and ease of use, ensuring you can take them along on all your adventures.
Selfie sticks are incredibly versatile and can enhance your video content in several ways:
- Wider Angles: Selfie sticks enable you to capture more of your surroundings, making your vlogs visually appealing.
- Stability: Many selfie sticks come with built-in stabilization features, reducing shaky footage.
- Self-Inclusion: They allow you to easily include yourself in group shots or scenic backgrounds.
When selecting a selfie stick for your GoPro, consider the following features:
- Portability: Look for lightweight and collapsible designs that can easily fit into your travel bag.
- Adjustable Length: A selfie stick with adjustable length allows you to capture different perspectives.
- Compatibility: Ensure that the selfie stick is compatible with your GoPro model for seamless integration.
- Durability: Choose a stick made from robust materials that can withstand the rigors of travel.
| Selfie Stick | Length | Weight | Features |
|---|---|---|---|
| GoPro Shorty | 8.9 inches (extends to 22 inches) | 0.5 lbs | Compact, tripod base, versatile |
| UBeesize Selfie Stick | 12.6 inches (extends to 40 inches) | 0.6 lbs | Bluetooth remote, adjustable angle |
| Insta360 Selfie Stick | 10.6 inches (extends to 38 inches) | 0.4 lbs | 360-degree rotation, lightweight |
To make the most out of your selfie stick, consider these practical tips:
- Practice Angles: Experiment with different angles to find what works best for your style.
- Use the Timer: Set a timer on your GoPro to give you time to pose and frame your shot.
- Stabilize Your Shots: Hold the selfie stick steady to avoid shaky footage, especially in windy conditions.
In summary, a selfie stick is an invaluable accessory for any travel vlogger looking to enhance their content. With the right features and proper usage, you can create engaging and dynamic videos that showcase both yourself and the breathtaking scenery around you.

Lighting Solutions for Stunning Footage
When it comes to travel vlogging, lighting plays a crucial role in determining the quality of your video content. Good lighting can dramatically enhance your visuals, making them more vibrant and engaging. In this section, we will delve into various portable lighting options that are perfect for travel vloggers, ensuring you always have the right tools at your disposal.
Why is Lighting Important for Vlogging?
Proper lighting can transform an ordinary shot into something extraordinary. It helps to highlight details, create mood, and enhance colors. Poor lighting, on the other hand, can lead to grainy footage and lost details. This is why understanding and utilizing effective lighting solutions is essential for any travel vlogger.
What are the Best Portable Lighting Options?
- LED Lights: These compact lights are a favorite among travel vloggers due to their brightness and energy efficiency. They are lightweight and can easily fit into your camera bag. Look for options with adjustable brightness settings to adapt to various environments.
- Ring Lights: Perfect for vlogging, ring lights provide even illumination and reduce shadows. They are especially useful for close-up shots or when filming in dimly lit areas. Some models are battery-operated, making them ideal for outdoor adventures.
- Light Panels: These versatile lighting solutions can be mounted on tripods or held by hand. They offer adjustable color temperatures and brightness levels, allowing you to customize the lighting to suit different scenes.
How to Use Light Diffusers for Better Results?
Light diffusers are essential tools for softening harsh light, which can create unflattering shadows on your subjects. By spreading the light evenly, diffusers help achieve a more natural look. They are particularly beneficial when filming in bright sunlight or artificial lighting conditions.
Choosing the Right Lighting for Your Needs
When selecting lighting equipment, consider factors such as weight, size, and battery life. Travel vloggers often need to prioritize portability without sacrificing quality. Look for products that are specifically designed for travel, ensuring they can withstand the rigors of an adventure while providing optimal performance.
Tips for Effective Lighting in Different Environments
- Outdoor Shooting: Utilize natural light as much as possible. Early mornings or late afternoons provide the best lighting conditions.
- Indoors: Use LED lights or ring lights to brighten up your space. Position them at a 45-degree angle for the best results.
- Low Light Conditions: Incorporate light panels or portable LED lights to enhance visibility without overwhelming the shot.
Conclusion
In summary, investing in the right lighting solutions can significantly improve your travel vlogs. By utilizing portable LED lights, ring lights, and light diffusers, you can create stunning visuals that captivate your audience. Remember to experiment with different lighting setups to find what works best for your unique style and content.
LED Lights: Brighten Up Your Shots
When it comes to capturing stunning visuals with your GoPro camera, lighting plays a crucial role. Whether you’re filming during the golden hour or in dimly lit environments, having the right lighting equipment can significantly enhance the quality of your footage. Among the various lighting options available, LED lights have emerged as a popular choice for travel vloggers due to their portability, versatility, and efficiency.
LED lights are not only energy-efficient but also provide a consistent and adjustable light source, making them ideal for various shooting conditions. Here are some key reasons to consider:
- Portability: Most LED lights are compact and lightweight, making them easy to carry in your travel gear.
- Adjustable Brightness: Many models allow you to adjust brightness levels, giving you control over the lighting in your shots.
- Battery Life: LED lights often come with long-lasting batteries, ensuring you have enough power for extended shooting sessions.
- Versatility: They can be used for various applications, from close-up shots to broader scenes, enhancing your creative options.
Here are some of the best portable LED lights designed specifically for GoPro cameras:
| Product Name | Features | Price Range |
|---|---|---|
| GoPro Light Mod | Compact, waterproof, adjustable brightness | $49.99 |
| Neewer 660 LED Video Light | Adjustable color temperature, remote control | $139.99 |
| Godox LEDP120C | High CRI, dimmable, portable | $89.99 |
To make the most out of your LED lights, consider the following tips:
- Positioning: Experiment with different angles and distances to achieve the desired effect. Soft, diffused light is often more flattering.
- Combine with Natural Light: Use LED lights in conjunction with natural light for a balanced look, especially during sunrise or sunset.
- Use Diffusers: If your LED light is too harsh, consider using a diffuser to soften the light and create a more pleasing effect.
While using LED lights can enhance your vlogging experience, there are some common pitfalls to avoid:
- Overexposing Your Shots: Too much light can wash out your footage. Always check your camera settings and adjust the light accordingly.
- Neglecting Battery Life: Always carry extra batteries or a portable charger to ensure your lights remain powered throughout your shoot.
- Ignoring Color Temperature: Be mindful of the color temperature of your LED lights to maintain color accuracy in your footage.
In conclusion, investing in a quality LED light can greatly enhance your GoPro filming experience. With the right lighting, you can achieve professional-looking videos that capture the essence of your travel adventures. Remember to explore different lighting techniques and find what works best for your unique style as a vlogger.
Light Diffusers: Softening Harsh Light
When it comes to capturing stunning footage, lighting plays a crucial role. In challenging lighting conditions, such as bright sunlight or harsh indoor lights, achieving the perfect shot can be difficult. This is where light diffusers come into play. These accessories help create a more flattering light, transforming the way your videos look and feel.
Light diffusers work by scattering light, which reduces harsh shadows and softens the overall illumination. This is particularly important for travel vloggers who often find themselves shooting in varying environments, from bustling city streets to serene natural landscapes. By using a diffuser, you can ensure that your subjects are evenly lit, enhancing their appearance and the overall quality of your footage.
One of the primary benefits of using light diffusers is their ability to improve skin tones. Harsh lighting can cause unflattering shadows on faces, making them appear washed out or overly dramatic. A diffuser helps to create a more natural look, allowing for smoother transitions between light and shadow. This is especially beneficial when filming people or wildlife, as it captures their true essence without the distraction of harsh lighting.
Additionally, light diffusers are versatile tools that can be used in various situations. For example, when filming outdoors, a diffuser can help to soften the intense sunlight, creating a more pleasant viewing experience. Similarly, in indoor settings, diffusers can help to balance artificial light sources, making sure that your footage remains consistent and visually appealing.
Travel vloggers often face the challenge of portability. Fortunately, many light diffusers are compact and easy to carry, making them an ideal accessory for those on the go. Whether you’re hiking in the mountains or exploring a vibrant market, having a light diffuser in your gear can make a significant difference in the quality of your footage.
There are various types of light diffusers available, including softboxes, umbrella diffusers, and portable diffusion panels. Each type offers unique advantages depending on your filming needs. For instance, softboxes are excellent for creating a broad, soft light source, while umbrella diffusers are lightweight and quick to set up, making them perfect for travel.
In conclusion, incorporating light diffusers into your travel vlogging toolkit can dramatically enhance your footage. By softening harsh light and providing more flattering illumination, these accessories allow you to capture stunning visuals that resonate with your audience. Whether you’re a seasoned vlogger or just starting, investing in a quality light diffuser is a step towards improving your video production quality.

Audio Accessories for Professional Sound Quality
When it comes to vlogging, audio quality is just as crucial as video quality. Poor sound can detract from even the most stunning visuals, making it essential for travel vloggers to invest in the right audio accessories. This section will explore the key audio tools that can significantly enhance your vlogging experience, ensuring your audience hears every detail clearly.
- External Microphones: Capture Clear Sound
- Windshields: Reducing Wind Noise
- Audio Recorders: High-Quality Sound Capture
- Headphones: Monitoring Audio Quality
One of the most effective ways to improve sound quality is by using external microphones. These devices can significantly enhance your audio capture, providing clearer and more professional sound compared to built-in camera microphones. Popular options include shotgun microphones, which are designed to capture sound from a specific direction, and lavalier microphones, which can be clipped onto clothing for hands-free audio recording. When choosing an external microphone, consider factors like compatibility with your GoPro and the type of content you are creating.
Another essential accessory is a windscreen, which helps to reduce wind noise during outdoor shoots. Wind can create disruptive sounds that overshadow your voice, making it difficult for viewers to engage with your content. By using a windscreen, you can ensure that your audio remains clear even in breezy conditions. Many windscreens are designed specifically for external microphones, so be sure to select one that fits your setup.
For those looking to take their audio quality a step further, investing in a dedicated audio recorder can be beneficial. These devices allow you to record high-quality sound separately from your video footage, giving you greater control during the editing process. This can be particularly useful for interviews or when capturing ambient sounds that enhance your storytelling.
Monitoring your audio in real-time is also crucial. Using headphones while recording allows you to catch any issues immediately, ensuring that you can adjust your setup as needed. Look for headphones that provide good sound isolation, so you can focus on the audio quality without distractions.
In summary, audio quality plays a vital role in the overall success of your vlogs. By investing in essential audio accessories such as external microphones, windscreens, audio recorders, and headphones, you can create a more engaging and professional viewing experience for your audience. Remember, clear audio not only enhances your content but also keeps your viewers coming back for more!
External Microphones: Capture Clear Sound
When it comes to capturing high-quality audio for your travel vlogs, external microphones can make a world of difference. While GoPro cameras are renowned for their exceptional video capabilities, their built-in microphones often fall short in delivering clear and professional-grade sound. This is where external microphones come into play, providing a solution to enhance your audio quality significantly.
Using an external microphone with your GoPro can help you achieve crystal-clear audio, essential for engaging storytelling. Whether you’re narrating your adventures or capturing the ambient sounds of nature, the right microphone can ensure that your viewers hear every detail without distortion.
- Rode VideoMicro: This compact microphone is lightweight and offers excellent sound quality. Its cardioid polar pattern focuses on sounds in front of the camera while minimizing background noise, making it ideal for vlogging in busy environments.
- Zoom H1n Handy Recorder: A versatile option, the Zoom H1n can be used as both a standalone recorder and an external microphone. It captures high-resolution audio and connects easily to GoPro cameras, ensuring you never miss a beat.
- Rode Wireless GO II: For those who prefer wireless solutions, the Rode Wireless GO II offers freedom of movement. This lavalier microphone system provides high-quality audio without the hassle of cables, perfect for dynamic shooting scenarios.
- Shure MV88: This portable microphone connects directly to your smartphone or GoPro, making it a fantastic option for travel vloggers on the go. It offers adjustable stereo width and various recording modes to suit different environments.
When selecting an external microphone for your GoPro, consider the following factors:
- Type of Microphone: Decide whether you need a shotgun microphone for directional sound or a lavalier for hands-free recording.
- Portability: Look for lightweight and compact options that are easy to carry during your travels.
- Compatibility: Ensure the microphone is compatible with your specific GoPro model, as some may require adapters.
To further improve audio quality, consider using windshields with your external microphones. These accessories help to reduce wind noise, which can be particularly problematic during outdoor shoots. Additionally, using a microphone stand or tripod can stabilize your audio capture, ensuring consistent sound levels.
To achieve the best results with your external microphone, keep these tips in mind:
- Test Your Setup: Always conduct a sound check before recording to ensure your microphone settings are optimal.
- Monitor Audio Levels: Use headphones to monitor audio levels in real-time, allowing you to catch any issues immediately.
- Adjust Settings: Familiarize yourself with your microphone’s settings and adjust them according to your recording environment.
In conclusion, investing in a quality external microphone can vastly improve the audio quality of your GoPro videos. By selecting the right microphone and employing best practices, you can ensure that your travel vlogs resonate with your audience, enhancing their viewing experience.
Windshields: Reducing Wind Noise
When it comes to capturing high-quality audio during outdoor shoots, windscreen accessories play a pivotal role. Wind noise can severely compromise the clarity of your audio, making it difficult for viewers to engage with your content. In this section, we delve into how windshields can help mitigate unwanted noise, ensuring that your travel vlogs maintain a professional sound quality.
Wind noise occurs when gusts of air disrupt the microphone’s ability to capture sound accurately. This can lead to muffled audio or distracting hissing sounds that overshadow your voice or the ambient sounds you want to highlight. As a travel vlogger, your goal is to immerse your audience in the experience, and poor audio quality can detract from that.
Windshield accessories, often referred to as windscreens or dead cats, are designed to reduce wind interference on microphones. They typically consist of a soft foam or furry material that creates a barrier between the microphone and the wind. By dispersing the wind’s force, these accessories allow for clearer audio capture, even in breezy conditions.
- Foam Windscreens: These lightweight covers fit snugly over the microphone and are ideal for moderate wind conditions.
- Furry Windscreens: Also known as dead cats, these provide superior wind noise reduction and are perfect for strong gusts.
- Custom Windscreens: Some brands offer tailored options designed specifically for certain microphone models, ensuring optimal performance.
Selecting the appropriate windshield depends on your shooting environment. For instance, if you’re filming in a windy beach location, a furry windscreen would be more effective than a foam one. Conversely, for light breezes in urban settings, a foam windscreen may suffice.
To maximize the effectiveness of your windshield accessory, follow these tips:
- Ensure a Secure Fit: Make sure the windscreen fits tightly over the microphone to prevent any air gaps that could allow wind to enter.
- Test Before Shooting: Conduct a quick audio test in the environment where you’ll be filming to assess the wind noise levels.
- Adjust Your Position: If possible, position yourself to minimize wind exposure, such as using natural barriers like rocks or buildings.
Many travel vloggers have successfully utilized windshields to enhance their audio quality. For example, a popular vlogger documented their hiking adventure in the mountains, using a furry windscreen to capture clear dialogue despite strong winds. This attention to audio detail not only improved viewer engagement but also elevated the overall production value of their content.
Investing in quality windshield accessories is essential for any serious travel vlogger. By reducing wind noise, you can ensure that your audience enjoys a seamless audio experience, allowing them to fully immerse themselves in your adventures. Whether you’re capturing the sound of crashing waves or the rustle of leaves in a forest, the right windscreen can make all the difference.

Protective Gear: Keeping Your GoPro Safe
Traveling can be tough on your equipment, especially when you’re capturing stunning moments on your GoPro. The unpredictable nature of travel—ranging from extreme weather conditions to accidental drops—can lead to potential damage. Therefore, investing in protective gear is essential to ensure your GoPro remains safe and functional throughout your adventures.
Using protective gear not only safeguards your camera from physical damage but also enhances its lifespan. When you’re on the move, your GoPro is exposed to various elements, including dirt, moisture, and impacts. The right gear can prevent scratches, dents, and other forms of damage that could hinder your filming experience.
For those who love aquatic adventures, a waterproof case is indispensable. These cases are designed to protect your GoPro from water damage while allowing you to capture breathtaking underwater footage. Look for cases that offer high depth ratings, ensuring they can withstand your underwater explorations.
- Durability: High-quality materials that resist wear and tear.
- Compatibility: Ensure it fits your specific GoPro model.
- Ease of Use: Quick access to controls while inside the case.
Another critical accessory is a screen protector. Your GoPro’s screen is vulnerable to scratches and cracks, especially when stored in a bag or during outdoor activities. A good screen protector will not only shield your display but also maintain clarity and touch sensitivity.
- Material: Look for tempered glass options for maximum protection.
- Installation: Opt for bubble-free application for a seamless finish.
Silicone skins provide an extra layer of protection against drops and bumps. These skins are lightweight and can enhance your grip, reducing the chances of accidental slips. They also come in various colors and designs, allowing you to personalize your GoPro while keeping it safe.
If you’re into water sports, a floating hand grip is a must-have. This accessory allows you to capture stunning footage while ensuring your GoPro remains buoyant. In case you drop it in the water, the grip will keep your camera afloat, preventing loss.
Your GoPro’s lens is another area that requires protection. A lens protector is designed to safeguard against scratches and dirt, ensuring that your footage remains crystal clear. These protectors are easy to install and can be replaced if they become damaged.
When traveling, having a dedicated backpack or case for your GoPro gear is crucial. Look for options with padded compartments to prevent damage during transport. Some backpacks even come with waterproof features, providing an extra layer of protection against the elements.
In conclusion, safeguarding your GoPro with the right protective gear is essential for any travel vlogger. From waterproof cases to lens protectors, each accessory plays a vital role in ensuring your equipment remains in top condition. By investing in these protective solutions, you can focus on capturing the moments that matter most, without worrying about the safety of your gear.
Waterproof Cases: Adventure-Ready Protection
When it comes to capturing stunning footage during your aquatic adventures, waterproof cases are not just an accessory; they are a necessity. Whether you are diving, surfing, or simply enjoying a day at the beach, having the right protective gear for your GoPro can make all the difference in preserving your equipment and ensuring high-quality video capture.
Waterproof cases are specifically designed to shield your GoPro from water damage, allowing you to immerse yourself in thrilling activities without the fear of ruining your camera. But why is this so crucial? Here are a few reasons:
- Protection Against Water Damage: Water can infiltrate your camera and cause irreparable damage. A waterproof case creates a reliable barrier, allowing you to film underwater without worry.
- Durability: Many waterproof cases are built to withstand not just water, but also impacts and scratches, making them ideal for adventurous settings.
- Enhanced Functionality: Some cases come with additional features like built-in filters and mounting options, enhancing your filming capabilities.
Not all waterproof cases are created equal. When selecting one for your GoPro, consider the following features:
- Depth Rating: Ensure the case can handle the depths you plan to explore. Some cases are rated for shallow snorkeling, while others can withstand deep dives.
- Ease of Use: Look for cases that allow for easy access to buttons and ports, so you can adjust settings without removing the camera.
- Clear Housing: A transparent front is essential for capturing high-quality footage while ensuring visibility and clarity.
Here are some of the best waterproof cases available that cater to various needs and budgets:
| Case Model | Depth Rating | Price Range | Key Features |
|---|---|---|---|
| GoPro Super Suit | 60m (196ft) | $$ | Ideal for deep dives, includes a skeleton back for improved audio. |
| SP Gadgets Splash Case | 30m (98ft) | $ | Lightweight, easy to use, and includes a wrist strap. |
| Waterproof Housing for GoPro HERO9 | 40m (131ft) | $$ | Designed for HERO9, includes lens cover and easy access to controls. |
To maximize the effectiveness of your waterproof case, follow these tips:
- Test Before Use: Always test your case in a controlled environment before taking it into the water.
- Regular Maintenance: Rinse the case with fresh water after each use to remove salt or sand.
- Check Seals: Before every use, inspect the seals and housing for any signs of wear or damage.
In conclusion, investing in a high-quality waterproof case is essential for anyone looking to capture breathtaking underwater footage with their GoPro. By selecting the right case and following best practices, you can ensure that your camera remains safe and functional, allowing you to focus on enjoying your aquatic adventures.
Screen Protectors: Preventing Scratches
Screen Protectors are essential accessories for any GoPro user looking to maintain the integrity of their camera’s display. Whether you’re an avid traveler or an action sports enthusiast, your GoPro’s screen is vulnerable to scratches, smudges, and other forms of damage. In this section, we will explore the importance of screen protectors and recommend some of the top options that combine durability and clarity.
The display of your GoPro is not just a touchscreen; it’s your window to capturing stunning footage. A scratch or crack can hinder your ability to frame shots accurately. Moreover, a damaged screen can affect the camera’s functionality, making it difficult to navigate settings or review footage. Thus, investing in a high-quality screen protector is a proactive measure to preserve your device.
- Durability: Look for materials that can withstand impacts and scratches.
- Clarity: A good screen protector should not hinder your ability to view the display clearly.
- Easy Installation: Many modern protectors come with installation kits to ensure a bubble-free application.
- Touch Sensitivity: Ensure that the protector maintains the responsiveness of the touchscreen.
After thorough analysis and testing, here are some of the best screen protectors currently available:
| Product Name | Key Features | Price |
|---|---|---|
| Insta360 Screen Protector | High durability, crystal clear, easy installation | $19.99 |
| Amfilm Tempered Glass Protector | 9H hardness, anti-fingerprint, ultra-thin | $14.99 |
| SP Connect Screen Protector | HD clarity, bubble-free application, touch-sensitive | $12.99 |
Applying a screen protector can be daunting, but following these steps can ensure a successful installation:
- Clean the screen thoroughly with the provided cleaning cloth.
- Align the protector with the edges of the screen.
- Slowly peel off the backing while pressing down to avoid bubbles.
- Use a credit card to smooth out any remaining air bubbles.
To ensure longevity, regularly clean your screen protector with a microfiber cloth. Avoid using harsh chemicals that can degrade the material. If you notice any scratches or damage, consider replacing it to keep your display in optimal condition.
In summary, a quality screen protector is a must-have accessory for any GoPro user. By choosing the right product and applying it correctly, you can safeguard your camera’s display against everyday wear and tear, ensuring that your footage remains as stunning as the adventures you capture.

Editing Software: Enhance Your Vlogs Post-Production
Editing software plays a crucial role in transforming raw footage into captivating travel vlogs. With the right tools, you can enhance the visual appeal, improve audio quality, and create a cohesive story that resonates with your audience. This section explores popular editing software options that cater to various skill levels, ensuring you find the perfect fit for your vlogging needs.
When selecting editing software, consider factors such as ease of use, features, and compatibility with your devices. Here are some of the top choices:
- Adobe Premiere Pro: A professional-grade software that offers extensive features like multi-camera editing, color correction, and audio mixing. It’s perfect for those looking to create high-quality content.
- Final Cut Pro: Ideal for Mac users, this software provides powerful editing tools and a user-friendly interface. Its magnetic timeline allows for efficient editing, making it a favorite among seasoned vloggers.
- DaVinci Resolve: Known for its advanced color grading capabilities, DaVinci Resolve also offers a free version with robust features. It’s suitable for both beginners and professionals.
- iMovie: A user-friendly option for Mac users, iMovie is perfect for beginners. It offers essential editing tools and templates to create polished videos quickly.
- Filmora: This software combines simplicity with powerful features, making it a great choice for novice editors. It includes a variety of effects and transitions to enhance your vlogs.
Editing software can significantly improve the quality of your travel vlogs in several ways:
- Visual Enhancements: Utilize filters, transitions, and effects to make your videos visually appealing. Adjusting brightness, contrast, and color can transform ordinary footage into stunning visuals.
- Audio Quality: Good audio is essential for engaging content. Many editing programs allow you to enhance audio quality, reduce background noise, and add music or voiceovers.
- Storytelling: Editing helps in structuring your narrative. You can cut unnecessary clips, arrange scenes logically, and add text overlays to guide your audience through your journey.
When choosing editing software, consider the following features:
- Ease of Use: A user-friendly interface can save you time and frustration, especially if you’re new to editing.
- Compatibility: Ensure that the software is compatible with your operating system and camera formats.
- Export Options: Look for software that allows you to export your videos in various formats and resolutions suitable for different platforms.
- Support and Resources: Access to tutorials, forums, and customer support can be invaluable as you learn to navigate the software.
Yes, several free editing software options provide excellent features for travel vloggers:
- HitFilm Express: A powerful free software that includes advanced features like composite shot enhancements and visual effects.
- Lightworks: Offers a free version with professional features, though exporting options are limited compared to the paid version.
- OpenShot: An open-source software that is easy to use and includes essential editing tools.
In conclusion, the right editing software can elevate your travel vlogs, making them more engaging and professional. By understanding your needs and exploring the available options, you can choose a tool that enhances your storytelling and showcases your adventures in the best light.
Beginner-Friendly Software: Easy to Use
When starting your journey in video editing, selecting the right software is crucial for success. Beginner-friendly software can significantly streamline the learning process, making it easier to create high-quality videos without feeling overwhelmed. In this section, we will explore some of the best editing software options tailored for newcomers, focusing on their features, usability, and how they can enhance your vlogging experience.
For those just diving into the world of video editing, the choice of software can be daunting. Many programs come with a steep learning curve, which can discourage new users. Beginner-friendly software typically features intuitive interfaces, guided tutorials, and essential editing tools that allow users to focus on creativity rather than technical challenges. This type of software is designed to help you get started quickly, enabling you to produce polished videos from the outset.
- iMovie: Available on macOS and iOS, iMovie is a great starting point for beginners. It offers a simple drag-and-drop interface, pre-set themes, and transitions, making it easy to create engaging videos.
- Filmora: Known for its user-friendly design, Filmora provides a wealth of effects and templates. Its intuitive layout allows beginners to edit videos efficiently while still offering advanced features as they progress.
- Adobe Premiere Rush: A simplified version of Adobe Premiere Pro, Rush is perfect for those who want to edit on the go. Its mobile-friendly design and easy sharing options make it ideal for travel vloggers.
- HitFilm Express: This free software offers a robust set of features, including visual effects and advanced editing tools. While it may have a slight learning curve, numerous tutorials are available to help beginners.
When selecting beginner-friendly editing software, consider the following features:
- Intuitive Interface: A clean and organized layout helps newcomers navigate the software easily.
- Built-in Tutorials: Many programs offer guided tutorials that help users learn the basics quickly.
- Essential Editing Tools: Look for software that includes basic tools such as trimming, splitting, and merging clips.
- Export Options: Ensure the software allows for easy exporting to popular formats suitable for various platforms.
To make the most out of your beginner-friendly software, keep these tips in mind:
- Start Simple: Begin with basic edits and gradually explore more advanced features as you become comfortable.
- Utilize Online Resources: Take advantage of online forums, tutorials, and communities to enhance your learning experience.
- Practice Regularly: The more you edit, the better you’ll become. Regular practice will help you develop your style and improve your skills.
Choosing the right editing software is a vital step for any aspiring vlogger. By opting for beginner-friendly options, you can create stunning videos without the frustration of complex tools. As you become more proficient, you can always transition to advanced software that offers greater flexibility and features. Remember, the key is to start editing and let your creativity shine!
Advanced Editing Tools: For Professionals
Advanced editing tools are essential for professional vloggers aiming to create high-quality content that stands out. These software solutions offer a multitude of features that cater to the intricate needs of experienced editors, allowing them to refine their footage and produce visually stunning videos. In this section, we will explore the various advanced editing tools available, their key features, and how they can elevate your vlogging experience.
As a vlogger, storytelling is at the heart of your craft. Advanced editing software provides the tools necessary to enhance your narrative through sophisticated visual effects, seamless transitions, and improved audio quality. These tools can significantly impact how your audience perceives your content, making it crucial to choose the right software for your needs.
- Multi-Track Editing: This feature allows you to work with multiple video and audio tracks simultaneously, enabling complex edits and the layering of sound effects.
- Color Grading: Advanced color correction tools help you adjust the color balance and enhance the mood of your footage, making it visually appealing.
- Motion Graphics: Create dynamic titles, lower-thirds, and animations that can add a professional touch to your videos.
- Audio Editing: Fine-tune your audio with advanced tools that allow for noise reduction, equalization, and sound mixing.
Several advanced editing tools are widely recognized in the vlogging community. Here are some of the top choices:
- Adobe Premiere Pro: Known for its robust features and flexibility, Premiere Pro is a favorite among professionals. It offers comprehensive editing capabilities, including support for various formats and seamless integration with other Adobe products.
- Final Cut Pro: Exclusive to Mac users, Final Cut Pro is celebrated for its intuitive interface and powerful editing tools, making it ideal for those looking to produce high-quality content quickly.
- DaVinci Resolve: This software is renowned for its advanced color grading capabilities and is a go-to for filmmakers and vloggers alike. The free version offers substantial features, making it accessible for beginners and professionals.
When selecting advanced editing software, consider the following:
- Your Editing Style: Identify what features are most important for your vlogging style. Do you require extensive audio editing, or is color grading your main focus?
- Budget: Advanced editing tools can vary significantly in price. Determine your budget and explore options that offer the best value for your needs.
- Learning Curve: Some software may have a steeper learning curve than others. Choose a tool that matches your skill level and offers sufficient tutorials and support.
In conclusion, investing in advanced editing tools can transform your vlogging experience. With the right software, you can enhance your storytelling, engage your audience, and produce professional-quality videos that reflect your unique style. By understanding the features and capabilities of these tools, you can make an informed decision that will elevate your vlogs to new heights.
Frequently Asked Questions
- What are the must-have GoPro accessories for travel vlogging?
The essential GoPro accessories for travel vlogging include various mounts (like chest and helmet mounts), tripods, lighting solutions, audio accessories, and protective gear. Each accessory plays a crucial role in enhancing your video quality and capturing stunning footage on your adventures.
- How do I choose the right mount for my GoPro?
Choosing the right mount depends on your activity. For hands-free convenience, a chest mount is ideal, while a helmet mount is perfect for action-packed adventures like biking or skiing. Consider your filming style and the perspective you want to capture when selecting a mount.
- Are there specific lighting solutions recommended for travel vloggers?
Absolutely! Portable LED lights are highly recommended as they significantly improve visibility in various conditions. Additionally, light diffusers can help soften harsh lighting, ensuring your footage looks professional, even in challenging environments.
- What audio accessories should I consider for better sound quality?
To enhance sound quality, consider using external microphones, which can dramatically improve audio clarity. Windshields are also essential for reducing wind noise, making them a great addition for outdoor shoots.
- How can I protect my GoPro while traveling?
Using waterproof cases is crucial for protecting your GoPro during aquatic adventures. Additionally, screen protectors help prevent scratches on your camera’s display, ensuring it remains in top condition throughout your travels.


