This article explores how to create a stylish and functional rope room divider, perfect for adding a bohemian touch to your space while maintaining a minimalist aesthetic. A rope room divider serves as an innovative way to define areas within a larger space, allowing you to enjoy both privacy and openness.
A rope room divider is a creative and flexible way to separate spaces within a room using ropes. Its appeal lies in its ability to blend functionality with artistic expression. These dividers can be used to create cozy nooks, define workspaces, or even add a decorative element to your home.
Opting for a DIY rope room divider allows for customization and creativity. By creating your own divider, you can tailor the design, size, and materials to fit your specific needs and style. This personal touch not only enhances your space but also provides a sense of accomplishment.
Gathering the right materials is crucial for a successful DIY project. Here’s a list of essential items you will need:
- Rope: Choose from natural fibers like jute or cotton for a bohemian look, or synthetic options for durability.
- Hardware: Hooks, brackets, and tension rods to secure your divider in place.
- Tools: Scissors, a measuring tape, and a drill for installation.
Creating your own rope room divider can be a straightforward process if you follow these steps:
1. Measure your space accurately.2. Choose the right rope based on your design preferences.3. Cut the rope to the desired lengths.4. Install the hardware securely.5. Hang the rope and adjust as needed.
Inspiring design concepts can elevate your rope divider from functional to fabulous. Consider the following ideas to personalize your divider:
- Incorporating Color and Texture: Use dyed ropes or combine different materials to create visual interest.
- Patterns and Knot Techniques: Experiment with various knot styles to add character and depth to your design.
Proper care ensures your rope room divider remains beautiful and functional over time. Regularly check for wear and tear, and clean the ropes with a damp cloth to remove dust and debris.
Avoiding common pitfalls can save time and frustration during your DIY project. Here are some frequent mistakes to watch out for:
- Not measuring your space accurately, leading to an ill-fitting divider.
- Choosing the wrong type of rope, which may not hold up over time.
Strategic placement can maximize the impact of your rope divider. Consider using it in areas such as:
- To separate a living room from a dining area.
- To create a cozy reading nook in a bedroom.
With thoughtful placement, your rope room divider can enhance both the functionality and aesthetic of your space.

What is a Rope Room Divider?
A rope room divider is an innovative and versatile solution for separating spaces within a room. This unique design not only serves a functional purpose but also adds a touch of style and personality to your interior decor.
At its core, a rope room divider utilizes ropes, often suspended from the ceiling or attached to walls, to create a visually appealing barrier. Unlike traditional dividers, which can be bulky and obstructive, a rope divider offers a minimalist aesthetic that seamlessly integrates into various design themes, particularly in modern and bohemian interiors.
One of the primary purposes of a rope room divider is to delineate areas without completely closing them off. This is especially beneficial in open-concept spaces where you might want to create a sense of privacy or define different functional zones, such as a cozy reading nook within a larger living area. The flexibility of ropes allows for adjustments and modifications, making it easy to change the layout as your needs evolve.
In terms of appeal, the use of ropes introduces a tactile element to the decor. The texture of the ropes can enhance the overall ambiance, providing warmth and a casual, relaxed vibe. Additionally, you can customize the design to fit your style by choosing different colors, materials, or knot patterns, allowing for a truly personalized touch.
Furthermore, a rope room divider can serve as a canvas for creativity. You can incorporate various decorative elements, such as plants or artwork, into the design, transforming the divider into a focal point rather than just a functional piece. This adaptability makes it a popular choice among those looking to infuse their space with a bohemian flair while maintaining a clean and uncluttered look.
In summary, a rope room divider is not just a practical solution for space management; it is also an artistic statement. Its ability to blend functionality with aesthetic appeal makes it a favored choice in contemporary interior design.

Why Choose a DIY Approach?
When it comes to home decor, the decision to create a DIY rope room divider can be both exciting and rewarding. This choice not only allows for personal expression but also provides a range of benefits compared to purchasing a pre-made option. Here, we delve into the reasons why opting for a DIY approach can be advantageous.
- Customization: One of the most significant benefits of a DIY rope room divider is the ability to customize every aspect of the design. From the type of rope used to the overall dimensions, you have complete control over how your divider will look and function. This means you can tailor it to fit your specific needs and style preferences.
- Cost-Effectiveness: Creating your own room divider can be a more economical choice. Pre-made dividers often come with a hefty price tag, while sourcing materials for a DIY project can be much cheaper. By choosing your materials wisely, you can create a stunning piece without breaking the bank.
- Creative Expression: Engaging in a DIY project allows you to unleash your creativity. You can experiment with different knotting techniques, incorporate various colors, and even add decorative elements like beads or fabric. This creative process can be incredibly fulfilling and result in a unique piece that reflects your personality.
- Quality Control: When you make your own divider, you can ensure that the materials used are of high quality. This is particularly important for durability and aesthetics. You can select ropes that are both sturdy and visually appealing, ensuring that your divider stands the test of time.
- Sense of Accomplishment: There’s a profound sense of satisfaction that comes from completing a DIY project. The process of building something with your own hands can boost your confidence and give you a sense of pride in your home. Every time you see your rope divider, you’ll be reminded of the effort and creativity that went into its creation.
In addition to these benefits, a DIY rope room divider can also be an excellent project for friends or family to undertake together. Collaborating on a creative endeavor can strengthen bonds and make the experience even more enjoyable. Whether you’re an experienced crafter or a beginner, the process of making your own rope room divider can be tailored to suit your skill level.
Moreover, the flexibility of a DIY project means that you can easily adapt your design as your tastes or needs change. Unlike a pre-made divider, which may not fit perfectly in your space or match your evolving decor, a DIY option can be modified or repurposed at any time.
In conclusion, opting for a DIY rope room divider not only enhances your living space but also offers numerous advantages that pre-made options cannot match. From customization and cost savings to creative expression and a sense of accomplishment, the benefits are clear. So gather your materials and let your imagination run wild as you embark on this rewarding DIY journey!

Essential Materials for Your Project
When embarking on your DIY rope room divider project, gathering the right materials is essential for a successful outcome. This section outlines the necessary items you will need, focusing on various types of ropes, hardware, and tools required for assembly. By ensuring you have everything at hand, you can streamline the process and achieve a beautiful final product.
Choosing the right rope is critical for both aesthetic appeal and structural integrity. Here are some popular options:
- Cotton Rope: Soft and easy to work with, cotton rope has a natural look that complements a bohemian style.
- Sisal Rope: This rope is durable and adds a rustic touch, making it suitable for various design themes.
- Jute Rope: Known for its eco-friendliness, jute is an excellent choice for a sustainable project.
- Nylon Rope: If you need something stronger and more weather-resistant, nylon is a great option, especially for outdoor use.
In addition to ropes, you’ll require specific hardware to ensure your divider is secure and functional:
- Wall Anchors: Essential for providing a strong hold, especially if you’re attaching the divider to drywall.
- Eye Hooks: These will allow you to easily hang and adjust your ropes as needed.
- Carabiners: Useful for quick connections, carabiners can help you change the design of your divider effortlessly.
- Wooden Dowels: If you prefer a more structured look, dowels can serve as a frame for your ropes.
Having the right tools on hand can make the assembly process smoother. Here’s a list of tools you should consider:
- Measuring Tape: Accurate measurements are crucial for ensuring your divider fits perfectly in your space.
- Drill: A power drill will help you install wall anchors and eye hooks securely.
- Scissors: Sharp scissors are necessary for cutting the ropes to your desired lengths.
- Level: To ensure your divider hangs straight, a level will be your best friend during installation.
By gathering these materials, you set the stage for a successful DIY rope room divider. Not only will you create a functional piece that enhances your living space, but you will also enjoy the process of crafting something uniquely yours. Remember, the right materials and tools will not only save you time but also ensure that your divider is both beautiful and durable.

Step-by-Step Guide to Building Your Rope Divider
Creating your own rope room divider can be a rewarding and creative project that enhances your living space. This step-by-step guide will walk you through the process, ensuring that both beginners and experienced DIY enthusiasts can follow along with ease.
Follow these detailed instructions to craft a beautiful and functional rope room divider:
- Measure Your Space: Begin by measuring the area where you plan to install your divider. Use a tape measure to determine the height and width required. It’s essential to account for any furniture or obstacles that may affect the placement.
- Select Your Rope: Choose a rope that suits your aesthetic and functional needs. Options include natural fibers like jute or cotton for a bohemian vibe, or synthetic ropes for durability. Consider the thickness of the rope; thicker ropes provide a more substantial look, while thinner ropes can create a delicate appearance.
- Gather Your Materials: In addition to rope, you will need hardware such as hooks or a tension rod, scissors, a drill, and possibly a level to ensure everything hangs straight. Having all materials ready before you start will streamline the process.
- Prepare the Hanging Area: If you’re using hooks, install them in the ceiling or wall where you want the divider to hang. Ensure they are securely fastened to support the weight of the rope. If using a tension rod, adjust it to the correct length before installation.
- Cut the Rope: Measure and cut your rope to the desired lengths. Depending on your design, you may want several lengths of rope to create a curtain-like effect. Remember to add a little extra length for knots if needed.
- Attach the Rope: Begin attaching the rope to your hooks or tension rod. You can create a simple straight hanging or experiment with patterns. If you’re using knots, consider using a square knot or double knot for added security.
- Adjust and Style: Once all ropes are attached, step back and assess the look. Adjust the lengths as needed to achieve a uniform appearance. You can also add decorative elements like beads or fabric strips for a personal touch.
- Final Touches: Ensure everything is secure and make any final adjustments. Check that the divider can be easily moved or adjusted if needed. This is also the time to clean up your workspace and enjoy your new creation!
By following this guide, you can create a stunning rope room divider that not only serves a practical purpose but also adds a unique design element to your home. Whether you choose to keep it simple or go for a more intricate design, your DIY divider will reflect your personal style and creativity.
Remember to take your time during each step and enjoy the process of crafting something uniquely yours. Happy DIYing!
Measuring Your Space
When embarking on the journey to create your own rope room divider, one of the most critical steps is accurately. This ensures that your divider not only fits perfectly but also enhances the overall aesthetic of your room. In this section, we will delve into the best practices for measuring your space effectively, enabling you to determine the right size for your project.
Accurate measurements are vital for a well-fitted divider. An ill-fitted divider can lead to a disjointed look in your space, making it appear cluttered or unbalanced. Additionally, precise measurements help in avoiding unnecessary costs associated with purchasing materials that are too large or too small.
- Gather Your Tools: Before you begin measuring, ensure you have the necessary tools on hand. A tape measure, a notepad, and a pencil are essential for recording your dimensions.
- Identify the Area: Determine where you want to place your rope divider. Consider the flow of the room and how the divider will enhance the space.
- Measure Width: Measure the width of the area where the divider will be installed. Take multiple measurements at different points to ensure accuracy, as walls may not always be perfectly straight.
- Measure Height: Next, measure the height from the floor to the ceiling. This will help you decide how tall your divider should be. Remember to account for any furniture that might obstruct the divider.
- Consider Depth: If your divider will be freestanding, measure the depth needed for stability. This is crucial if you plan to use the divider as a functional piece rather than just a decorative one.
To enhance the accuracy of your measurements, consider the following tips:
- Double-Check Measurements: Always measure twice to confirm your dimensions. This simple step can prevent costly mistakes.
- Use a Level: When marking where your divider will go, use a level to ensure that your lines are straight. This is especially important for a rope divider that may require multiple attachment points.
- Visualize the Space: Use painter’s tape to outline where the divider will be placed. This will help you visualize the space and make any necessary adjustments before finalizing your measurements.
Once you have your measurements, you can begin to plan the design and materials for your rope room divider. Consider how the dimensions will influence the style, such as the spacing of the ropes and the overall layout. A well-measured divider will not only look great but also serve its purpose effectively, whether it’s to create privacy or simply to define a space.
In conclusion, taking the time to measure your space accurately is an essential step in the process of creating a stunning rope room divider. By following the steps outlined above and keeping your measurements organized, you’ll be well on your way to crafting a beautiful and functional addition to your home.
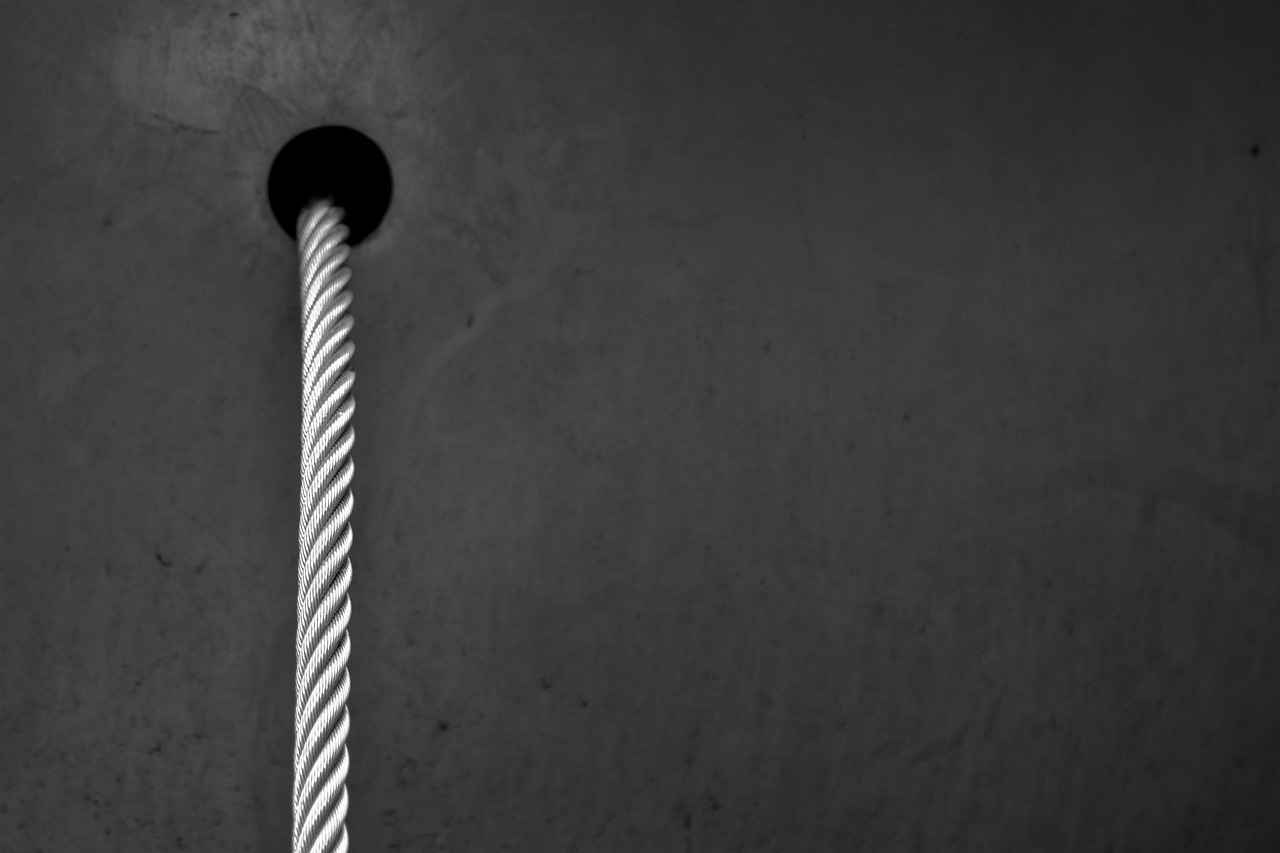
Choosing the Right Rope
is a critical step in creating an effective and aesthetically pleasing rope room divider. The material you select will significantly influence both the visual appeal and the durability of your divider. In this section, we will explore various types of ropes and their suitability for room dividers, ensuring you make an informed decision that aligns with your design vision.
When considering rope materials, it is essential to understand the different options available and their unique properties. Here are some popular rope materials to consider:
- Cotton Rope: Soft and flexible, cotton rope is an excellent choice for a bohemian aesthetic. It is easy to work with and comes in various colors. However, it may not be as durable as synthetic options and can absorb moisture, which might lead to mold growth if used in humid areas.
- Jute Rope: This natural fiber rope adds an earthy touch to your divider. Its textured appearance enhances the visual interest of your space. While jute is biodegradable and eco-friendly, it can be less durable than synthetic ropes and may fray over time.
- Nylon Rope: Known for its strength and resilience, nylon rope is perfect for high-traffic areas. It is resistant to moisture, UV rays, and abrasion, making it suitable for both indoor and outdoor use. However, its synthetic nature may not align with a completely natural aesthetic.
- Polypropylene Rope: Another synthetic option, polypropylene is lightweight and floats on water. It is resistant to mildew and rot, making it a practical choice for humid environments. However, it may not provide the same aesthetic warmth as natural fibers.
When selecting the right rope for your room divider, consider the following factors:
- Aesthetics: What look are you trying to achieve? Natural fibers like cotton and jute can provide a warm, inviting feel, while synthetic options may lend a more modern appearance.
- Durability: Assess the wear and tear your divider will face. For high-traffic areas, stronger materials like nylon or polypropylene may be more suitable.
- Maintenance: Some materials require more upkeep than others. Cotton and jute may need regular cleaning to prevent mold, while synthetic ropes are often easier to maintain.
- Cost: Budget considerations can also play a role in your decision. Natural fibers can be more expensive, while synthetic options may offer a more affordable solution.
Ultimately, the choice of rope material will depend on your individual needs and the overall design of your space. By carefully considering the aesthetics, durability, maintenance, and cost, you can select the perfect rope to create a stunning and functional room divider.
In summary, choosing the right rope is not just about functionality; it’s about enhancing the overall ambiance of your space. With the right material in hand, your DIY rope room divider can become a striking feature that beautifully separates areas while reflecting your personal style.

Design Ideas for Your Rope Room Divider
When it comes to enhancing your living space, a rope room divider can serve as both a functional and stylish element. In this section, we will explore innovative design ideas that can transform your rope divider from a simple partition to a stunning focal point in your home.
Personalization is key when it comes to creating a unique rope room divider. Here are some creative ideas to consider:
- Colorful Ropes: Incorporate vibrant or pastel-colored ropes to match your interior decor. You can use fabric dye or purchase pre-colored ropes to add a pop of color.
- Textured Layers: Mix different types of ropes, such as jute, cotton, and nylon, to create a rich texture. This layering can add depth and interest to your divider.
- Natural Elements: Consider adding natural elements like driftwood or bamboo to your design. These materials can enhance the bohemian vibe and create a more organic feel.
Utilizing various knot techniques can elevate the aesthetic appeal of your rope divider:
- Macramé Knots: Incorporate macramé techniques to create intricate patterns. This not only adds visual interest but also reinforces the structure of the divider.
- Simple Knots: Use simple knots to create a minimalist look. A series of evenly spaced knots can provide a clean and modern appearance.
- Geometric Patterns: Experiment with geometric knotting techniques to produce unique designs. This can give your divider a contemporary edge.
Accessories can play a significant role in the overall look of your rope room divider:
- Hanging Plants: Attach small planters with trailing plants to the ropes. This not only adds greenery but also softens the look of the divider.
- Lighting: Integrate string lights or small lanterns within the design. This can create a cozy ambiance and highlight the beauty of your divider.
- Artwork: Consider hanging lightweight art pieces or fabric hangings from the divider. This can serve as a canvas for your creativity.
Creating a themed design can significantly enhance the impact of your rope divider:
- Bohemian Style: Embrace a boho theme with colorful fabrics, natural materials, and eclectic accessories. This style promotes a relaxed and inviting atmosphere.
- Minimalist Approach: For a clean, modern look, stick to neutral colors and simple designs. This approach emphasizes simplicity and functionality.
- Coastal Vibes: Incorporate nautical elements like shells or sea glass to evoke a beachy feel. This theme can bring a sense of tranquility to your space.
In conclusion, by implementing these design ideas, you can transform your rope room divider into a stunning piece of art that reflects your personal style. Whether you prefer bold colors, intricate knots, or thematic elements, the possibilities are endless. Let your creativity flow and enjoy the process of crafting a unique divider that enhances your living space.
Incorporating Color and Texture
Incorporating color and texture into your DIY rope room divider can significantly enhance its visual appeal and create a more inviting atmosphere in your space. By thoughtfully selecting materials and colors, you can transform a simple divider into a stunning focal point that complements your decor.
Color plays a crucial role in interior design. It can influence mood, create depth, and define spaces. When choosing colors for your rope room divider, consider the following:
- Harmony: Ensure that the colors you select harmonize with the existing palette of your room.
- Contrast: Using contrasting colors can make your divider stand out, drawing attention and adding interest.
- Theme: Align your color choices with the overall theme of your space, whether it’s bohemian, minimalist, or eclectic.
Texture adds depth and dimension to your design. Different materials can create various tactile experiences, making your divider not only visually appealing but also engaging to the touch. Here are some ideas:
- Natural Fibers: Incorporate jute or cotton ropes for a rustic, organic feel.
- Metal Accents: Use metal rings or chains to introduce a modern touch and contrast with the softness of rope.
- Fabric Panels: Attach fabric swatches or panels between the ropes to introduce color and softness.
There are numerous ways to infuse color into your rope room divider:
- Dyed Ropes: Consider using ropes dyed in vibrant colors or even creating an ombre effect for a unique look.
- Painted Hardware: If you’re using metal components, painting them in a bold hue can create a striking contrast.
- Decorative Elements: Attach colorful beads, tassels, or pom-poms to the ropes for a playful touch.
Mixing patterns can elevate your rope divider design. Consider these tips:
- Geometric Patterns: Use ropes of different thicknesses to create geometric shapes that draw the eye.
- Layering Textiles: Layer patterned fabrics with solid colors to create visual interest.
- Color Blocking: Segment sections of your divider into blocks of color for a modern, bold look.
Bringing in natural elements can enhance the overall aesthetic of your rope divider:
- Greenery: Integrate hanging plants or vines that weave through the ropes, adding a lush, organic touch.
- Wood Accents: Use wooden dowels or frames to support your divider, adding warmth and texture.
- Natural Dyes: Experiment with natural dyes from plants to color your ropes, promoting sustainability.
By thoughtfully incorporating color and texture into your rope room divider, you can create a stunning and functional piece that enhances your living space. Remember to experiment and have fun with the process, allowing your personal style to shine through in every detail.
Patterns and Knot Techniques
When it comes to creating a stunning rope room divider, play a crucial role in enhancing its visual appeal. By experimenting with different knot styles, you can infuse your divider with unique character that reflects your personal style. This section delves into various knot techniques and their impact on the overall design of your rope divider.
Knot techniques are not just functional; they serve an aesthetic purpose as well. The way you tie your ropes can transform a simple divider into a work of art. Different knots can create varying textures and patterns, adding depth and interest to your space. For instance, a macramé knot can evoke a bohemian vibe, while a double knot may lend a more structured look.
- Square Knot: This classic knot is easy to tie and offers a clean, uniform appearance. It works well for a minimalist look.
- Bowline Knot: Known for its strength, the bowline knot creates a fixed loop at the end of a rope, making it great for hanging.
- Clove Hitch: This knot is perfect for securing the rope to a post or beam and can add an interesting twist to your design.
- Macramé Knots: These intricate knots can be used to create beautiful patterns, ideal for a bohemian or artistic touch.
The visual impact of different knot techniques can dramatically change the perception of your divider. For example, using a combination of knots and patterns can create a dynamic look that draws the eye. A tightly woven macramé design can create a sense of intimacy, while looser knots can allow light to filter through, enhancing the overall ambiance of your space.
Don’t be afraid to mix and match different knot styles to create a custom design. For instance, pairing a square knot with a series of macramé knots can result in a visually striking contrast. This blend of techniques not only showcases your creativity but also adds layers of texture and dimension to your divider.
To achieve the best results with your knot techniques, consider the following tips:
- Practice: Before committing to your divider, practice tying knots on spare rope to gain confidence.
- Use Quality Materials: Ensure that the rope you choose is suitable for the knots you plan to use. Natural fibers like jute or cotton are excellent for macramé, while synthetic ropes are better for durability.
- Plan Your Design: Sketch out your ideas before starting. Visualizing your design can help you determine which knots and patterns will work best together.
Incorporating unique patterns and knot techniques into your rope room divider not only enhances its functionality but also transforms it into a statement piece in your home. With a little creativity and practice, you can create a divider that is both beautiful and practical, perfectly suited to your personal taste.

Maintenance Tips for Longevity
When it comes to maintaining your rope room divider, proper care is essential for ensuring it remains both beautiful and functional over time. This section provides you with practical maintenance tips to keep your divider in top condition, enhancing its longevity and preserving its aesthetic appeal.
Regular maintenance not only extends the life of your rope room divider but also helps in retaining its visual charm. Over time, dust, dirt, and environmental factors can affect the material, making it look worn and less appealing. By following simple maintenance practices, you can ensure that your divider continues to be a stunning feature in your space.
- Dust Regularly: Use a soft cloth or a feather duster to remove dust from the ropes. This should be done at least once a week to prevent buildup.
- Spot Clean Stains: In case of spills or stains, use a mild soap solution and a damp cloth to gently clean the affected area. Avoid harsh chemicals that could damage the rope fibers.
- Vacuum Occasionally: For a deeper clean, use a vacuum with a brush attachment to remove any embedded dirt or debris.
Regularly inspect your rope room divider for signs of wear and tear. Look for:
- Fraying: Check the ends of the ropes for fraying or unraveling. If you notice any damage, consider re-knotting or replacing the affected section.
- Loose Hardware: Ensure that all hardware used for installation is secure. Tighten any loose screws or fittings to maintain stability.
Environmental conditions can significantly affect the lifespan of your rope divider. Here are some tips to protect it:
- Avoid Direct Sunlight: Prolonged exposure to sunlight can cause fading and degradation of the rope material. Position your divider away from direct sunlight or use window treatments to reduce exposure.
- Control Humidity: High humidity can lead to mold and mildew growth. Ensure your space is well-ventilated and consider using a dehumidifier in damp conditions.
As your rope divider ages, it may require some structural reinforcement:
- Re-Knotting: If the knots begin to loosen, re-knotting them can help maintain the integrity of the divider.
- Adding Support: If the divider starts to sag, consider adding additional support, such as tension rods or additional anchoring points.
Consider performing a thorough check and maintenance of your rope room divider at the start of each season. This ensures that it is prepared for changes in temperature and humidity, which can affect its condition.
By following these maintenance tips, you can ensure that your rope room divider remains a beautiful and functional part of your home for years to come. Regular care and attention will not only preserve its aesthetic appeal but also enhance the overall atmosphere of your space.

Common Mistakes to Avoid
When embarking on a DIY project, especially one as creative as crafting a rope room divider, it’s essential to navigate potential challenges effectively. Avoiding common pitfalls can save you both time and frustration, ensuring your project runs smoothly from start to finish. In this section, we will highlight frequent mistakes and provide practical advice on how to prevent them, making your DIY experience more enjoyable and successful.
Many DIY enthusiasts, whether beginners or seasoned crafters, often overlook critical steps that can lead to setbacks. The excitement of starting a new project can sometimes cloud judgment, resulting in rushed decisions. To help you avoid these errors, we delve into some of the most common mistakes made during the creation of a rope room divider.
One of the most prevalent mistakes is miscalculating dimensions. Before you begin, ensure you take precise measurements of your space. A poorly sized divider can disrupt the flow of your room and may require additional adjustments later. Always double-check your measurements and consider using a level to ensure a straight installation.
Not all ropes are created equal. Selecting the wrong type can affect both the durability and the aesthetic of your divider. For instance, natural fibers like jute offer a rustic look but may not be as sturdy as synthetic options. Research and choose a rope that fits your design vision while ensuring it can withstand the intended use.
Jumping straight into the project without a clear plan can lead to chaos. It’s crucial to outline your design and gather all necessary materials before starting. Create a checklist of items you need, including tools and hardware, to avoid multiple trips to the store.
DIY projects can pose safety risks if proper precautions are not taken. Always wear protective gear, such as gloves and goggles, when working with tools or materials that could cause injury. Additionally, ensure your workspace is organized to prevent accidents.
Many DIYers underestimate the time required to complete their projects. Be realistic about your schedule and allow for extra time to handle unexpected challenges. This approach will help reduce stress and lead to a more enjoyable crafting experience.
Once the main structure is complete, it’s easy to overlook the finishing touches. However, these details can significantly impact the overall look of your divider. Consider adding decorative knots, paint, or other embellishments to enhance your design. Take the time to ensure every aspect of your project meets your standards.
Don’t hesitate to seek advice from experienced DIYers or online communities. Many resources are available, including tutorials and forums, where you can find tips and solutions to common problems. Engaging with others can provide valuable insights and boost your confidence.
By being aware of these common mistakes and taking proactive steps to avoid them, you can create a stunning rope room divider that enhances your space and reflects your personal style. Remember, the key to a successful DIY project lies in careful planning, execution, and a willingness to learn from the process.

Where to Place Your Rope Room Divider?
Strategic placement can significantly enhance the functionality and aesthetic appeal of your rope room divider. Understanding the ideal locations and scenarios for using a rope divider effectively can transform your space, making it both stylish and practical. Here are some key considerations for optimal placement:
- Defining Zones in Open Spaces: In homes with open floor plans, a rope room divider can be used to create distinct areas for different activities. For example, placing a divider between a living area and a workspace can help to visually separate these zones, allowing for better focus and reduced distractions.
- Enhancing Privacy: If you need a little more privacy in shared spaces, consider positioning your rope divider in areas where you typically spend time alone, such as a reading nook or a meditation corner. This not only adds a personal touch but also creates a cozy atmosphere.
- Framing Entryways: Another effective placement for a rope divider is at entryways. By framing a doorway with ropes, you can create a welcoming entrance that adds texture and depth to your home. This approach is especially appealing in bohemian or minimalist designs.
- Creating Visual Interest: Use your rope divider as a focal point in a room. Placing it in the center of a large space can draw the eye and create a sense of balance. Experiment with different heights and arrangements to find the most visually appealing setup.
- Utilizing Vertical Space: When dealing with limited floor space, consider using a tall rope divider that stretches from floor to ceiling. This maximizes vertical space while maintaining an open feel. It can be particularly effective in studio apartments or small living areas.
In addition to these specific placements, consider the following scenarios to enhance the effectiveness of your rope divider:
- Incorporating Plants: Surrounding your rope divider with plants can create a natural barrier while adding life to your space. This combination not only improves air quality but also enhances the bohemian aesthetic.
- Using Lighting: Positioning your rope divider near a light source can create interesting shadows and highlights, adding depth to your design. Consider using string lights or pendant lamps to accentuate the divider and create a warm ambiance.
- Seasonal Decor: Change the placement of your rope divider according to the seasons or special occasions. This flexibility allows you to refresh your space regularly without a complete overhaul.
Ultimately, the placement of your rope room divider should reflect your personal style and the functionality you desire. By thoughtfully considering where to position your divider, you can maximize its impact, creating a space that is not only beautiful but also tailored to your lifestyle.
Frequently Asked Questions
- What materials do I need for a DIY rope room divider?
To create your own rope room divider, you’ll need essential materials such as sturdy rope, a mounting system (like hooks or brackets), scissors, and a measuring tape. Depending on your design, you might also consider adding decorative elements like beads or fabric.
- How do I measure my space for the divider?
Measuring your space accurately is crucial. Start by determining the height and width where you want the divider. Use a measuring tape to get precise dimensions, ensuring you account for any furniture or obstructions that might affect the divider’s placement.
- Can I customize the design of my rope room divider?
Absolutely! One of the best parts of a DIY project is the ability to customize. You can choose different rope colors, textures, and even incorporate unique knot techniques or patterns to match your decor style.
- How do I maintain my rope room divider?
To keep your rope divider looking great, regularly check for fraying or wear. Clean it gently with a damp cloth and avoid placing it in areas with high humidity to prevent mold. Proper care will extend its lifespan significantly.
- What are common mistakes to avoid when making a rope room divider?
Some common pitfalls include not measuring accurately, using the wrong type of rope for your design, and neglecting to secure the divider properly. Take your time and double-check your work to avoid these issues!


