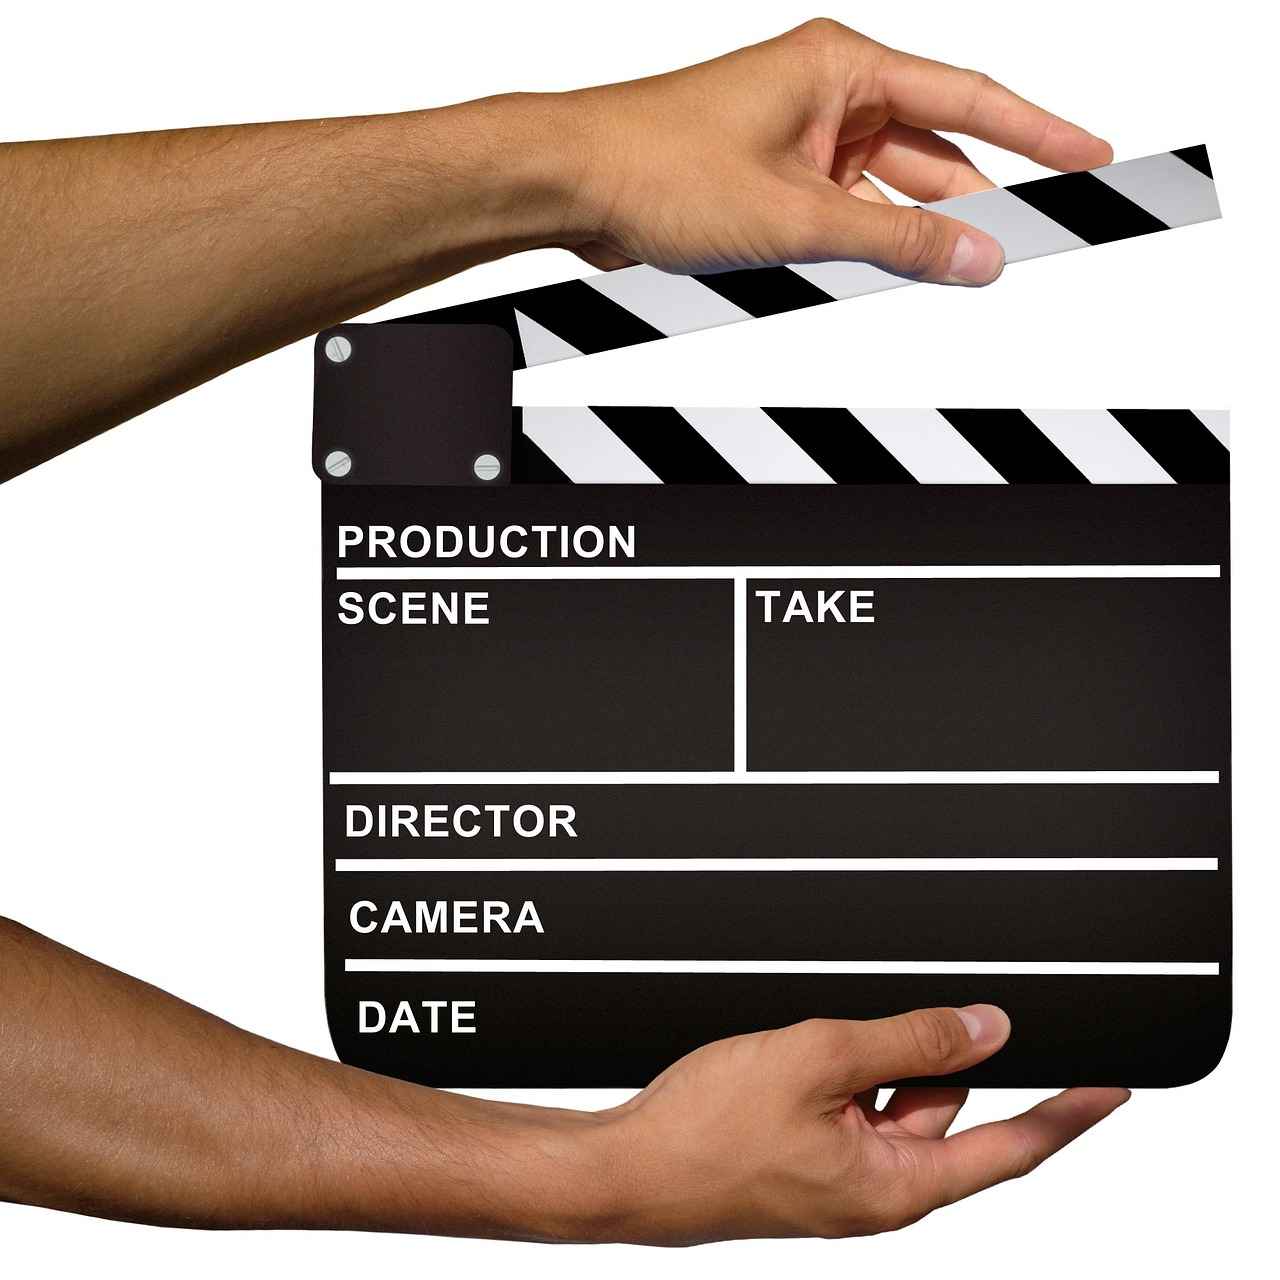
Are you ready to take your filmmaking skills to the next level? This guide offers a plethora of fun and creative movie tricks that you can easily replicate at home. Whether you’re a beginner or a seasoned filmmaker, these techniques will not only enhance your videos but also inject excitement into your storytelling. Let’s dive into the various methods that will make your films stand out!
1. DIY Special Effects
Creating stunning special effects doesn’t require expensive equipment. Using items like water, mirrors, and even kitchen supplies, you can produce impressive visual effects. For instance, try using a spray bottle to simulate rain or a mirror to create reflections that enhance your scene. These simple techniques can add a professional touch to your videos without straining your budget.
2. Creative Transitions
Transitions are critical in filmmaking as they guide your audience through the story. Learn how to use creative transitions such as whip pans, fades, and match cuts to elevate your storytelling. For example, a whip pan can create a dynamic shift from one scene to another, maintaining the viewer’s interest and ensuring a smooth narrative flow.
3. Lighting Techniques for Home Filmmaking
Lighting plays a vital role in setting the mood of your film. Understanding lighting techniques can dramatically improve the quality of your videos. Experiment with natural light by shooting during golden hour or use household lamps to create dramatic shadows. Proper lighting can transform a mundane scene into something visually captivating.
4. Using Green Screens Effectively
Green screens open up a world of possibilities in filmmaking. By learning how to use green screen technology, you can transport your characters to any location imaginable. This technique allows for limitless creativity, whether you want to place your actors in a bustling city or a serene landscape. Just ensure good lighting and proper keying during editing for the best results.
5. Sound Design Basics
Sound design is often overlooked but is crucial for creating an immersive experience. Learn how to incorporate sound effects and background music to enhance your narrative. Utilize free sound libraries and experiment with layering sounds to create depth. The right audio can evoke emotions and make your scenes more impactful.
6. Storyboarding Your Film
Storyboarding is an essential step in the filmmaking process. It helps you visualize your film and plan each shot meticulously. By creating a storyboard, you can ensure a coherent narrative structure and save time during filming. This visual guide serves as a reference for camera angles, scenes, and transitions, making the shooting process smoother.
7. Camera Angles and Shots
The way you frame your shots can significantly affect the perception of your film. Learn about different camera angles and shot types, such as close-ups, wide shots, and high angles. Each angle conveys a different emotion and can add depth to your storytelling. Experimenting with these techniques can lead to more dynamic and engaging videos.
8. Practical Makeup Effects
Transform your actors into characters with practical makeup techniques. Simple makeup effects can create dramatic transformations without the need for CGI. Use face paint, fake wounds, or even everyday cosmetics to enhance your characters and bring your story to life in a visually compelling way.
9. Editing Tips for Beginners
Editing is where your film truly comes together. Gather essential editing tips to help you piece together your footage effectively. Familiarize yourself with editing software and learn about cutting techniques, color grading, and sound syncing. A polished edit can captivate your audience and elevate the overall quality of your film.
10. Using Props Creatively
Props can greatly enhance your narrative. Learn how to use props creatively to tell your story. Everyday objects can be transformed into significant storytelling tools. For example, a simple book can represent knowledge or mystery, depending on how you frame it within your scene.
11. Filming Techniques for Action Scenes
Action scenes require specific techniques to convey excitement and energy. Explore filming techniques designed for these moments, such as dynamic camera movements and strategic editing. Incorporating slow motion or fast cuts can heighten the intensity of your scenes, keeping your audience on the edge of their seats.
12. Sharing Your Films Online
Once your film is complete, it’s time to share it with the world. Discover the best platforms and strategies for sharing your films online. Utilize social media, video-sharing sites, and film festivals to showcase your work and reach a wider audience. Engaging with viewers can also provide valuable feedback for your future projects.

1. DIY Special Effects
Creating stunning special effects doesn’t have to be an expensive endeavor. With a bit of creativity and some everyday household items, you can achieve remarkable results that will elevate your videos. This guide will explore various DIY special effects techniques, allowing you to add a professional touch to your projects without breaking the bank.
To get started, consider the following DIY special effects techniques:
- Smoke Effects: Use dry ice and warm water to create a foggy atmosphere. This effect is perfect for adding a dramatic touch to your scenes. Always handle dry ice with care and ensure proper ventilation.
- Blood Effects: Create realistic blood using corn syrup, red food coloring, and a touch of cocoa powder for texture. This mixture can be used for horror scenes or injury effects, making it a versatile addition to your toolkit.
- Explosion Effects: For a simple explosion effect, use a balloon filled with flour or colored powder. When popped, it creates an impressive burst that can be captured on camera for an action-packed scene.
- Water Effects: Use a spray bottle filled with water to simulate rain or create a splash effect. This can be particularly effective in outdoor scenes or to enhance dramatic moments in your narrative.
- Mirror Effects: Utilize mirrors to create reflections and distortions in your shots. This can add an artistic flair and depth to your visuals, making them more engaging.
When implementing these effects, consider the following tips to enhance your results:
- Lighting: Proper lighting can significantly enhance the appearance of your special effects. Experiment with different light sources to see how they interact with your effects.
- Camera Angles: The way you shoot your effects can change their impact. Try different angles to find the most dramatic presentation.
- Practice: Before filming your final scenes, practice your effects to ensure you achieve the desired look. This will help you troubleshoot any issues and perfect your techniques.
By utilizing these DIY special effects, you can transform your home videos into captivating visual stories. Remember, the key is to experiment and have fun with the process. With practice and creativity, you’ll be able to create effects that not only enhance your storytelling but also impress your audience.

2. Creative Transitions
Creative transitions play a crucial role in filmmaking, helping to maintain the narrative flow and enhance the emotional impact of your story. By employing innovative transition techniques, you can elevate your storytelling, making your videos flow seamlessly from one scene to another with flair and style. In this section, we will explore various creative transitions that you can easily implement in your home videos, regardless of your skill level.
One of the most popular techniques is the fade transition. This method involves gradually fading out of one scene while simultaneously fading into another. It creates a smooth and professional look, perfect for indicating a passage of time or a change in location. To achieve this effect, simply adjust the opacity of your clips in your editing software, allowing one clip to dissolve into the next.
Another effective transition is the wipe transition. This technique involves one scene being replaced by another through a sliding motion, which can be done horizontally, vertically, or even diagonally. Wipes can add a dynamic feel to your videos and can be customized to match the mood of your content. For instance, a fast wipe can create excitement, while a slower wipe can evoke a sense of calm.
For a more artistic approach, consider using match cuts. This technique involves cutting from one scene to another while maintaining a similar visual element or action. For example, if a character throws a ball in one scene, you can cut to another scene where a different character catches a ball. This creates a visual connection between the two scenes, enhancing the storytelling.
Moreover, zoom transitions can add an exciting twist to your videos. By zooming in on a specific element in one scene and then zooming out from a similar element in the next scene, you create a seamless transition that keeps the viewer engaged. This technique is particularly effective when transitioning between related scenes or moments.
Don’t forget about the power of sound transitions. A well-timed sound effect can significantly enhance your visual transitions. For instance, using a whoosh sound during a wipe or a fade can create a more immersive experience for your audience. Experimenting with sound can make your transitions feel more cohesive and polished.
Lastly, consider incorporating creative cuts such as jump cuts or L-cuts. Jump cuts involve cutting between two scenes that are similar in action but different in location or time, which can create a sense of urgency or excitement. L-cuts, on the other hand, allow the audio from one scene to continue playing over the visuals of the next scene, creating a smooth auditory transition that maintains the viewer’s engagement.
In conclusion, mastering creative transitions can significantly enhance your storytelling capabilities. By experimenting with various techniques such as fades, wipes, match cuts, zoom transitions, sound transitions, and creative cuts, you can create videos that flow seamlessly and captivate your audience. Remember, the key to effective transitions is to ensure they serve the story rather than distract from it. So get creative, and let your imagination guide you as you explore these exciting techniques in your filmmaking journey!

3. Lighting Techniques for Home Filmmaking
Lighting is a crucial element in filmmaking that can significantly affect the mood, tone, and overall quality of your videos. Understanding how to manipulate light can transform your home videos from ordinary to extraordinary. This section will delve into the importance of lighting and provide you with simple yet effective techniques to achieve professional-looking illumination.
Lighting sets the stage for your narrative, guiding the audience’s emotions and reactions. Good lighting can enhance the visual appeal of your scenes, create depth, and highlight the subjects effectively. Poor lighting, on the other hand, can lead to flat, uninteresting visuals that detract from your story. By mastering lighting techniques, you can ensure that your audience remains engaged and immersed in your film.
- Natural Light: Utilize natural light sources like windows during the day. Position your subjects facing the light to create a soft, flattering illumination.
- Three-Point Lighting: This classic technique involves using three light sources: a key light, fill light, and backlight. The key light is the primary source, while the fill light softens shadows, and the backlight adds depth.
- DIY Lighting Solutions: Use household lamps, LED lights, or even smartphone flashlights to create your own lighting setup. Reflectors made from white sheets or aluminum foil can help bounce light effectively.
Different lighting setups can evoke various emotions. For instance, soft, diffused lighting creates a warm, inviting atmosphere, perfect for romantic scenes. In contrast, harsh lighting with strong shadows can build tension and suspense. Experiment with different angles and intensities to find the right mood for your narrative.
Understanding color temperature is essential for achieving the desired look in your videos. Light can be warm (yellow/orange) or cool (blue). Use this knowledge to enhance the emotional tone of your scenes. For example, warm lighting can create a cozy feel, while cool lighting can evoke feelings of sadness or isolation. Adjust your camera settings accordingly to maintain color consistency throughout your film.
- Test Your Setup: Always test your lighting setup before filming. Make adjustments as needed to ensure your subjects are well-lit and the background is not distracting.
- Watch for Shadows: Pay attention to shadows cast by your lights. Avoid harsh shadows on faces by adjusting the angle or distance of your light sources.
- Use Dimmers: If possible, use dimmable lights to control the intensity of your lighting, allowing for greater flexibility in achieving the desired look.
By applying these lighting techniques, you can significantly enhance the quality of your home videos. Remember, lighting is not just about visibility; it’s a powerful storytelling tool that can help convey emotions and set the atmosphere for your narrative. With practice and experimentation, you’ll be able to create visually stunning films that captivate your audience.

4. Using Green Screens Effectively
Using Green Screens EffectivelyGreen screen technology, also known as chroma keying, is a powerful tool in the world of filmmaking that allows creators to place their characters in any setting they can imagine. This technique has been widely used in the film industry, from blockbuster movies to television shows, enabling producers to create stunning visual effects without the constraints of physical locations. In this section, we will explore the fundamentals of using green screens effectively, ensuring that your projects achieve a professional look.
What Is a Green Screen?
A green screen is a solid-colored backdrop that filmmakers use to replace the background of a scene in post-production. The color green is typically chosen because it is the least likely to match skin tones, making it easier to separate the subject from the background. By filming in front of a green screen, you can digitally replace the green area with any image or video, allowing for limitless creative possibilities.
Setting Up Your Green Screen
To get started, you need to set up your green screen properly. Here are some essential tips:
- Choose the Right Material: You can use fabric, paint, or even a professional green screen kit. Ensure that the material is wrinkle-free and evenly lit.
- Lighting is Key: Use soft, even lighting to eliminate shadows on the green screen. This helps achieve a cleaner key in post-production.
- Distance Matters: Position your subject at least a few feet away from the green screen to avoid green spill on their edges, which can complicate the keying process.
Filming Techniques
When filming, consider the following techniques to enhance the effectiveness of your green screen:
- Maintain Consistent Lighting: Ensure that your lighting remains consistent throughout the shoot to avoid discrepancies in color during editing.
- Use Proper Camera Settings: Adjust your camera settings to achieve the best quality footage. A higher frame rate and resolution will yield better results.
- Plan Your Shots: Visualize how your characters will interact with the new background. This planning will help you shoot the scenes more effectively.
Post-Production Tips
Once you’ve filmed your scenes, it’s time to move into post-production. Here are some tips for effective editing:
- Choose the Right Software: Use video editing software that supports chroma keying, such as Adobe Premiere Pro, Final Cut Pro, or DaVinci Resolve.
- Adjust the Keying Settings: Fine-tune the keying settings to remove any green edges and ensure a seamless blend with the new background.
- Add Depth with Shadows: Incorporate shadows and lighting effects in your new background to create a more realistic scene.
Creative Applications
The possibilities with green screen technology are endless. You can transport your characters to fantastical worlds, historical settings, or even outer space. Consider using green screens for:
- Virtual Sets: Create immersive environments that would be impossible to film in real life.
- Interactive Scenes: Combine live-action with animated backgrounds for a unique storytelling approach.
- Visual Effects: Enhance action scenes or dramatic moments with special effects that integrate seamlessly with your footage.
In conclusion, mastering green screen technology can significantly enhance your filmmaking capabilities. With the right setup, filming techniques, and post-production skills, you can create visually stunning content that captivates your audience. Embrace the potential of green screens and let your creativity soar!

5. Sound Design Basics
In the realm of filmmaking, sound design plays a crucial role in crafting a captivating narrative. It is not merely about adding background music or sound effects; it’s about creating an immersive experience that resonates with the audience. This section will explore the fundamentals of sound design, providing you with the tools to enhance your films significantly.
Sound design is the art of manipulating audio elements to create a desired emotional response. It encompasses everything from dialogue and sound effects to music and ambient sounds. By effectively utilizing sound, filmmakers can:
- Enhance storytelling: Sound can convey emotions, set the mood, and provide context that visuals alone cannot achieve.
- Create atmosphere: Ambient sounds can transport the audience to different locations, making them feel as if they are part of the scene.
- Guide attention: Strategic use of sound can direct viewers’ focus to specific elements within a frame, enhancing the narrative.
Sound effects are vital in sound design, adding realism and depth to your film. Here are some practical tips for incorporating sound effects:
- Use foley: Foley is the reproduction of everyday sound effects that are added in post-production. You can create your own using household items to achieve unique sounds.
- Layer sounds: Combine multiple sound effects to create a richer audio landscape. For instance, layering footsteps with ambient noise can enhance the realism of a scene.
- Match sounds to visuals: Ensure that the sound effects you use align with what the audience sees on screen. This synchronization is key to maintaining immersion.
Music is a powerful tool in sound design, capable of evoking strong emotions. When selecting music for your film, consider the following:
- Emotion and tone: Choose music that reflects the emotional tone of the scene. A tense moment may require a suspenseful score, while a romantic scene might benefit from soft melodies.
- Original vs. licensed music: Decide whether to use original compositions or licensed tracks. Original music can provide a unique feel, while licensed music may be more recognizable.
- Volume and mixing: Pay attention to the volume levels of your music in relation to dialogue and sound effects. Proper mixing ensures that no element overshadows another.
Editing is where sound design truly comes to life. Here are some key considerations for editing sound:
- Timing: The timing of sound effects and music is crucial. Make sure they hit at the right moment to maximize their impact.
- Transitions: Use fades, cuts, and crossfades to create smooth transitions between different audio elements, enhancing the overall flow of your film.
- Sound balancing: Ensure that all audio elements are balanced. No sound should overpower another; they should work together to create a cohesive audio experience.
By delving into the world of sound design, you can transform your films into immersive experiences that captivate your audience. Incorporating sound effects and music thoughtfully will not only enhance your storytelling but also elevate the overall quality of your work. With practice and creativity, you can master the art of sound design and take your filmmaking skills to new heights.

6. Storyboarding Your Film
Storyboarding is a crucial step in the filmmaking process that allows you to visualize your film before the actual shooting begins. This method involves creating a series of illustrations or images displayed in sequence to pre-visualize the scenes in your film. By mapping out your film through storyboards, you can ensure a coherent narrative structure, which is essential for effective storytelling.
One of the primary benefits of storyboarding is that it helps you organize your thoughts and ideas. When you sketch out each scene, you can see how the narrative flows from one moment to the next. This visual representation allows you to identify any gaps in the storyline or areas that may need more development. Additionally, it aids in determining the pacing of your film, ensuring that the story unfolds at a rhythm that keeps the audience engaged.
- Enhances Communication: Storyboards serve as a visual guide for everyone involved in the production, from directors to cinematographers. This shared reference helps communicate your vision clearly.
- Saves Time and Resources: By planning your shots in advance, you can minimize the time spent on set and reduce the number of takes needed, ultimately saving money and resources.
- Facilitates Problem-Solving: When you visualize your film, you may encounter logistical issues that can be addressed before filming begins, such as location constraints or special effects challenges.
To create an effective storyboard, start by breaking down your script into individual scenes. For each scene, sketch out the key moments, focusing on the composition, camera angles, and actions of the characters. You don’t need to be an artist; simple stick figures and basic shapes can convey your ideas effectively. You can also use digital tools or storyboard software to streamline this process.
In addition to visual elements, consider incorporating notes on sound, dialogue, and transitions between scenes. This comprehensive approach will provide a clearer roadmap for your film. Remember, the storyboard is a flexible tool and can be adjusted as your vision evolves during the production process.
In conclusion, storyboarding is an invaluable step in filmmaking that not only enhances your creative vision but also ensures a smoother production process. By taking the time to storyboard, you set the stage for a successful film that captivates your audience.

7. Camera Angles and Shots
In the world of filmmaking, the way you capture a scene can significantly impact how your audience perceives the story. Understanding camera angles and shot types is essential for any filmmaker looking to enhance their storytelling. This section will delve into various techniques that can add depth and interest to your scenes, making your videos more engaging.
Camera angles refer to the position and orientation of the camera in relation to the subject. Different angles can evoke different emotions and reactions from the audience. Here are some common camera angles:
- Eye Level: This is the most neutral angle, where the camera is positioned at the subject’s eye level. It creates a sense of equality between the viewer and the subject.
- High Angle: When the camera looks down on the subject, it can make them appear smaller or weaker, evoking feelings of vulnerability.
- Low Angle: Conversely, a low angle shot looks up at the subject, which can give them a sense of power or dominance.
- Bird’s Eye View: This angle provides a unique perspective, as the camera is directly above the subject. It can create a sense of distance or isolation.
- Over-the-Shoulder: This angle places the viewer behind a character, providing insight into their perspective and emotional state.
In addition to camera angles, the type of shot you choose can significantly affect the scene’s mood and storytelling. Here are some essential shot types:
- Close-Up: This shot focuses closely on a subject, capturing details and emotions. It’s excellent for conveying feelings and reactions.
- Medium Shot: A medium shot frames the subject from the waist up, providing context while still focusing on the character.
- Wide Shot: This shot captures a broader view of the scene, establishing the setting and context for the action.
- Extreme Close-Up: This shot zooms in on a specific detail, such as an eye or a hand, emphasizing its importance.
- Establishing Shot: Typically used at the beginning of a scene, this shot sets the context by showing the location and environment.
Combining different angles and shot types can create a dynamic visual experience. For instance, starting with a wide shot to establish the setting, then cutting to a close-up of a character’s reaction, can enhance emotional engagement. Additionally, using high and low angles strategically can shift the audience’s perception of the characters and their relationships.
In conclusion, mastering camera angles and shot types is crucial for any filmmaker. By experimenting with these techniques, you can significantly enhance the storytelling in your videos, making them more compelling and impactful. Remember, the key to effective filmmaking lies in how you choose to present your story visually.

8. Practical Makeup Effects
In the realm of filmmaking, makeup serves as a powerful tool that can significantly enhance character portrayal and storytelling. While CGI has its place, practical makeup effects can offer a more tangible connection to the characters, making them feel real and relatable. This section will explore a variety of practical makeup techniques that can transform your actors into compelling characters, enriching your film’s visual narrative.
Practical makeup effects allow filmmakers to create stunning transformations using simple techniques and materials. Unlike CGI, which can sometimes feel detached, practical effects provide a hands-on approach that can engage both the actor and the audience. By using makeup, you can:
- Enhance Character Authenticity: Realistic makeup can help actors embody their roles more convincingly.
- Save on Costs: Practical effects can be created with affordable materials, reducing the need for expensive digital effects.
- Increase Audience Engagement: Seeing real transformations can captivate viewers and draw them deeper into the story.
Here are some essential techniques to consider when working with practical makeup effects:
- Face Painting: Utilize face paints to create dramatic looks, whether for fantasy characters or to simulate injuries.
- Prosthetics: Use latex or silicone to create scars, wounds, or other physical alterations. These materials can be molded to fit the actor’s face and provide a three-dimensional effect.
- Body Makeup: Extend your makeup skills beyond the face. Body makeup can be used for full transformations, such as turning an actor into a mythical creature.
- Age Makeup: Techniques such as aging cream and specific color palettes can effectively simulate aging, helping actors portray older characters convincingly.
To achieve stunning practical makeup effects, having the right tools is crucial. Here’s a list of essential items you should consider:
| Tool/Material | Purpose |
|---|---|
| Face Paints | For creating vibrant designs and character features. |
| Latex/Silicone | For crafting realistic prosthetics and wounds. |
| Makeup Brushes | For precise application and blending. |
| Setting Spray | To ensure makeup longevity during filming. |
To ensure your makeup effects are successful, consider the following tips:
- Practice: Always practice your techniques before the actual shoot to ensure smooth application.
- Communicate with Actors: Discuss the look and feel of the character with your actors, ensuring they are comfortable with the makeup process.
- Test Under Lighting: Makeup can look different under various lighting conditions, so always test your effects in similar lighting to what will be used during filming.
By mastering these practical makeup techniques, you can significantly elevate your filmmaking, creating characters that resonate with audiences and enhance the overall storytelling experience. Embrace the art of makeup, and watch your films come to life in ways you never thought possible.

9. Editing Tips for Beginners
Editing is a crucial phase in the filmmaking process that can significantly enhance the final product. For beginners, understanding the basics of editing can be overwhelming. However, with the right tips and techniques, you can transform your raw footage into a polished masterpiece that captivates your audience.
Before diving into editing, familiarize yourself with the software you plan to use. Popular options like Adobe Premiere Pro, Final Cut Pro, and DaVinci Resolve offer powerful features that can help you edit effectively. Take time to explore tutorials and guides available online to learn the interface and tools.
Organization is key to efficient editing. Create a structured folder system on your computer to categorize your clips, audio files, and images. This will save you time and frustration when searching for specific footage during the editing process. A well-organized project also allows for smoother workflow and better focus on storytelling.
Begin your editing journey with a rough cut. This involves piecing together your footage in a basic sequence without fine-tuning. Focus on the story you want to tell, and don’t get bogged down by details. This version serves as a foundation for your final edit, helping you visualize the overall flow of your film.
Transitions can enhance the storytelling but should be used sparingly. Simple cuts and fades are often more effective than flashy transitions that can distract the viewer. Experiment with different types, such as cross dissolves or fade-ins, to see what best fits your narrative.
Color grading is an essential step that can dramatically affect the mood of your film. Use color correction tools to adjust brightness, contrast, and saturation. This process can help achieve a consistent look across your footage, making it visually appealing. Experiment with different color palettes to find the one that enhances your story.
Sound is just as important as visuals in filmmaking. Incorporate background music, sound effects, and voiceovers to create an immersive experience for your audience. Pay attention to audio levels and ensure that dialogue is clear and balanced with other sound elements. Tools like Audacity or the audio features in your editing software can help you fine-tune your sound design.
After completing your edit, take a break before reviewing your work. Fresh eyes can help you spot inconsistencies or areas for improvement. Consider sharing your film with friends or fellow filmmakers for constructive feedback. Their insights can provide valuable perspectives that you might have overlooked.
Once you are satisfied with your edit, it’s time to export your film. Choose the appropriate format based on where you plan to share it. For online platforms, formats like MP4 are widely accepted. Ensure you optimize the resolution and bitrate for the best quality without making the file too large.
By following these editing tips, beginners can develop their skills and create engaging films that resonate with audiences. Remember, practice makes perfect, so keep experimenting and learning as you hone your editing craft.

10. Using Props Creatively
Using props in filmmaking is an art that can significantly enhance your narrative and engage your audience. By transforming ordinary objects into extraordinary storytelling tools, you can elevate the emotional depth and visual appeal of your films. This section will explore various techniques for creatively utilizing props, ensuring they serve a purpose beyond mere decoration.
- Understanding the Role of Props: Props can be defined as any object used on screen that helps to tell your story. They can range from a simple coffee cup to intricate weapons or magical artifacts. The key is to ensure that every prop has a reason for being in the scene. Ask yourself, What does this object symbolize? or How does it contribute to character development?
- Choosing the Right Props: When selecting props, consider their relevance to the story and the emotions you want to convey. For instance, a broken watch might signify lost time or regret, while a vibrant flower could represent hope and renewal. Use color, texture, and size to create a visual contrast that enhances the narrative.
- Incorporating Props in Action: Props should not be static; they need to interact with the characters and the environment. Think about how your actors can use props to express their emotions or advance the plot. For example, a character might throw a book in frustration or use a mirror to reflect on their past.
- Layering Meaning with Props: A single prop can have multiple meanings depending on the context in which it is used. Consider a simple chair: it can symbolize comfort, isolation, or even a barrier between characters. Layering meanings adds complexity to your storytelling and invites the audience to engage more deeply.
- DIY Props for Budget Filmmaking: You don’t need a big budget to create impactful props. Many filmmakers have successfully crafted their own using materials found around the house. For example, cardboard can be transformed into a futuristic weapon, or fabric can be turned into costumes. Embrace creativity and resourcefulness!
- Props as Character Extensions: Sometimes, props can act as extensions of a character’s personality. For instance, a character who is meticulous might have a perfectly arranged desk, while a chaotic character might have a cluttered space. Use props to visually communicate traits without needing dialogue.
- Using Props for Symbolism: Props can serve as powerful symbols throughout your film. Consider using a recurring object that represents a theme or character arc. For example, a key might symbolize freedom or opportunity, while a locked box could represent secrets or fears.
- Experimenting with Scale: Don’t be afraid to play with the scale of your props. Oversized or miniature versions of everyday objects can create a surreal effect that enhances the narrative. This technique can be particularly effective in genres like fantasy or horror, where reality can be bent.
- Engaging the Audience: Finally, think about how props can engage your audience. Use interactive elements that invite viewers to think critically about their significance. For example, a prop might be central to a mystery that the audience is invited to solve alongside the characters.
In summary, creatively using props in your films can transform the ordinary into the extraordinary. By understanding their role, choosing the right items, and incorporating them thoughtfully, you can enhance your storytelling and create a more immersive experience for your audience. Embrace the potential of props as a vital part of your filmmaking toolkit and watch your narratives flourish.

11. Filming Techniques for Action Scenes
When it comes to capturing the thrill of action scenes, the techniques you employ can make all the difference. Filmmaking is an art that thrives on **creativity** and **innovation**, especially in the realm of action. Here, we will explore some essential filming techniques that can help you convey the excitement and energy of action sequences effectively.
- 1. Dynamic Camera Movements: Utilize camera movements such as pans, tilts, and tracking shots to create a sense of speed and urgency. For instance, a handheld camera can add a raw, immersive feel to chase scenes, while a steadicam can provide smooth tracking to enhance the fluidity of movements.
- 2. Close-ups and Wide Shots: Incorporate a mix of close-ups and wide shots to emphasize emotions and the scale of action. Close-ups can capture the intensity on an actor’s face, while wide shots can showcase the entire environment, giving viewers a sense of context.
- 3. Slow Motion: Using slow motion can heighten dramatic moments, allowing the audience to savor the action. This technique is particularly effective during pivotal moments, such as a character dodging an attack or executing a skillful maneuver.
- 4. Choreographed Action: Invest time in **choreographing** your action scenes. Well-rehearsed stunts and fight sequences not only look more realistic but also ensure the safety of your actors. Collaborate with stunt coordinators to design intricate and believable movements.
- 5. Creative Editing: The editing process is crucial in action filmmaking. Quick cuts can build tension, while longer takes can allow the audience to appreciate the choreography. Experiment with pacing to find the right balance that keeps viewers on the edge of their seats.
- 6. Sound Effects: Enhance the impact of your action scenes with strategic sound design. The right sound effects can amplify the intensity of a fight or chase, making the scene more engaging. Consider using foley techniques to create realistic sounds that sync with the visuals.
- 7. Lighting Techniques: Use lighting to create mood and highlight key moments in your action scenes. High contrast lighting can add drama, while softer lighting can create a more subdued atmosphere. Experiment with shadows and highlights to enhance the visual storytelling.
- 8. Use of Props: Integrate props creatively into your action sequences. Whether it’s a weapon, vehicle, or environmental elements, props can add depth and realism to your scenes. Ensure that they are well-integrated into the choreography for maximum effect.
- 9. Location Scouting: Choose locations that enhance the action. Urban settings can provide dynamic backdrops for chase scenes, while open spaces can be ideal for large-scale battles. Scout locations that offer unique features, such as stairs or rooftops, to add variety to your shots.
- 10. Audience Perspective: Always consider the audience’s perspective. How will they perceive the action? Use angles and framing that guide viewers’ eyes to the most important elements of the scene, ensuring they remain engaged throughout the sequence.
By implementing these techniques, you can elevate your action scenes and ensure they resonate with your audience. Remember, the key to successful action filmmaking lies in the meticulous planning and execution of each element, from camera work to sound design. With practice and creativity, you can create thrilling sequences that leave a lasting impression.

12. Sharing Your Films Online
In today’s digital age, sharing your films online has become an essential part of the filmmaking process. With a plethora of platforms available, filmmakers can easily reach a global audience, showcasing their creative talents and unique storytelling. This section will explore the best platforms and strategies for effectively sharing your films online.
When it comes to sharing your films, selecting the right platform is crucial. Here are some popular options:
- YouTube: As the largest video-sharing platform, YouTube offers a vast audience. Filmmakers can create channels, engage with viewers, and utilize SEO strategies to enhance visibility.
- Vimeo: Known for its high-quality video hosting, Vimeo is favored by professionals. It allows filmmakers to showcase their work in a more artistic environment and offers various privacy settings.
- Social Media: Platforms like Facebook, Instagram, and TikTok are excellent for sharing short films or trailers. They can help generate buzz and direct traffic to your full-length films.
- Film Festivals: Online film festivals provide a unique opportunity to gain recognition. Submitting your film to these festivals can lead to exposure and potential awards.
Once you’ve chosen your platform, consider these strategies to effectively promote your films:
- Engage with Your Audience: Building a community around your films is essential. Respond to comments, ask for feedback, and create a dialogue with your viewers.
- Utilize SEO Techniques: Optimize your film titles, descriptions, and tags with relevant keywords. This will help your films appear in search results and attract more viewers.
- Create Eye-Catching Thumbnails: Thumbnails are the first thing viewers see. Design compelling thumbnails that accurately represent your film and entice viewers to click.
- Leverage Social Media: Use social media to share behind-the-scenes content, teasers, and updates. This can create excitement and anticipation for your film’s release.
After sharing your films, it’s vital to analyze viewer feedback. Here’s how:
- Monitor Engagement Metrics: Track views, likes, shares, and comments to gauge audience interest. This data can inform your future projects.
- Conduct Surveys: Create surveys to gather direct feedback from your viewers. Understanding their preferences can help you improve your storytelling and production quality.
Consider collaborating with other filmmakers to expand your reach. Here are some ways to do this:
- Guest Appearances: Feature other filmmakers in your films or collaborate on joint projects. This can introduce your work to their audience.
- Cross-Promotion: Promote each other’s films on social media and other platforms, enhancing visibility for both parties.
Sharing your films online is not just about uploading content; it’s about creating a strategy that resonates with your audience. By selecting the right platforms, employing effective promotion strategies, analyzing feedback, and collaborating with others, you can significantly enhance your film’s reach and impact. Embrace these techniques to showcase your creative talents and connect with a wider audience.
Frequently Asked Questions
- What materials do I need for DIY special effects?
You can use everyday household items like water, food coloring, and even kitchen supplies! Think of it as a treasure hunt around your home, where ordinary objects can become extraordinary effects.
- How can I create smooth transitions in my videos?
Experiment with techniques like fades, cuts, and creative wipes. It’s like dancing with your footage, where each move should feel natural and engaging, keeping your audience glued to the screen!
- What lighting setup is best for home filmmaking?
Natural light is your best friend! Position yourself near windows or use lamps to create soft, diffused light. Think of lighting as the mood setter for your film—just like a candlelit dinner makes everything feel special!
- How do I use a green screen effectively?
Ensure even lighting on the green screen and avoid wrinkles. When you edit, use software to key out the green. It’s like magic—transporting your characters to any world you can imagine!
- What are some basic sound design tips?
Start by layering sound effects and music that match your visuals. Good sound can elevate your film from amateur to professional; it’s like adding the perfect spice to a dish—it makes all the difference!


