So, you ever heard of decoupage paper? I mean, it’s like this magical stuff that can turn your boring old junk into, well, something kinda artsy and fabulous. You can grab some decoupage paper for crafts and suddenly, your plain box is now a masterpiece—or at least, that’s what you tell your friends, right? It’s like, who needs Picasso when you got a bunch of old magazines and some glue? But here’s the kicker, not everyone knows how to use that stuff properly. You might end up with a sticky mess that looks more like a toddler’s art project than a chic home decor piece. And let’s be real, sometimes it’s hard to find the right decoupage paper designs that don’t scream “I’m trying too hard!” You might think you can just slap some paper on anything and call it a day. Spoiler alert: you can’t! But hey, that’s what makes it fun, right? So, let’s dive in and figure out how to make the most of this crafty wonder, shall we? Or maybe we’ll just make a bigger mess. Who knows!
Discover the Top 10 Decoupage Paper Designs to Transform Your Home Décor Instantly
Decoupage paper, huh? It’s like, one of those crafty things that sounds fancy but really isn’t rocket science. You just take some pretty paper, slap it on stuff, and boom! You’re an artist. At least, that’s the idea. Not really sure why this matters, but people seem to go nuts over it. Maybe it’s just me, but I feel like decoupage is kinda therapeutic, you know? Like, you can zone out and just glue paper while you listen to your favorite tunes. Anyway, let’s dive into the world of decoupage paper.
So, first off, what is decoupage paper? Well, it’s basically designed for, you guessed it, decoupage! It comes in all sorts of designs and thicknesses, and you can find everything from floral patterns to vintage prints. Some people even use old newspapers or magazines, but if you wanna look classy, grab some real decoupage paper. It’s like the difference between a fast-food burger and a gourmet one, if you catch my drift.
When you’re looking for the right decoupage paper, keep in mind that not all papers are created equally. You wanna find paper that’s thin enough to glue but thick enough to hold its shape. A lot of folks make the mistake of using cardstock, which is just too thick. Trust me, you don’t wanna be fighting with your paper. It should be more like a dance, not a wrestling match.
Here’s a little table to help you out:
| Type of Paper | Thickness | Best For |
|---|---|---|
| Decoupage Paper | Thin | Furniture, wood, fabric |
| Tissue Paper | Very Thin | Fragile items, layering |
| Scrapbook Paper | Medium | Crafts, scrapbooking, cards |
| Cardstock | Thick | Not really for decoupage, just don’t |
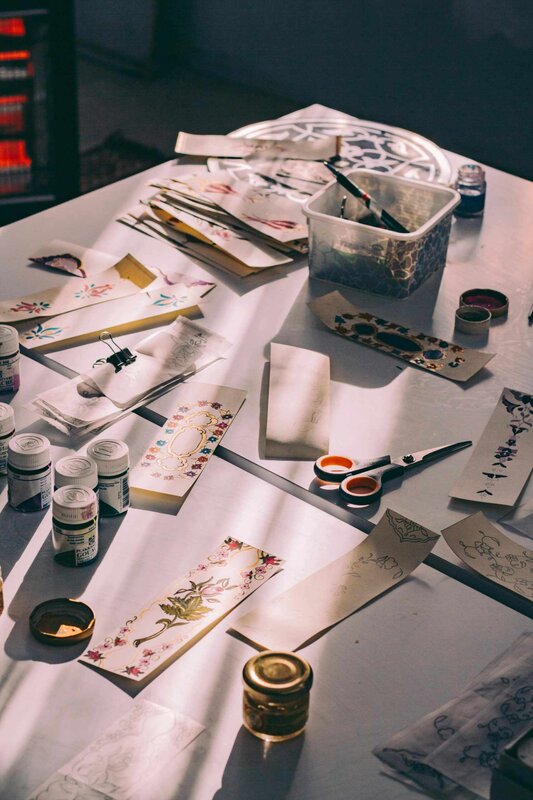
Now, when you’re ready to start, you’ll need some supplies. Here’s a handy-dandy list:
- Decoupage paper of your choice
- Scissors (not the kid ones, unless you like living dangerously)
- Mod Podge or any decoupage glue (I mean, it’s basically magic in a bottle)
- A brush (or your fingers, but let’s keep it classy)
- Something to decorate (like an old table or a boring box)
So, once you got all that, it’s time to get creative. Cut your decoupage paper into the shapes you want. Now, here’s where it gets tricky. You can either go for a clean look or embrace the chaos. Honestly, I’m a fan of the chaos. You can layer pieces and make it look all artsy-fartsy, or you can just slap them on in a straight line. It’s your world, you do you!
Now, some people say you gotta apply the glue just right. Like, you gotta use a thin layer, and then another layer on top. But honestly, I’ve tried both ways and sometimes it works, sometimes it doesn’t. Maybe the glue just has a mood? Who knows! Just make sure it’s not too thick, or you’ll end up with a mess that looks like a toddler got into the glue stash.
After you’ve glued everything down, let it dry. This is where patience comes in — not my strong suit, but I try. You might wanna wait a few hours, or even overnight if you’re feeling particularly fancy. Once it’s dry, you can seal it with more glue. Some folks go for a shiny finish, while others prefer a matte look. Your call!
Here’s a quick list of tips to keep in mind:
- Always do a test piece first. Just in case your genius ideas doesn’t pan out.
- Don’t overthink it. Seriously, it’s paper and glue. It’s not like you’re curing cancer.
- Mix and match different decoupage paper styles. You’d be surprised how well they can work together.
- If you mess up, just paint over it and start again! Like they say, “If at first you don’t succeed, try, try again” (or just give up and go eat ice cream).
If you’re feeling extra adventurous, try using decoupage paper on things like glass or ceramic. Just make sure you use a waterproof sealant, or else you might end up with a soggy masterpiece. Not ideal, right? Just think of the possibilities, though! You can create custom plates, vases — whatever tickles your fancy.
So there you have it. The world of decoupage paper is waiting for you, and honestly, it’s not as scary as it sounds. Grab some glue, choose
How to Choose the Best Decoupage Paper: Expert Tips for Stunning Craft Projects
Decoupage paper, ya know, it’s like that magic stuff that can turn boring things into fabulous art. I mean, who doesn’t want to slap some paper on an old chair and call it a day, right? But seriously, it’s not just for grandma’s crafts anymore. Decoupage is so trendy nowadays, it’s like the avocado toast of the craft world. And speaking of which, let’s dive into what decoupage paper really is, how to use it, and maybe a few tips thrown in for good measure.
So, what is decoupage paper? Well, it’s basically special paper that you can use for decoupage projects, which involves gluing paper onto surfaces and then sealing it with a finish. Sounds simple enough, but let me tell ya, it’s a bit more complicated than just slapping some glue on and hoping for the best. There’s this whole world of patterns, textures, and designs out there. Maybe it’s just me, but I feel like there’s a decoupage paper for every mood.
Here’s the thing, you don’t need to be an artsy-fartsy type to get into this. Anyone can jump on the decoupage train, even if you have two left hands. Just grab some decoupage paper, a pair of scissors, and some Mod Podge or whatever glue you fancy. You could even use old magazines if you’re feeling thrifty, but, again, that might be just me!
Now, let’s talk about the types of decoupage paper you can find. It’s like a candy store for crafters. You got your standard decoupage paper sheets, which are thin and easy to work with. Then there’s heavier options like cardstock, which can add some dimensions to your project. And don’t forget about rice paper – it’s super delicate and gives that ethereal vibe. The point is, the options are endless, and if you don’t find something you like, well, you might be too picky.
Here’s a little table for ya, breaking down the different types of decoupage paper:
| Type of Paper | Features | Best For |
|---|---|---|
| Standard Paper | Thin, easy to cut | Basic projects |
| Cardstock | Heavier, sturdier | 3D designs |
| Rice Paper | Delicate, translucent | Ethereal effects |
| Fabric Paper | Textured, soft | Unique fabric projects |
| Printed Paper | Pre-designed patterns | Quick projects |
I mean, isn’t that helpful? Or maybe it’s just cluttering your brain. Either way, if you want to really stand out in your decoupage game, you gotta experiment with different types of decoupage paper.
Now, let’s get into the nitty-gritty of how to use this stuff. First off, you’ll need to prepare your surface. Clean it really well, or your decoupage paper is just gonna fall off like a bad relationship. Once you’ve got a clean slate, cut your paper to the desired shapes. Honestly, it doesn’t have to be perfect. If it’s slightly crooked, who cares? It adds character, right?
Next, you’ll wanna apply a thin layer of glue onto your surface and then lay down your decoupage paper. Smooth it out to get rid of any bubbles, because nobody likes bubble wrap in their art. After that, add another layer of glue over the top. Some people say to use multiple coats, but I guess it depends on how much patience you have, or how much coffee you’ve had that day.
Here’s a quick list of tools and supplies you might need for your decoupage paper projects:
- Decoupage paper sheets (duh!)
- Scissors
- Mod Podge or similar glue
- Brush for the glue
- Clear sealant (if you want it to last)
And hey, if you mess up? Just embrace it. It’s not like Picasso was perfect, right? Maybe he just had a ton of decoupage paper lying around. Who knows?
If you’re feeling adventurous, try layering different types of decoupage paper for unique effects. Mix and match patterns – get wild with it! Just don’t go overboard. There’s a fine line between art and a hot mess, if you catch my drift.
In the end, decoupage is all about having fun and expressing yourself, even if it’s a bit messy. The world doesn’t need another cookie-cutter project; it needs your creativity, mistakes and all. So grab that decoupage paper and let your
5 Creative Decoupage Techniques You Need to Try This Weekend
Ah, decoupage paper, or as I like to call it, that fancy paper you stick on stuff to make it look artsy or something. Honestly, who knew that slapping pretty pictures on a box could turn into a whole craft phenomenon, huh? You might be asking yourself, why should I care about decoupage paper designs? Good question, my friend, and I’m not really sure why this matters, but let’s dive into this rabbit hole together!
First off, what even is decoupage? It’s like, you take some images or patterns, cut ’em out, and glue them onto just about anything. I mean, people have glued them on furniture, walls, and even their own skin (yikes, but whatever floats your boat, right?). The best part? You don’t need to be Picasso to do it. Seriously, if you can cut and paste, you’re halfway there.
Now, let’s talk types of decoupage paper for crafts. There’s like, a whole buffet of options. You got your standard napkin decoupage, which is kinda like the beginner’s level. Then there’s scrapbook paper which is a little more sophisticated, like, “hey look at me, I’m artsy.” And don’t forget about tissue paper, which is super delicate and can be a pain in the butt to work with. But hey, aren’t we all just a little bit of a masochist when it comes to crafting?
Here’s a quick table of decoupage paper types, just to keep things organized:
| Type of Paper | Pros | Cons |
|---|---|---|
| Napkin | Inexpensive, easy to find | Thin, can tear easily |
| Scrapbook Paper | Variety of designs available | Can be pricey |
| Tissue Paper | Lightweight, translucent | Difficult to handle |
| Specialty Paper | Unique textures and designs | Often more expensive |
Not gonna lie, picking the right paper is like choosing a Netflix show. You scroll forever and end up just watching The Office for the millionth time. Maybe it’s just me, but I feel like the paper you choose can totally make or break your project. If you slap a cute unicorn on a rustic wooden box, it could either look like a masterpiece or a total disaster, ya know?
On to supplies! You can’t just go around gluing stuff without the right goodies. You’ll need some glue (Mod Podge is like the holy grail for decoupage), scissors (make sure they be sharp, or you’ll be getting all frustrated), and a brush for applying glue like a pro. Here’s a list of must-haves for your decoupage paper projects:
- Mod Podge: The magic glue that holds it all together.
- Scissors: Sharp enough to cut through dreams.
- Foam Brush: For that smooth application, because who wants brush strokes?
- Sealer: To protect your creation from the elements, or your kids (if you have them).
Now, let’s get real for a sec. Sometimes, things don’t go according to plan. The paper rips, the glue doesn’t stick, or you accidentally glue your fingers together. It happens, and you know what? Embrace it. Not everything has to be perfect. Maybe you meant for that smudge to be there, right? Maybe it adds character? Or at least that’s what I tell myself when I mess up.
When it comes to applying the decoupage paper techniques, don’t overthink it. Just slap some glue on your surface, lay down your paper, and smooth it out. Sounds simple, right? But then you realize you’ve got air bubbles. Ugh. It’s like the paper has a mind of its own. But hey, just poke a tiny hole and push the bubble out. Voilà! Instant fix.
And if you’re feeling really wild, try layering different types of decoupage paper patterns. It’s like a collage but with a fancy name, so it sounds artsy. Just remember to let each layer dry before adding the next. Patience is a virtue, or so they say. You could rush it, but then you’ll just be dealing with a sticky mess and who needs that in their life?
I just gotta say, there’s something oddly satisfying about finishing a decoupage project. You look at your creation, and it’s like, “Wow, I made that!” Even if it’s just a flower pot with some wrinkled paper on it. It’s your art, your style, and hey, it beats scrolling social media for hours, right?
So there you have it, folks. Decoupage paper is not just for grandmas
The Ultimate Guide to Decoupage Paper: Types, Uses, and Where to Buy
Decoupage paper is one of those crafty things that kind of makes you feel like an artist, even if you can barely draw a stick figure. So, what is this stuff, anyway? Well, decoupage paper is basically specialized paper that you use for, you guessed it, decoupage! Seriously, it’s like a magical gateway to transforming boring objects into something fabulous. You know, like your grandma’s old chair that needs a serious makeover. Who knew you could turn it into a work of art, right?
In the world of crafting, using decoupage paper for furniture is like adding sprinkles on a cupcake; it just makes everything better. So, let’s talk about how to get started with this fun project. First things first, you gotta gather your supplies. You will need some decoupage paper sheets, glue (Mod Podge is the holy grail, people), scissors, and a clear topcoat. Trust me, you don’t want to skip that topcoat; otherwise, you might end up with a mess that looks like a toddler’s art project gone wrong.
Now, about the different types of decoupage paper designs you can find. There’s floral, vintage, abstract—you name it! It’s like a candy store for the crafty soul. And maybe it’s just me, but I feel like the more eclectic the design, the better. You can mix and match papers. Just don’t go overboard or it might look like a craft explosion in your living room.
Here’s a tip: when you’re choosing your decoupage paper patterns, think about what vibe you wanna create. Are you going for shabby chic or modern elegance? Decide on a theme first. I mean, it’s not rocket science, but having a plan definitely helps.
Once you got your papers and your theme sorted out, it’s time to prep your surface. If you’re working on wood, make sure it’s clean and sanded down a bit. No one wants to decoupage over a dirty surface, am I right? If you’re doing something like a glass jar, just wipe it down with some alcohol. Not the drinkable kind, though—let’s keep it classy.
Now, let’s get to the fun part. Cutting the decoupage paper into shapes! You can go with squares, hearts, or whatever tickles your fancy. There’s no right or wrong here, just let your imagination run wild. And if you mess up a cut, just roll with it. Honestly, it adds character, right? Who doesn’t love a little quirkiness in their home décor?
Alright, once you’ve got your shapes all cut out, it’s time to apply ‘em. Grab that Mod Podge and start slapping it on the surface. I mean, don’t go overboard, but you definitely want enough to make sure everything sticks. Place your decoupage paper pieces where you want them and then add another layer of Mod Podge on top. It’s like a glue sandwich.
And here’s where it gets a little tricky. You gotta be careful with bubbles. If you see ‘em, just smooth ‘em out gently. Maybe it’s just me, but I feel like bubbles are the enemy of any crafting project. So, keep an eye out!
Now, after you’ve finished applying everything, you gotta let it dry. How long, you ask? Well, it depends, but I’d say at least a couple hours. But who’s counting, right? You could binge-watch a show or something while you wait.
After it’s dry, don’t forget that topcoat! It’s super important to protect your masterpiece. Slap on a few coats if you’re feeling ambitious. The more, the merrier! Just make sure to let each coat dry before adding the next one. It’s like a waiting game, and let me tell you, patience is not my strong suit.
Lastly, let’s talk about where to use your decoupaged items. You can decorate anything from furniture to picture frames, to even your boring old kitchen canisters! Imagine how cool those would look with some funky decoupage paper designs. I’m telling ya, it’ll be a hit at your next dinner party. You’ll be the crafty genius everyone talks about, and who doesn’t want that?
So, whether you’re a craft novice or a seasoned pro, decoupage paper crafts can be a fun way to express your creativity. Just remember, it’s all about having fun and not stressing over the little things. Embrace the chaos, and you’ll end up with something beautiful, even if it’s not perfect. And let’s be real, perfection is overrated anyway!
Unleash Your Imagination: Unique Decoupage Paper Ideas for Every Season and Occasion
Decoupage paper, huh? It’s like the fanciest way to decorate stuff, if you ask me. So, what is it really? Well, it’s basically those cool, printed sheets that you can glue onto pretty much anything. Think of it as a way to jazz up your old furniture or that boring box you keep your junk in. Not really sure why this matters, but it’s a craft that’s been around for ages, and people still go gaga over it. Maybe it’s just me, but I feel like there’s a bit of magic in transforming something dull into something fabulous with just a little bit of decoupage paper.
Alright, let’s dive into what makes this stuff so special. First off, you got your variety of decoupage paper designs. From floral patterns to funky abstract shapes, there’s really a design for everyone. And if you’re thinking it’s only for grandmas making crafty gifts, think again! It’s trendy, it’s hip, and honestly, it can make you look like a DIY genius when you’re really just slapping paper onto things.
Now, if you’re gonna get into this whole decoupage scene, you might wanna know about the materials. You’ll need more than just decoupage paper. Here’s a nifty little table to get you started:
| Material | Purpose |
|---|---|
| Decoupage paper | The star of the show, obviously! |
| Mod Podge | This glue is like magic in a bottle! |
| Scissors | For cutting out your designs. |
| Paintbrush | For applying the glue like a pro. |
| Sealant | To protect your masterpiece, duh! |
So, you got your materials, but how do you actually use them? It’s not rocket science, I promise. You just cut the decoupage paper into shapes or sizes that you want, then slap it on whatever surface you’re working with, and brush on that Mod Podge. It’s like a glue and sealant combo, so it’s super handy. But, just a heads up, don’t forget to smooth out any bubbles. Nobody wants a bumpy mess!
Here’s a quick rundown of the steps, just in case you’re a visual learner or something:
- Pick your surface – Anything goes, really! Wood, glass, or even ceramic. Just make sure it’s clean and dry.
- Choose your paper – Go wild! Pick something that makes you happy or that fits your vibe.
- Cut it out – Scissors are your best friend here. Cut it into shapes, or just tear it for a more rustic look.
- Glue it down – Use that Mod Podge and brush it on the back of the paper and the surface. Be generous, but not a total hog with it.
- Seal the deal – Once it’s all dried (which can take a while, so maybe grab a snack), brush on another layer of Mod Podge to seal everything up.
Now, here’s a fun fact that might blow your mind: you can mix and match different decoupage paper styles. Like, who says you can’t combine floral with polka dots? Not me! It’s all about expressing yourself, and honestly, if it looks weird, at least it’ll be a conversation starter, right?
But let’s not forget the struggles, because, oh boy, there’s always a catch! Sometimes, the paper doesn’t stick properly, or it wrinkles up. And then you’re just sitting there, wondering what went wrong. Maybe it’s the humidity? Or maybe it’s just that the universe hates your craft project. Either way, it can be frustrating.
Here’s a list of common pitfalls to avoid:
- Rushing the drying time – Patience is a virtue, my friend!
- Using the wrong type of glue – Not all glues are created equal, believe me!
- Skipping the sealant – This is like putting icing on a cake. You don’t wanna skip that part!
And if you’re thinking, “What if I mess up?” Here’s the thing: imperfection is kinda the name of the game in decoupage. If you mess up, just own it! Maybe it’s a new trend. Maybe it’s abstract art. Who knows? Just roll with the punches!
In the end, decoupage paper is all about having fun and unleashing your creativity. Whether you’re making gifts, decorating your home, or just trying to kill some time, this craft has got your back. So grab your supplies, pick out some awesome designs, and let your imagination run wild. And remember, it’s not about being
Conclusion
In conclusion, decoupage paper is a versatile and creative medium that opens up a world of possibilities for crafters and DIY enthusiasts. We’ve explored its various types, including tissue, napkin, and specialty papers, each offering unique textures and patterns to enhance your projects. The techniques of layering, sealing, and finishing were also discussed, showcasing how to achieve professional-looking results with just a few simple steps. Whether you’re personalizing furniture, creating unique home décor, or crafting personalized gifts, decoupage paper can elevate your creations. As you embark on your decoupage journey, remember to experiment with different styles and materials to discover what resonates with you. So, gather your supplies, unleash your creativity, and start transforming ordinary items into beautiful, one-of-a-kind pieces today! Don’t forget to share your decoupage projects and inspire others in the crafting community.


