When it comes to capturing breathtaking moments in low-light and nighttime conditions, action cameras can be your best ally. However, to achieve stunning visuals, you need to optimize your camera settings effectively. This article provides essential tips and techniques for ensuring you capture stunning visuals in challenging lighting conditions.
Understanding which camera settings to modify is crucial for low-light photography. Key adjustments include:
- ISO: Increasing ISO sensitivity allows your camera to capture more light, but be cautious as higher settings can introduce noise.
- Aperture: A wider aperture (lower f-stop number) permits more light, essential for night shooting.
- Shutter Speed: Slower shutter speeds can brighten images but may also cause motion blur.
Selecting the appropriate action camera is vital for night shooting. Look for models with:
- Larger Sensors: Cameras with larger sensors typically perform better in low-light conditions.
- Enhanced Low-Light Capabilities: Features like optical image stabilization can significantly improve your results.
ISO sensitivity determines how well your camera captures light. A higher ISO can brighten images, but it may also introduce noise, affecting overall quality. Generally, an ISO range between 800 and 3200 is suitable for low-light conditions, balancing brightness and noise.
Aperture controls the amount of light entering the camera. A wider aperture allows more light, making it crucial for night shooting. An aperture setting of f/2.8 or wider is usually ideal for action cameras in low-light conditions, enabling maximum light capture.
Shutter speed affects how long the camera sensor is exposed to light. A slower shutter speed can brighten images but may introduce motion blur. For night shooting, a shutter speed of 1/30 to 1/60 seconds is often recommended, balancing light exposure and motion clarity.
Stabilization is crucial in low-light conditions to avoid blurry images. Using a tripod or gimbal can significantly enhance stability during shooting. Additionally, consider using your camera’s built-in stabilization features if available.
Incorporating external lighting sources can dramatically improve your footage. Consider using:
- LED Lights: These can provide consistent illumination for your subjects.
- Flashlights: Handy for quick lighting adjustments, especially in dynamic environments.
Certain accessories can improve low-light performance:
- Lens Filters: These can help manage glare and enhance color saturation.
- External Microphones: Improve audio quality, crucial for capturing immersive experiences.
- Stabilizers: These can help maintain smooth footage, especially in low-light scenarios.
Post-production editing can enhance low-light footage significantly. Adjusting contrast, brightness, and color grading can transform your night shots into stunning visuals. Software like Adobe Premiere Pro or Final Cut Pro offers advanced tools to refine your work.
By applying these techniques and tips, you can optimize your action camera for low-light and night shooting, ensuring that you never miss a moment, no matter the lighting conditions.
What Settings Should You Adjust for Low-Light Conditions?
When venturing into the realm of low-light photography, understanding which camera settings to modify is crucial for capturing stunning images. The interplay between ISO, aperture, and shutter speed can dramatically enhance image quality, allowing photographers to make the most of challenging lighting conditions. Below, we explore these settings in detail to help you optimize your action camera for low-light situations.
In low-light environments, the right adjustments can mean the difference between a blurry image and a breathtaking shot. Here are the key settings to consider:
- ISO: This setting determines your camera’s sensitivity to light. In low-light conditions, increasing the ISO can help brighten your images. However, be cautious; while a higher ISO can enhance brightness, it may also introduce noise, which can detract from image quality. Aim for a balance between brightness and clarity.
- Aperture: The aperture setting controls the amount of light that enters your camera. A wider aperture (indicated by a lower f-stop number) allows more light to hit the sensor, making it essential for night photography. For action cameras, an aperture of f/2.8 or wider is typically ideal, as it maximizes light capture.
- Shutter Speed: Shutter speed dictates how long your camera’s sensor is exposed to light. In low-light scenarios, a slower shutter speed can help brighten images. However, it’s important to find a balance, as too slow a shutter speed may introduce motion blur. A shutter speed of 1/30 to 1/60 seconds is often recommended for night shots.
Each of these settings plays a vital role in achieving the desired exposure and clarity in your images. Adjusting them thoughtfully can lead to significant improvements in your low-light photography.
The ISO sensitivity of your camera is a critical factor in how well it captures light. In low-light conditions, increasing the ISO can brighten images, making it easier to capture details that would otherwise be lost. However, it is essential to be mindful of the trade-off: higher ISO settings can introduce noise, which can compromise the overall quality of your images.
Selecting the appropriate action camera is vital for successful night shooting. Cameras equipped with larger sensors and advanced low-light capabilities tend to yield superior results. Look for models that offer manual control over settings, allowing you to fine-tune ISO, aperture, and shutter speed to suit your shooting environment.
To enhance image quality in low-light environments, employing noise reduction techniques is essential. This can include using post-processing software to adjust noise levels and selecting optimal camera settings during shooting. Additionally, consider shooting in RAW format, which provides greater flexibility for adjustments in post-production.
The aperture setting is crucial in controlling the light entering your camera. A wider aperture allows more light, making it indispensable for low-light photography. By selecting a lower f-stop number, you can significantly improve the quality of your images in dim conditions.
Switching to manual mode grants you greater control over your exposure settings. This flexibility allows you to adjust ISO, aperture, and shutter speed to achieve optimal results tailored to your shooting environment. Experimenting with manual settings can lead to more creative and visually appealing outcomes.
Stabilization is essential in low-light conditions to avoid blurry images. Using a tripod or gimbal can significantly enhance stability during shooting, allowing for clearer and sharper images even when using slower shutter speeds.
By understanding and adjusting these key settings, you can elevate your low-light photography skills and capture stunning visuals, even in the most challenging lighting conditions.
How to Choose the Right Action Camera for Night Shooting?
Choosing the right action camera for night shooting is essential for capturing stunning visuals in low-light conditions. The right camera can make a significant difference in the quality of your footage, allowing you to document your adventures even after the sun goes down. This guide will help you understand the key features to look for when selecting an action camera optimized for night shooting.
When selecting an action camera for night shooting, consider the following features:
- Sensor Size: Cameras equipped with larger sensors tend to perform better in low-light conditions. A larger sensor can gather more light, resulting in clearer and more detailed images.
- Low-Light Performance: Look for cameras specifically designed with low-light capabilities. Features such as advanced noise reduction technology can help minimize graininess in your images.
- Aperture: A wider aperture (lower f-stop number) allows more light to enter the camera. This is particularly important for night shooting, as it enhances the camera’s ability to capture brighter images.
The lens quality of an action camera plays a pivotal role in night shooting. High-quality lenses offer better light transmission, which is crucial when shooting in dimly lit environments. Look for lenses with anti-reflective coatings, as they help reduce flare and improve contrast in low-light scenes.
Image stabilization is vital for capturing smooth footage, especially in low-light conditions where camera shake can easily lead to blurry images. Cameras with advanced stabilization features, such as electronic image stabilization (EIS) or optical image stabilization (OIS), can significantly enhance the quality of your night shots.
ISO performance is another critical factor to consider. A camera with a high ISO range allows you to brighten images without compromising quality. However, be cautious, as increasing the ISO too much can introduce noise. Look for cameras that maintain image clarity even at higher ISO levels.
Night shooting can be demanding on your camera’s battery. Ensure that the action camera you choose has a robust battery life, especially for extended shooting sessions. Additionally, heat management is essential, as prolonged usage in low-light conditions can cause cameras to overheat, affecting performance.
Some brands are renowned for their action cameras’ low-light capabilities. Brands like GoPro, DJI, and Insta360 have models specifically designed for night shooting, featuring advanced sensors and superior image processing technology. Researching user reviews and professional recommendations can help you identify the best options available.
In addition to selecting the right camera, consider investing in accessories that can improve your night shooting experience. Here are some useful tools:
- External Lights: Portable LED lights can illuminate your subject effectively, making a significant difference in low-light scenarios.
- Tripods or Gimbals: Stabilization tools can help keep your camera steady, reducing the risk of motion blur during longer exposures.
- Lens Filters: Filters can help manage light and enhance color accuracy, which is particularly useful in challenging lighting conditions.
By focusing on these essential features and considerations, you can confidently choose the right action camera for your night shooting adventures. With the right equipment, you’ll be able to capture breathtaking visuals, even in the darkest environments.
Why is ISO Important in Low-Light Photography?
When it comes to low-light photography, understanding the importance of ISO is crucial for achieving stunning results. ISO sensitivity plays a pivotal role in determining how well your camera captures light, especially in dimly lit environments. By adjusting the ISO setting, photographers can manipulate the camera’s sensitivity to light, which can significantly impact the quality of the images captured.
In low-light conditions, a higher ISO setting can be a game changer. For instance, increasing the ISO allows the camera sensor to become more sensitive to light, effectively brightening the image. However, this comes with a trade-off: as ISO increases, so does the potential for noise. Noise appears as grainy or speckled patterns in images, which can detract from the overall quality and sharpness.
Understanding the balance between brightness and noise is essential. A common range for low-light photography is between ISO 800 and ISO 3200. This range typically provides a good compromise, allowing for brighter images while keeping noise at bay. However, the ideal ISO setting can vary based on the camera model and the specific shooting conditions. Therefore, it’s advisable to experiment with different settings to find what works best for your camera.
Another factor to consider is the camera’s sensor size. Cameras with larger sensors often handle higher ISO settings better than those with smaller sensors. This means that a camera with a full-frame sensor may produce cleaner images at ISO 3200 compared to a crop sensor camera. Thus, when selecting an action camera for low-light shooting, it’s beneficial to choose one known for its superior low-light performance.
In addition to adjusting ISO, employing other techniques can help mitigate noise in low-light photography. For example, using a tripod can enable longer exposure times without introducing motion blur, allowing you to keep the ISO lower while still capturing enough light. Additionally, post-processing software can be used to reduce noise in images, providing another layer of control over the final outcome.
In summary, ISO sensitivity is a fundamental aspect of low-light photography that can greatly influence the quality of your images. By understanding how to adjust ISO settings effectively and considering the capabilities of your camera, you can enhance your low-light shooting experience. Remember to balance brightness and noise, and don’t hesitate to experiment with various settings to achieve the best results.
What is the Ideal ISO Range for Night Shooting?
When it comes to capturing stunning visuals in low-light conditions, understanding your camera’s settings is paramount. One of the most crucial settings to consider is the ISO range. The ideal ISO range for night shooting typically falls between 800 and 3200. This range strikes a balance between achieving adequate brightness while minimizing noise, which can detract from the overall quality of your images.
In low-light environments, the camera’s ability to capture light is significantly challenged. A higher ISO setting allows the camera sensor to become more sensitive to light, effectively brightening the image. However, this increased sensitivity can also introduce unwanted noise, which manifests as grainy textures in your photos. Therefore, selecting the correct ISO setting is essential for maintaining the clarity and detail of your images.
- ISO 800: This is often a good starting point for low-light photography. It provides a reasonable balance of brightness and noise, making it suitable for most situations.
- ISO 1600: As you increase the ISO, you’ll notice a brighter image. This setting is great for slightly darker environments, though some noise may begin to appear.
- ISO 3200: This setting is useful for very low-light conditions. However, be cautious, as this can lead to more significant noise, potentially compromising image quality.
To further enhance your low-light shooting experience, consider the following tips:
- Experiment: Don’t hesitate to try different ISO settings based on your shooting environment. Each location has unique lighting conditions that may require adjustments.
- Use Noise Reduction: If you find that high ISO settings introduce too much noise, consider using noise reduction software during post-processing to clean up your images.
- Combine Settings: Adjusting other settings such as aperture and shutter speed in conjunction with ISO can yield better results. For instance, using a wider aperture (lower f-stop number) can allow more light in, enabling you to lower the ISO and reduce noise.
Ultimately, the ideal ISO range for night shooting will depend on your specific camera model, the available light, and the desired outcome of your images. Regular practice and experimentation will help you find the perfect balance for your unique shooting style.
In conclusion, mastering the ISO settings on your action camera is vital for capturing breathtaking low-light footage. By understanding the implications of different ISO ranges and combining them with other camera settings, you can significantly enhance your night photography and videography skills.
How to Reduce Noise in Low-Light Images?
When capturing images in low-light conditions, one of the most significant challenges photographers face is noise. Noise can detract from the overall quality of your images, making them appear grainy and less appealing. Therefore, understanding how to reduce noise in low-light images is essential for achieving stunning results.
Noise is primarily caused by the camera’s sensor struggling to capture enough light. In low-light situations, the sensor amplifies the signal to produce a brighter image, which can also amplify unwanted noise. Factors such as high ISO settings, long exposure times, and the camera’s sensor quality all play a role in the amount of noise present in your images.
- Use a Lower ISO Setting: Keeping your ISO as low as possible is crucial. While higher ISO settings can brighten your images, they also introduce more noise. Aim for an ISO range between 800 and 1600 for optimal results.
- Opt for a Wider Aperture: A wider aperture allows more light to hit the sensor, which can help reduce the need for higher ISO settings. Consider using an aperture of f/2.8 or wider.
- Adjust Shutter Speed: Slower shutter speeds can help capture more light, but be cautious of motion blur. A balance between exposure and clarity is necessary.
- Utilize a Tripod: Stabilizing your camera with a tripod allows for longer exposure times without the risk of camera shake, reducing noise in the process.
Post-processing is an effective way to further reduce noise in your images. Here are some techniques to consider:
- Noise Reduction Software: Use dedicated software like Adobe Lightroom or Photoshop, which offer noise reduction features that can help smooth out grainy images.
- Adjust Exposure and Contrast: Sometimes, simply adjusting the exposure and contrast can help minimize the appearance of noise in your images.
- Apply Selective Noise Reduction: Instead of applying noise reduction globally, consider using selective adjustments to target only the noisy areas of your image.
The quality of your camera can significantly affect the amount of noise present in low-light images. Cameras with larger sensors typically perform better in low-light conditions, producing cleaner images with less noise. When choosing an action camera or any other camera for low-light photography, consider models that are known for their low-light capabilities.
Understanding how to reduce noise is critical for anyone serious about low-light photography. By employing both shooting techniques and post-processing strategies, you can enhance the quality of your images, ensuring they are not only visually appealing but also professionally presented. The combination of these methods will allow you to capture the beauty of low-light environments without compromising on quality.
In summary, reducing noise in low-light images involves a combination of optimal camera settings during shooting and effective post-processing techniques. By mastering these strategies, you can elevate your photography skills and produce stunning visuals even in the most challenging lighting conditions.
How Can Aperture Impact Your Low-Light Footage?
When it comes to capturing stunning visuals in low-light conditions, aperture plays a pivotal role. The aperture setting of your camera determines the size of the lens opening, which directly influences the amount of light that reaches the camera sensor. Understanding how to manipulate this setting can significantly enhance your night shooting capabilities.
The aperture is measured in f-stops, with lower numbers indicating a wider opening. For instance, an aperture of f/2.0 allows more light to enter compared to an aperture of f/8.0. This characteristic is particularly crucial when shooting in dimly lit environments or at night. A wider aperture not only facilitates better light intake but also creates a shallower depth of field, resulting in beautifully blurred backgrounds that emphasize your subject.
During nighttime or in low-light settings, the availability of natural light is limited. A wider aperture is essential because it compensates for this lack of light, allowing you to capture clearer and more vibrant images. This is especially important for action cameras, which may have smaller sensors compared to traditional cameras. By using a lower f-stop number, you enhance your camera’s ability to gather more light, making it easier to achieve well-exposed shots.
For action cameras, an aperture setting of f/2.8 or wider is typically recommended. This setting strikes a balance between light intake and image sharpness, ensuring that your footage remains crisp even in challenging lighting conditions. It’s important to note that while wider apertures are beneficial, they can also make focusing more critical, as a shallow depth of field can lead to missed focus on your subject.
Switching to manual mode on your action camera allows you to have full control over the aperture setting. This level of control enables you to adjust the aperture based on the specific lighting conditions you encounter. Experimenting with different f-stop values will help you understand how aperture impacts your footage and allows you to make informed decisions during your shoots.
Yes, aperture can also affect motion blur in your footage. A wider aperture allows more light, which means you can use a faster shutter speed to freeze motion. This is particularly useful when shooting fast-moving subjects at night. Conversely, if you opt for a smaller aperture, you may need to slow down your shutter speed, which can introduce motion blur. Understanding this relationship is essential for achieving the desired effect in your low-light footage.
To maximize the quality of your low-light footage, it is crucial to consider aperture in conjunction with other settings such as ISO and shutter speed. A balanced approach can significantly improve your results. For instance, if you set a wide aperture, you might be able to lower the ISO to reduce noise while maintaining a fast enough shutter speed to capture clear images.
While a wider aperture offers numerous advantages, it is not without limitations. As previously mentioned, a shallow depth of field can make it challenging to keep all elements in focus, particularly in dynamic shooting scenarios. Additionally, using a wide aperture can sometimes lead to lens aberrations, which may affect image quality. Therefore, it’s essential to find the right balance based on your shooting conditions.
In summary, understanding how aperture impacts your low-light footage is crucial for achieving remarkable results. By mastering this aspect of your action camera, you can elevate your night shooting experience, capturing vibrant and engaging visuals even in the most challenging lighting conditions.
What is the Best Aperture Setting for Action Cameras?
When it comes to capturing stunning visuals with your action camera in low-light conditions, understanding the aperture setting is crucial. The aperture controls the amount of light that enters the camera, and selecting the right setting can make a significant difference in the quality of your footage.
The aperture is measured in f-stops, and a lower f-stop number indicates a wider aperture. For action cameras, an aperture setting of f/2.8 or wider is generally ideal in low-light environments. This allows for maximum light capture, which is essential when shooting at night or in dimly lit areas. A wider aperture not only enhances brightness but also contributes to a shallower depth of field, helping to isolate subjects from the background.
Choosing the right aperture setting impacts not just the brightness of your images but also the overall exposure. If you set your aperture too narrow (higher f-stop number), less light will reach the sensor, resulting in darker images. Conversely, a wider aperture captures more light, which is particularly beneficial for action shots taken in low-light situations.
- Improved Low-Light Performance: A wider aperture allows for better performance in low-light scenarios, reducing the risk of underexposed images.
- Enhanced Subject Isolation: With a shallower depth of field, subjects can be effectively isolated, creating a more professional look.
- Faster Shutter Speeds: A wider aperture enables the use of faster shutter speeds, which can help freeze action and reduce motion blur.
Many action cameras come with automatic settings, but to achieve the best results in low-light conditions, consider switching to manual mode. In manual mode, you can adjust the aperture settings to your preference. Look for the aperture option in the camera’s menu and select the desired f-stop. If your camera supports it, aim for f/2.8 or wider to maximize light capture.
While using a wider aperture has its advantages, there are challenges to consider. One potential issue is increased lens distortion, which can affect the overall quality of the image. Additionally, a shallow depth of field may lead to difficulties in keeping the entire subject in focus, especially in fast-paced action shots.
To achieve optimal results in low-light conditions, it’s essential to balance the aperture with other settings such as ISO and shutter speed. A higher ISO can help brighten images, but be cautious as it may introduce noise. Pairing a wider aperture with a moderate ISO and a suitable shutter speed will yield the best outcomes. For action shots, consider a shutter speed of 1/60 seconds or faster to prevent motion blur.
In summary, selecting the correct aperture setting is vital for capturing high-quality footage in low-light conditions. An aperture of f/2.8 or wider is recommended for action cameras, providing the necessary light for stunning visuals. By understanding the interplay between aperture, ISO, and shutter speed, you can elevate your low-light photography skills and achieve impressive results.
How to Use Manual Mode for Better Control?
When it comes to capturing stunning visuals, especially in challenging lighting conditions, manual mode on your action camera is a game changer. This mode allows you to take full control over your camera settings, enabling you to achieve the perfect shot. By adjusting ISO, aperture, and shutter speed, you can tailor your images to reflect the desired mood and clarity.
Switching to manual mode provides you with the ability to fine-tune your camera’s exposure settings. Unlike automatic settings, where the camera makes decisions based on its algorithms, manual mode allows you to dictate how your camera responds to light. This is particularly beneficial in low-light conditions where precision is key.
- ISO: This setting determines your camera’s sensitivity to light. A higher ISO can help brighten your images in dark environments, but it may also introduce noise, which can degrade image quality.
- Aperture: The aperture controls the amount of light that enters the camera. A wider aperture (lower f-stop number) allows more light, making it essential for night shooting.
- Shutter Speed: This setting affects how long the camera sensor is exposed to light. A slower shutter speed can brighten images but may also lead to motion blur if not stabilized properly.
When shooting in low-light conditions, setting your ISO between 800 and 3200 is often ideal. This range strikes a balance between brightness and noise. However, keep in mind that the higher the ISO, the more grainy your images may appear. Experiment with different settings to find what works best for your specific shooting environment.
For action cameras, an aperture of f/2.8 or wider is usually recommended. This setting allows maximum light to enter the camera, which is crucial for capturing clear images in low-light scenarios. A wider aperture not only enhances brightness but also creates a beautiful bokeh effect, adding depth to your shots.
In manual mode, selecting the right shutter speed is vital. For night shots, a shutter speed of 1/30 to 1/60 seconds is typically recommended. This range allows enough light to hit the sensor while minimizing motion blur. However, if you’re capturing fast-moving subjects, you may need to increase the shutter speed to maintain clarity.
- Practice Makes Perfect: Familiarize yourself with your camera’s settings in various lighting conditions. The more you practice, the better you’ll understand how each setting impacts your images.
- Use a Tripod: To avoid camera shake, especially with slower shutter speeds, use a tripod or a stable surface. This will help you achieve sharper images.
- Monitor Your Histogram: Use the histogram feature on your camera to assess exposure levels. Aim for a balanced histogram to avoid overexposed highlights or underexposed shadows.
By mastering manual mode, you can significantly enhance your photography skills. Taking control of your camera settings allows for greater creativity and flexibility, especially in low-light shooting scenarios. Embrace the challenge and enjoy the process of experimenting to achieve the best results.
What Role Does Shutter Speed Play in Low-Light Shooting?
When it comes to capturing stunning visuals in low-light conditions, understanding the role of shutter speed is essential. Shutter speed determines how long your camera’s sensor is exposed to light, directly influencing the brightness and clarity of your images. In this section, we will explore the intricacies of shutter speed and its impact on low-light shooting, providing you with the knowledge to enhance your photography skills.
A slower shutter speed allows more light to hit the sensor, which can result in a brighter image. This is particularly beneficial in low-light situations where capturing adequate light is challenging. However, it is important to note that extending the exposure time can also lead to motion blur. This occurs when there is movement in the scene or if the camera is not stabilized, causing the image to appear less sharp.
For optimal results in low-light shooting, a shutter speed between 1/30 to 1/60 seconds is often recommended. This range strikes a balance between allowing sufficient light to enter the camera while minimizing the risk of motion blur. However, the ideal shutter speed can vary based on the specific lighting conditions and the subject’s movement. For static subjects, you may be able to use a slower shutter speed without introducing blur.
- Use a Tripod: Stabilizing your camera on a tripod is one of the most effective ways to prevent motion blur during long exposures.
- Employ Image Stabilization: If your camera has built-in image stabilization, make sure to enable it to help counteract any small movements.
- Utilize Remote Shutter Releases: This prevents camera shake when pressing the shutter button, ensuring a clearer image.
Experimenting with different shutter speed settings can yield fascinating results. Try taking a series of shots with varying shutter speeds to see how each affects your images. For instance, using a very slow shutter speed can create artistic effects, such as light trails from moving vehicles or smooth water in landscapes. Conversely, a faster shutter speed can freeze motion, capturing fast-moving subjects with clarity.
While adjusting shutter speed can enhance your low-light photography, it also presents challenges. The most significant challenge is the potential for noise, especially if you attempt to compensate for low light by increasing ISO settings. Higher ISO levels can introduce graininess, which may detract from the image quality. Additionally, achieving the correct exposure can be tricky, requiring careful adjustments to both shutter speed and aperture.
Understanding shutter speed is crucial for night photography because it directly impacts your ability to capture detail in low-light environments. Mastering this setting allows you to make informed decisions based on your shooting conditions, whether you’re photographing cityscapes at night, capturing the stars, or documenting events in dimly lit spaces.
In summary, shutter speed plays a pivotal role in low-light shooting, affecting both the brightness and clarity of your images. By experimenting with different settings and employing stabilization techniques, you can effectively harness the power of shutter speed to create stunning visuals, even in challenging lighting conditions.
What is the Recommended Shutter Speed for Night Shots?
When it comes to capturing stunning visuals in low-light and night conditions, understanding the recommended shutter speed is crucial. Shutter speed plays a vital role in determining how long your camera’s sensor is exposed to light, which directly affects the brightness and clarity of your images. For night shooting, a shutter speed of 1/30 to 1/60 seconds is often advised. This range strikes a balance between light exposure and motion clarity, allowing you to capture more light without introducing excessive motion blur.
The shutter speed influences the overall exposure of your shot. A slower shutter speed allows more light to hit the sensor, which is particularly beneficial in low-light situations. However, it is essential to find the right balance; if the shutter speed is too slow, any movement—whether from the subject or camera shake—can result in blurry images. This is where the recommended range of 1/30 to 1/60 seconds comes into play, as it minimizes the risk of motion blur while still gathering sufficient light.
- Assess the Lighting Conditions: In darker environments, you may need to use slower shutter speeds. Conversely, in slightly brighter settings, you can increase your shutter speed to avoid overexposure.
- Consider Subject Movement: If your subject is moving quickly, a faster shutter speed will be necessary to freeze the action. In contrast, for static subjects, you can afford to use slower speeds.
- Use Stabilization Tools: Employing a tripod or gimbal can allow you to use slower shutter speeds without the risk of camera shake, providing sharper images.
While using a shutter speed in the range of 1/30 to 1/60 seconds is generally safe, there are risks associated with slower speeds. The most significant risk is motion blur, which occurs when either the subject or the camera moves during the exposure. This can lead to images that lack detail and clarity. To mitigate this risk, ensure that your camera is stable, and if possible, use a remote shutter release or the camera’s timer function to avoid any shake caused by pressing the shutter button.
Experimenting with different shutter speeds can help you understand how they affect your images. Here are some practical tips:
- Take Test Shots: Start by taking several test shots at varying shutter speeds within the recommended range. Review the results to see which settings yield the best balance between exposure and clarity.
- Review and Adjust: Analyze your images for any signs of blur or overexposure. Adjust your shutter speed accordingly for subsequent shots.
- Combine with Other Settings: Remember to consider your ISO and aperture settings as you adjust your shutter speed. A well-balanced exposure is achieved by harmonizing these three elements.
Understanding the recommended shutter speed for night shots is essential for capturing high-quality images in low-light conditions. By adhering to the suggested range of 1/30 to 1/60 seconds, and taking into account the factors that influence exposure, you can significantly enhance your night photography skills. With practice and experimentation, you’ll be able to master the art of low-light shooting, creating stunning visuals that capture the beauty of the night.
How to Stabilize Your Camera for Low-Light Shooting?
When it comes to capturing stunning visuals in low-light conditions, stabilization is a critical factor that cannot be overlooked. Blurry images can easily ruin an otherwise perfect shot, and this is especially true in dimly lit environments where every little shake or movement is magnified. To achieve clarity and sharpness in your photos and videos, employing stabilization techniques is essential.
In low-light scenarios, your camera’s sensor requires a longer exposure time to gather enough light. This extended exposure increases the risk of motion blur, making stabilization techniques even more crucial. By ensuring that your camera remains steady, you can capture crisp images and smooth videos, even in challenging lighting conditions.
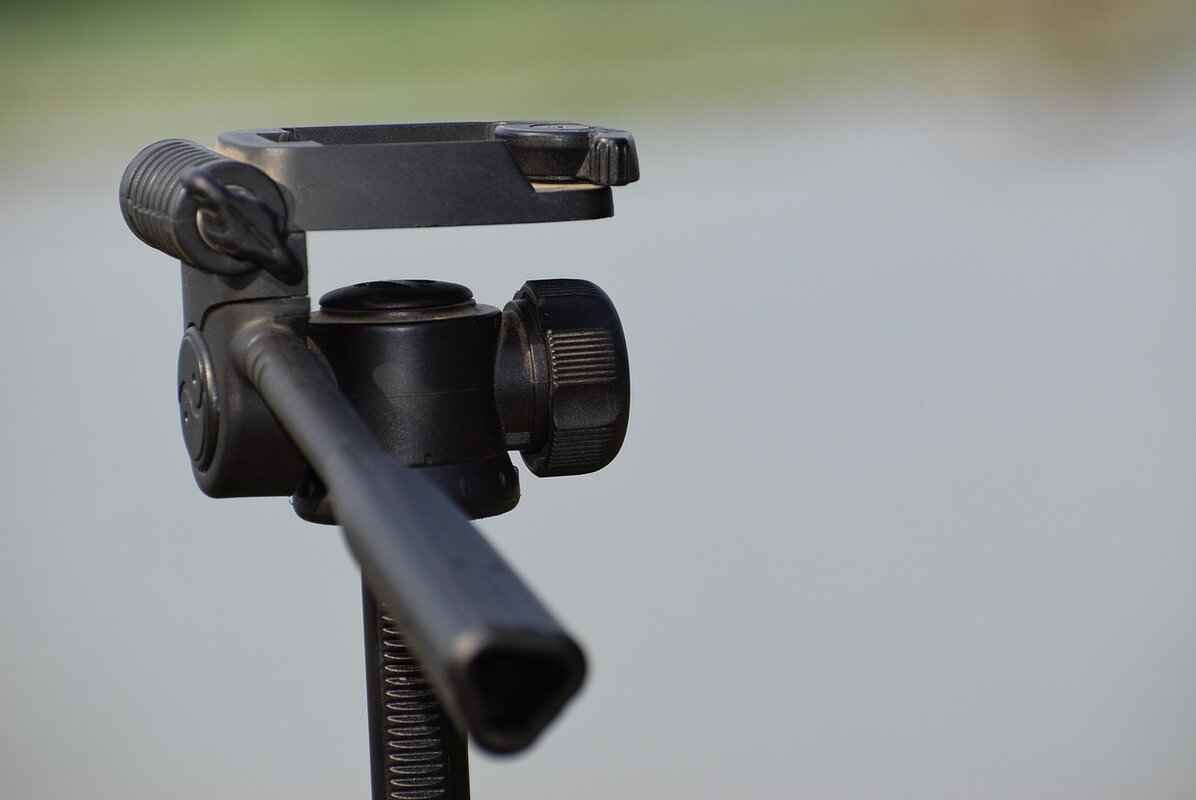
One of the most effective ways to stabilize your camera is by using a tripod. A sturdy tripod provides a stable platform that eliminates the risk of hand shake, allowing for longer exposure times without compromising image quality. When selecting a tripod, consider factors such as height, weight, and stability to ensure it meets your shooting needs.
Another excellent option for stabilization is a gimbal. Gimbals are designed to counteract unwanted movements, providing smooth footage even while you’re on the move. This is particularly useful for action cameras, as they are often used in dynamic situations. With a gimbal, you can achieve cinematic shots that would otherwise be impossible with just a handheld setup.
For the best outcomes, consider combining both a tripod and a gimbal. Use the tripod for static shots where stability is paramount, and switch to a gimbal for more dynamic scenes. This combination allows you to maintain high-quality footage regardless of the shooting environment.
- Use Image Stabilization Features: Many modern cameras come equipped with built-in image stabilization technology. Make sure to enable these features to enhance your shots further.
- Practice Good Handheld Techniques: If you must shoot handheld, keep your elbows close to your body and use a wide stance for better balance.
- Utilize a Remote Shutter: Using a remote shutter or timer can help minimize camera shake when pressing the shutter button.
Stabilization is a vital component of low-light photography and videography. By utilizing tools like tripods and gimbals, along with adopting good shooting practices, you can significantly improve the quality of your images and videos. Whether you’re capturing a serene night landscape or an action-packed scene, proper stabilization will ensure that your visuals remain sharp and engaging.
How to Utilize External Lighting for Night Shoots?
When it comes to capturing stunning visuals in low-light conditions, external lighting can be a game-changer. Utilizing various lighting sources not only enhances the visibility of your subjects but also adds depth and dimension to your footage. Here are some effective strategies and tips for incorporating external lighting into your night shooting setup.
- LED Lights: LED lights are a popular choice for action camera enthusiasts. They are compact, energy-efficient, and provide bright illumination. Look for adjustable LED panels that allow you to modify the intensity and color temperature, giving you the flexibility to create the desired mood in your shots.
- Flashlights: A simple yet effective tool, flashlights can be used to highlight specific areas or subjects within your frame. Opt for flashlights with adjustable beams and brightness settings to control the focus of the light. This can help in creating dramatic shadows and highlights, adding an artistic touch to your footage.
- Softboxes and Diffusers: To achieve a more natural look, consider using softboxes or diffusers with your LED lights. These accessories help to soften the light, reducing harsh shadows and creating a more flattering illumination on your subjects. This is particularly important when filming people or detailed objects.
- Colored Gels: Experimenting with colored gels can dramatically change the atmosphere of your shots. By placing gels over your lights, you can create vibrant and dynamic visuals that enhance storytelling. This technique is especially useful in creative projects where mood and tone are essential.
- Portable Lighting Kits: Investing in a portable lighting kit can be beneficial for serious night shooters. These kits often include various lighting options, stands, and accessories that allow for greater flexibility and creativity in your filming process.
When using external lighting, it’s crucial to consider the placement of your lights. Here are some tips to maximize their effectiveness:
- Angle and Direction: Experiment with different angles and directions of your lights. Lighting from below can create an eerie effect, while lighting from above can mimic natural daylight.
- Distance: The distance between the light source and the subject can significantly affect the intensity of the illumination. Moving the light closer will brighten the subject, while placing it further away will create softer shadows.
- Balance with Ambient Light: If there is any ambient light available, such as streetlights or moonlight, try to balance your external lighting with these sources. This will create a more natural look and feel in your footage.
Incorporating external lighting not only improves visibility but can also enhance the overall cinematic quality of your footage. By carefully selecting and positioning your lighting sources, you can transform ordinary night scenes into visually stunning narratives. So, whether you’re shooting a thrilling action scene or capturing serene landscapes, don’t underestimate the power of light in your creative process.
What Accessories Enhance Low-Light Shooting Capabilities?
When it comes to capturing stunning visuals in low-light conditions, the right accessories can make a significant difference. In this section, we will explore various tools that can enhance your action camera’s performance during night shooting, ensuring you achieve the best possible results.
In low-light environments, certain accessories can dramatically improve the quality of your footage. Here are some essential tools to consider:
- Lens Filters: Using lens filters can help manage glare and reflections, allowing for clearer images. They can also enhance color saturation, which is particularly useful in dim lighting. A ND filter can be beneficial for long exposures, helping to reduce light entering the lens.
- External Microphones: While primarily aimed at improving audio quality, external microphones can also enhance the overall shooting experience. High-quality audio can add depth to your videos, making them more engaging, especially in low-light conditions where visuals may not be as sharp.
- Stabilizers: Keeping your camera steady is crucial in low-light shooting to prevent motion blur. Using a gimbal or a tripod can help stabilize your shots, allowing for smoother, clearer footage. A handheld stabilizer is particularly useful for action shots, ensuring that even in dynamic movements, your footage remains steady.
- LED Lights: Incorporating external lighting sources like LED lights can significantly improve your low-light footage. These lights can illuminate your subject effectively, providing the necessary brightness without overwhelming the scene. LED panels are adjustable and can be positioned to create the desired effect.
- Camera Cases with Built-in Lights: Some action camera cases come equipped with built-in lights, which can be a game-changer for night shooting. These cases not only protect your camera but also provide additional lighting, ensuring that you can capture clear images in the dark.
- Smartphone Apps: Utilizing smartphone apps that connect with your action camera can enhance your shooting experience. These apps often provide advanced settings and tools that can help you adjust your camera’s performance in low-light conditions.
By investing in these accessories, you can significantly enhance your action camera’s capabilities in low-light scenarios. Whether you’re shooting at dusk, dawn, or in complete darkness, the right tools can make all the difference in capturing stunning visuals.
In summary, the combination of lens filters, external microphones, stabilizers, LED lights, specialized camera cases, and smartphone apps can transform your low-light shooting experience. Each accessory plays a unique role in improving both the quality of your footage and the overall shooting experience, making them invaluable for any serious action camera user.
How to Edit Low-Light Footage for Maximum Impact?
Editing low-light footage can be a challenging yet rewarding process. With the right techniques, you can transform your dimly lit shots into stunning visuals that captivate your audience. In this section, we will explore various editing techniques that can enhance your low-light footage, ensuring that your night shots stand out.
Post-production is crucial for low-light footage because it allows you to correct exposure issues and enhance the overall quality of your images. Low-light conditions often result in grainy images and lost details, but with effective editing, you can recover these elements. Utilizing software tools can significantly improve your final product.
- Adjusting Contrast: Increasing contrast can help separate the subject from the background, giving your footage more depth and dimension.
- Brightness Correction: Brightening the footage can reveal hidden details in shadows, making your visuals more dynamic.
- Color Grading: Applying color grading techniques can enhance mood and atmosphere, allowing you to create a specific tone that resonates with your audience.
Color grading is a powerful tool in post-production. By adjusting the color balance, saturation, and hue, you can create a unique look for your footage. For instance, adding a slight blue tint can evoke a night-time feel, while warmer tones can create a cozy atmosphere. Experimenting with different color palettes can help you find the perfect aesthetic for your project.
There are numerous editing software options available that cater to low-light footage. Some popular choices include:
- Adobe Premiere Pro: Offers advanced editing features and excellent color grading tools.
- DaVinci Resolve: Known for its powerful color correction capabilities, this software is a favorite among professional editors.
- Final Cut Pro: Provides intuitive editing tools and a user-friendly interface, making it suitable for both beginners and experts.
Noise can be a significant issue in low-light footage. To minimize noise, consider the following techniques:
- Use Noise Reduction Filters: Most editing software includes noise reduction features that can help smooth out grainy footage.
- Adjusting ISO Settings: While shooting, try to keep your ISO as low as possible to reduce noise, which can be corrected in post-production.
- Layering and Masking: Using layers to mask out noisy areas can help maintain detail in the important parts of your footage.
After making the necessary adjustments, consider adding final touches such as:
- Sharpening: Enhancing sharpness can bring out details that may have been lost in the low-light environment.
- Adding Sound Design: Complementing your visuals with the right sound effects and music can elevate the overall impact of your footage.
- Creating Transitions: Smooth transitions between clips can maintain viewer engagement and enhance storytelling.
By applying these editing techniques, you can significantly improve the quality of your low-light footage, transforming ordinary night shots into extraordinary visual experiences. Remember, practice and experimentation are key to mastering the art of editing.
Frequently Asked Questions
- What settings should I adjust for low-light conditions?
For low-light conditions, adjusting your ISO, aperture, and shutter speed is crucial. Increasing the ISO helps capture more light, while a wider aperture allows more light into the camera. Slowing down the shutter speed can also enhance brightness, but be cautious of motion blur.
- How do I choose the right action camera for night shooting?
When selecting an action camera for night shooting, look for models with larger sensors and superior low-light capabilities. These features will ensure you capture clearer, more vibrant images even in challenging lighting conditions.
- Why is ISO important in low-light photography?
ISO sensitivity determines your camera’s ability to capture light. A higher ISO can brighten images, but it may also introduce noise, which can affect the overall quality of your photos and videos.
- What is the best aperture setting for action cameras?
An aperture setting of f/2.8 or wider is typically ideal for action cameras in low-light conditions, allowing maximum light capture for clearer images.
- How can I stabilize my camera for low-light shooting?
To avoid blurry images in low-light conditions, use a tripod or gimbal for stabilization. This will help keep your shots steady and improve the overall quality of your footage.
- What accessories can enhance low-light shooting capabilities?
Consider using lens filters, external microphones, and stabilizers as accessories to improve low-light performance. These tools can significantly enhance both video quality and your overall shooting experience.


