This article provides a comprehensive guide on effectively removing overspray from your car’s surface, ensuring a flawless finish and maintaining your vehicle’s aesthetic appeal. Overspray can be a frustrating issue for car owners, especially if it detracts from the vehicle’s overall appearance. Understanding how to tackle this problem efficiently can save you time and money.
Understanding Overspray: What Is It?Overspray is the unintentional application of paint particles onto surfaces that were not meant to be painted. This phenomenon often occurs during nearby painting projects or due to improper techniques. Recognizing the characteristics of overspray is essential for effective removal. The paint can bond with your car’s clear coat, making it challenging to remove if not addressed promptly.
Common Causes of Overspray on CarsIdentifying the common causes of overspray can help you avoid future occurrences and protect your vehicle from damage.
- Painting Projects Nearby: When painting is happening nearby, the wind can carry paint particles onto your car, leading to overspray. Being aware of this can help you take preventive measures.
- Improper Masking Techniques: Improper masking during painting can result in overspray. Understanding proper techniques is essential for protecting your car from unwanted paint.
Tools and Materials Needed for RemovalHaving the right tools and materials is vital for effectively removing overspray without damaging your car’s paint job.
- Clay Bar: A clay bar is a popular tool for removing overspray and contaminants from the surface of your car. Its effectiveness makes it a must-have for car enthusiasts.
- Automotive Detailing Spray: Using a high-quality detailing spray can help lubricate the surface while removing overspray. This ensures a smooth and effective cleaning process.
Step-by-Step Guide to Remove OversprayThis section provides a detailed, step-by-step guide to efficiently remove overspray from your car’s surface.
Step 1: Assess the DamageBefore beginning the removal process, assess the extent of the overspray to determine the best approach and tools needed for effective removal.Step 2: Wash the CarWashing the car thoroughly removes dirt and debris, providing a clean surface for effective overspray removal. Use a pH-balanced car wash solution for best results.
Step 3: Use a Clay BarAfter washing, use a clay bar with detailing spray to gently remove the overspray. This technique is effective and safe for your car's paint.
Step 4: Polish the SurfaceAfter removing the overspray, polishing the surface can restore shine and smoothness. This step is essential for achieving a professional finish.
Preventing Overspray: Tips and TechniquesPreventing overspray is as important as removing it. Implementing effective techniques can save you time and effort in the future.
- Proper Masking Techniques: Using proper masking techniques during painting projects can significantly reduce the risk of overspray. Invest time in learning effective methods to protect your vehicle.
- Choosing the Right Location for Painting: Selecting a suitable location for painting can minimize overspray risks. Opt for enclosed spaces or controlled environments when working with paint.
When to Seek Professional HelpIn some cases, overspray removal may require professional assistance. Understanding when to seek help can save you time and potential damage to your vehicle.
- Severe Overspray Cases: If the overspray is extensive and difficult to remove, consider consulting a professional detailer. They have specialized tools and expertise for effective removal.
- Restoration of Classic Cars: For classic cars, professional restoration services can ensure that the original finish is preserved while effectively removing overspray. This is crucial for maintaining value.
By following these steps and tips, you can effectively address overspray issues while maintaining the integrity of your car’s paint job. Whether you choose to tackle the task yourself or seek professional help, understanding the process can lead to a better outcome and a more aesthetically pleasing vehicle.

Understanding Overspray: What Is It?
Overspray refers to the unintentional application of paint or coating onto surfaces that were not intended to be painted. This phenomenon typically occurs during various painting projects, whether they involve automobiles, home interiors, or industrial applications. The characteristics of overspray can significantly affect the ease of removal and the potential for damage to the underlying surfaces.
When paint is sprayed, it can become airborne and drift away from the target area due to factors such as wind, improper technique, or environmental conditions. As a result, paint particles can settle on nearby objects, creating an unsightly and often challenging problem for car owners and contractors alike.
Understanding the nature of overspray is crucial for both effective removal and prevention strategies. The composition of the paint, the method of application, and environmental factors all play a role in how overspray behaves. For instance, water-based paints may be easier to remove than oil-based paints, which can adhere more tenaciously to surfaces.
Moreover, the texture and finish of the surface affected by overspray can influence the removal process. Smooth surfaces like glass or polished metal may allow for easier cleanup compared to textured surfaces like matte paint or fabric, which can trap paint particles more effectively.
To effectively manage overspray, it is essential to recognize its characteristics. Timing is also a critical factor; addressing overspray promptly can lead to more successful removal. The longer paint sits on a surface, the more difficult it becomes to remove, as it can cure and bond with the substrate.
In summary, overspray is an unintended consequence of painting that can lead to unwanted aesthetic issues and potential damage to surfaces. By understanding its characteristics, individuals can implement more effective removal techniques and prevention strategies, ensuring a cleaner and more professional finish in their painting projects.

Common Causes of Overspray on Cars
Understanding the common causes of overspray is crucial for vehicle owners who want to maintain their car’s aesthetic appeal and avoid potential damage. Overspray can occur unexpectedly, and identifying its sources can help you take preventive measures in the future. Below are some of the most frequent causes of overspray that every car owner should be aware of.
- Nearby Painting Projects: One of the primary causes of overspray is nearby painting projects. Whether it’s a house being painted or a fence being stained, the wind can carry tiny paint particles that settle on your vehicle. This is especially common during windy days. To mitigate this risk, consider parking your car in a garage or covered area when you know painting activities are taking place nearby.
- Improper Masking Techniques: During a DIY painting job, improper masking can lead to overspray. If edges are not adequately covered, paint can easily drift to unintended surfaces. Learning the correct masking techniques, such as using high-quality painter’s tape and drop cloths, can significantly reduce the chances of overspray affecting your vehicle.
- Professional Painting Services: Even professional painters can sometimes create overspray. If you are having your car repainted or repaired, ensure that the service provider is taking the necessary precautions to protect your vehicle from overspray. Ask about their masking methods and whether they use protective coverings.
- Environmental Factors: Weather conditions play a significant role in overspray occurrences. Wind, humidity, and temperature can affect how paint particles behave. For instance, painting in windy conditions can lead to more overspray. Always check the weather before starting any painting project and choose calmer days for such activities.
- Improper Spray Techniques: If you are painting your vehicle yourself, using improper spray techniques can lead to overspray. Techniques such as spraying too close to the surface or using too high a pressure can cause paint to drift. Familiarizing yourself with proper spray painting techniques can help you achieve a cleaner job.
By recognizing these common causes of overspray, you can take proactive steps to protect your vehicle. Whether it involves choosing the right location for painting, using proper techniques, or being aware of environmental factors, knowledge is your best defense against overspray. This awareness not only helps in maintaining your car’s appearance but also saves you time and money in potential repairs or detailing services.
Painting Projects Nearby
When engaging in painting projects, whether at home or in a commercial setting, it is essential to recognize the potential risks associated with overspray. **Overspray** refers to the paint particles that unintentionally land on surfaces other than the intended target. This situation often arises when paint is sprayed in open environments, allowing the wind to carry fine paint particles to nearby objects, including vehicles. Understanding how this occurs can help you take proactive steps to protect your car and maintain its pristine condition.
One of the primary factors contributing to overspray is **wind direction**. On breezy days, even a slight gust can transport paint particles across significant distances. If you live in an area where painting activities are common, it is advisable to monitor weather conditions and take necessary precautions. For instance, if you know that painting will occur nearby, consider moving your vehicle to a garage or a covered area to shield it from potential overspray.
Additionally, the type of paint used can also influence the likelihood of overspray. **Aerosol paints**, which are commonly used for DIY projects, tend to create more overspray compared to traditional brushes or rollers. This is because aerosol cans disperse paint in a fine mist, making it easier for the wind to carry it away. If you are planning a painting project, consider using less volatile options or applying paint in a more controlled manner to minimize the risk of overspray.
To further protect your vehicle, consider using **protective coverings** such as tarps or old sheets. If you are aware of nearby painting activities, placing these covers over your car can act as a barrier against paint particles. Furthermore, applying a high-quality wax or sealant to your car’s surface can create a protective layer, making it easier to remove any accidental overspray without damaging the underlying paint.
Awareness and preparation are key in preventing overspray from ruining your vehicle’s finish. By understanding the risks associated with nearby painting projects and implementing effective protective measures, you can significantly reduce the chances of encountering this frustrating issue. Always stay informed about local painting activities and be proactive in safeguarding your car from potential damage.
Improper Masking Techniques
When it comes to painting vehicles, proper masking techniques are crucial. Improper masking can lead to overspray, which is not only unsightly but can also result in additional work and potential damage to your car’s finish. Understanding the importance of effective masking can save you time, effort, and money in the long run.
Masking is the process of covering areas that should not be painted. This is typically done using masking tape and masking paper or plastic sheeting. The goal is to create sharp lines and prevent paint from reaching unintended surfaces. Here are some key points to consider when masking your vehicle:
- Choose the Right Materials: Always use high-quality masking tape designed for automotive use. Regular tape may not adhere properly and can leave residue.
- Clean the Surface: Before applying masking tape, ensure that the surface is clean and dry. Dust and grease can prevent the tape from sticking effectively.
- Apply Tape Carefully: When applying the tape, make sure it is pressed down firmly to prevent paint from seeping underneath. For curves and edges, use a flexible tape that can conform to the surface.
- Overlap Edges: If you need to use multiple strips of tape, overlap the edges slightly to ensure complete coverage and prevent bleed-through.
- Use Masking Paper or Plastic: Cover larger areas with masking paper or plastic sheeting. Secure these materials with masking tape to ensure they stay in place during painting.
Improper masking can lead to several issues, including:
- Paint Bleed: If the tape is not properly adhered, paint can seep underneath, resulting in messy lines and a need for touch-ups.
- Wasted Time: Cleaning up overspray or correcting mistakes can be time-consuming, detracting from the enjoyment of your painting project.
- Damage to Original Finish: In some cases, removing overspray can damage the original paint, especially if the wrong techniques or products are used.
To avoid these problems, it’s essential to invest time in learning and practicing proper masking techniques. Consider watching tutorials or seeking advice from experienced painters to enhance your skills.
In conclusion, understanding and implementing proper masking techniques is vital in any painting project. By taking the necessary precautions, you can protect your vehicle from unwanted paint and ensure a clean, professional finish. Remember, the key to a successful paint job lies in the details, and proper masking is one of the most important details to get right.

Tools and Materials Needed for Removal
When it comes to removing overspray from your car, having the right tools and materials is essential for achieving effective results without causing any damage to the paint job. This section will explore the necessary items that can help you tackle overspray efficiently.
To successfully remove overspray, you need to equip yourself with a few key tools and materials. Here’s a comprehensive list:
- Clay Bar: A clay bar is a highly effective tool designed to remove contaminants, including overspray, from your car’s surface. It works by gently lifting particles off the paint, leaving a smooth finish.
- Automotive Detailing Spray: This spray is crucial for providing lubrication while using a clay bar. It helps in preventing scratches during the removal process and enhances the overall cleaning efficiency.
- Microfiber Towels: Soft microfiber towels are essential for drying your car after washing and for wiping down surfaces during the overspray removal process. They are gentle on paint and help avoid swirl marks.
- Paint Thinner or Solvent: In some cases, a specialized paint thinner can be used to dissolve stubborn overspray. However, it’s important to use it sparingly and test it on a small area first to ensure it doesn’t damage the paint.
- Polishing Compound: After removing overspray, using a polishing compound can help restore the shine of your vehicle’s paint. This step is crucial for achieving a professional finish.
- Protective Gloves: Always wear protective gloves when handling chemicals or solvents to ensure your skin is safe from irritation or damage.
Using the right tools not only makes the process smoother but also reduces the risk of damaging your car’s paint. Here are some tips on how to effectively use these tools:
- Clay Bar Usage: When using a clay bar, ensure the surface is clean and lubricated with detailing spray. Work in small sections to avoid missing spots.
- Detailing Spray Application: Spray a generous amount of detailing spray on the area with overspray, allowing it to sit for a moment before using the clay bar.
- Polishing: After removing the overspray, apply a small amount of polishing compound to a clean microfiber towel and gently buff the surface until the desired shine is achieved.
In summary, having the right tools and materials is not just about convenience; it’s about ensuring the longevity and beauty of your vehicle’s paint job. By investing in quality products and following the correct procedures, you can effectively remove overspray while maintaining the integrity of your car’s finish.
Clay Bar
Clay Bar: The Essential Tool for Car CareA is an indispensable tool for anyone serious about maintaining their vehicle’s appearance. This innovative detailing product is designed to remove contaminants from the surface of your car’s paint, ensuring a smooth and glossy finish. But what exactly is a clay bar, and why is it so effective? Let’s delve into its features, benefits, and proper usage.
A clay bar is a synthetic material that feels similar to modeling clay. When used correctly, it can effectively remove overspray, tree sap, industrial fallout, and other contaminants that regular washing fails to eliminate. The process of using a clay bar is often referred to as claying, and it is a crucial step in the car detailing process.
- Enhances Paint Finish: By removing embedded contaminants, a clay bar restores the paint’s smoothness and enhances its shine.
- Prepares for Waxing: Claying your vehicle before applying wax or sealant allows for better adhesion, leading to longer-lasting protection.
- Cost-Effective: Clay bars are relatively inexpensive and can be used multiple times if maintained properly, making them a cost-effective solution for car care.
Using a clay bar is straightforward, but following the right steps is essential for achieving optimal results:
- Wash Your Car: Start with a thorough wash using a pH-balanced car shampoo to remove dirt and grime.
- Prepare the Surface: Dry the car completely and ensure the surface is free of any loose debris.
- Apply Lubrication: Spray a detailing spray or lubricant on a small section of the car to prevent the clay bar from sticking to the surface.
- Use the Clay Bar: Gently glide the clay bar over the lubricated area using a back-and-forth motion. You’ll feel the contaminants being lifted away.
- Wipe Clean: After claying, wipe the area with a microfiber towel to remove any residue.
To maximize the longevity of your clay bar, consider the following tips:
- Store Properly: Keep your clay bar in a sealed container to prevent it from drying out.
- Inspect Before Use: Always check the clay bar for dirt or debris before using it on your car to avoid scratching the paint.
- Re-knead Frequently: Knead the clay bar regularly to expose a clean surface for use.
Using a clay bar is recommended at least twice a year, or more frequently if your vehicle is exposed to harsh environmental conditions. Regularly claying your car can help maintain its value and appearance, making it a worthwhile investment for any car enthusiast.
In summary, a clay bar is a vital tool for anyone looking to achieve a flawless finish on their vehicle. By understanding its function and proper usage, you can enjoy a cleaner, shinier car that turns heads on the road.
Automotive Detailing Spray
Automotive detailing sprays are essential tools for car enthusiasts and anyone looking to maintain their vehicle’s appearance. These sprays serve multiple purposes, from quick clean-ups to providing a protective layer on the paint. Understanding how to use detailing sprays effectively can enhance the longevity of your vehicle’s finish and make cleaning much easier.
What is Automotive Detailing Spray?
Automotive detailing spray is a versatile product designed to clean, shine, and protect your car’s surfaces. It is typically used for quick detailing jobs, allowing you to remove dust, fingerprints, and light contaminants without the need for a full wash. These sprays often contain lubricants that help lift dirt and debris away from the surface, making them ideal for use with clay bars when removing overspray or other stubborn contaminants.
Benefits of Using Detailing Spray
- Convenience: Detailing sprays are easy to use and can be applied quickly, making them perfect for on-the-go cleaning.
- Versatility: They can be used on various surfaces, including paint, glass, and plastic, providing a comprehensive cleaning solution.
- Protection: Many detailing sprays contain wax or sealant properties that provide a protective layer, enhancing shine and repelling dirt and water.
- Lubrication: When used with a clay bar, detailing sprays act as a lubricant, preventing scratches while effectively removing overspray and contaminants.
How to Use Automotive Detailing Spray
Using detailing spray is straightforward, but following the correct steps can maximize its effectiveness. Here’s a simple guide:
1. Start by ensuring the vehicle's surface is cool and out of direct sunlight.2. Shake the detailing spray bottle well before use.3. Spray a small amount of detailing spray onto a clean microfiber cloth or directly onto the surface.4. Wipe the area gently, using a back-and-forth motion to lift dirt and debris.5. For best results, follow up with a dry section of the microfiber cloth to buff the surface to a shine.
Choosing the Right Detailing Spray
When selecting a detailing spray, consider the following factors:
- Type of Finish: Some sprays are designed specifically for waxed surfaces, while others work best on ceramic coatings.
- Ingredients: Look for sprays that are free from harsh chemicals, as these can damage your vehicle’s paint over time.
- Brand Reputation: Opt for reputable brands known for quality products to ensure you are getting a reliable detailing spray.
Conclusion
Incorporating a high-quality automotive detailing spray into your car care routine can significantly improve the appearance and longevity of your vehicle’s finish. By understanding its benefits and proper usage, you can effectively maintain your car’s aesthetic appeal while making the cleaning process smoother and more efficient.
Step-by-Step Guide to Remove Overspray
Removing overspray from your car can seem daunting, but with the right approach, it can be accomplished efficiently and effectively. This step-by-step guide will walk you through the entire process, ensuring that your vehicle’s surface remains intact and visually appealing.
Step 1: Assess the Damage
Begin by carefully inspecting the affected areas of your car. Look for the extent of the overspray and identify whether it is light or heavy. This assessment will help you determine the appropriate tools and methods needed for removal. If the overspray is minimal, a clay bar may suffice, while heavy overspray might require more intensive techniques.
Step 2: Wash the Car
Before attempting to remove the overspray, it’s crucial to wash your car thoroughly. Use a pH-balanced car wash solution and a microfiber cloth to eliminate any dirt or grime. This step is important as it prevents scratching the paint during the removal process. Rinse the car well and dry it with a soft towel to prepare for the next steps.
Step 3: Use a Clay Bar
Once the car is clean and dry, it’s time to use a clay bar. This tool is designed to remove contaminants from the car’s surface without damaging the paint. Spray a generous amount of detailing spray on the area with overspray. Gently glide the clay bar over the surface, applying light pressure. As you work, you’ll notice the clay picking up the overspray particles. Wipe the area with a microfiber cloth after completion to remove any residue.
Step 4: Polish the Surface
After successfully removing the overspray, it’s essential to polish the surface. Polishing not only restores the shine but also smooths out any imperfections left behind. Choose a high-quality automotive polish and apply it using a foam applicator pad. Work in small sections and buff the area with a clean microfiber cloth. This step will enhance the overall appearance of your car, giving it a fresh look.
Step 5: Wax for Protection
To protect your car from future overspray and environmental contaminants, apply a layer of wax. Waxing creates a barrier that shields the paint and enhances its gloss. Use a quality car wax and apply it evenly across the surface. Allow it to cure as per the manufacturer’s instructions, then buff it off for a brilliant finish. Regular waxing can help maintain your vehicle’s appearance and prevent damage.
Additional Tips
- Always work in a shaded area to prevent the detailing products from drying too quickly.
- Test any product on a small, inconspicuous area before applying it to the entire surface.
- Consider using a professional detailing service for severe overspray cases to avoid potential damage.
By following this comprehensive guide, you can effectively remove overspray from your car’s surface, ensuring it looks its best while preserving its value. Regular maintenance and protective measures will further enhance your vehicle’s longevity and aesthetic appeal.
Step 1: Assess the Damage
Before diving into the removal of overspray from your vehicle, it is crucial to thoroughly assess the damage. This initial step will not only inform you of the extent of the overspray but also help you determine the most effective methods and tools for removal. Understanding the nature of the overspray can prevent further damage to your car’s paint and save you time and effort in the long run.
Start by inspecting the entire surface of your car. Look for signs of overspray, which can often appear as a dull or uneven texture on the paint. It may also manifest as a different color or sheen compared to the surrounding areas. Use your hands to feel for rough patches, as overspray can create a gritty texture that is easily noticeable upon touch.
Once you’ve identified the areas affected by overspray, consider the following factors:
- Extent of Coverage: Determine how much of the car’s surface is affected. Is it a small section or widespread? The larger the area, the more intensive the removal process may need to be.
- Type of Paint: Assess the type of paint that has oversprayed onto your vehicle. Different paints have varying properties and may require specific removal techniques.
- Duration of Exposure: Consider how long the overspray has been on the surface. Fresh overspray is often easier to remove compared to older, dried paint, which may bond more firmly to the vehicle’s finish.
After this assessment, you can make informed decisions about the tools and products you will need. For minor overspray, a simple clay bar and detailing spray might suffice. However, for more extensive damage, you might need to consider more specialized products or professional help.
Additionally, document the areas affected by taking pictures. This not only helps you keep track of your progress during the removal process but also serves as a reference if you decide to seek professional assistance later on.
In summary, assessing the damage is a vital first step in effectively removing overspray from your car. By taking the time to evaluate the situation, you can choose the right approach and tools, ensuring a smoother and more successful removal process.
Step 2: Wash the Car
Washing your car is a critical step in the process of removing overspray. A thorough wash not only eliminates dirt and debris but also prepares the surface for effective paint removal. When tackling overspray, it is essential to ensure that the car’s surface is clean and free from any contaminants that could hinder the removal process.
To achieve the best results, follow these detailed steps:
- Gather Your Supplies: Before you start washing, collect all necessary materials. You will need a pH-balanced car wash solution, a soft sponge or wash mitt, and two buckets—one for soapy water and the other for rinsing. Using a pH-balanced solution is crucial as it prevents damage to your car’s paint.
- Rinse the Car: Begin by rinsing your car with water to remove loose dirt and debris. This initial rinse helps prevent scratching the paint when you start scrubbing.
- Wash with a Two-Bucket Method: Fill one bucket with soapy water and the other with clean water. Dip your sponge or wash mitt into the soapy water, wash a section of the car, and then rinse the sponge in the clean water bucket before dipping it back into the soapy water. This method minimizes the transfer of dirt back onto the car’s surface.
- Pay Attention to Overspray Areas: Focus on areas where overspray is most likely to occur. Use gentle, circular motions to avoid scratching the paint. Be thorough, as any remaining debris can complicate the overspray removal process.
- Rinse Thoroughly: After washing, rinse the car thoroughly with clean water to remove any soap residue. Soap left on the surface can create a barrier that prevents effective overspray removal.
- Dry the Car: Use a soft microfiber towel to dry the car. This step is important because it prevents water spots and prepares the surface for the next steps in the overspray removal process.
By following these steps, you ensure that your car is in the best condition for overspray removal. A clean surface allows for better adhesion of any products used in the subsequent steps, such as clay bars or detailing sprays. Remember, investing time in a thorough wash can save you effort and enhance the effectiveness of the overspray removal process.
In summary, washing your car with a pH-balanced solution is essential for creating a clean surface that facilitates effective overspray removal. This step sets the foundation for achieving a flawless finish and maintaining the aesthetic appeal of your vehicle.
Step 3: Use a Clay Bar
Using a clay bar is a crucial step in the process of removing overspray from your car’s surface. This tool is designed specifically to eliminate contaminants that regular washing cannot remove. The clay bar works by gently lifting and trapping particles, ensuring a smooth finish without damaging the vehicle’s paint.
What is a Clay Bar?A clay bar is a small, putty-like substance that is used in automotive detailing. It is made from a type of clay that has been formulated to be non-abrasive. When used correctly, it is one of the safest methods to remove overspray, tree sap, industrial fallout, and other contaminants that cling to your car’s paint.
Why Use a Clay Bar for Overspray Removal?The primary reason for using a clay bar is its effectiveness. When overspray occurs, it can create a rough texture on the surface of your vehicle. A clay bar, when paired with a detailing spray, provides lubrication that allows it to glide smoothly over the paint, picking up the overspray without scratching or damaging the surface.
How to Use a Clay Bar:
- Preparation: Ensure that your car is clean and dry. Wash it thoroughly with a pH-balanced car wash solution to remove any dirt or debris.
- Apply Detailing Spray: Spray a generous amount of detailing spray on a small section of the car’s surface. This will act as a lubricant, preventing the clay bar from sticking.
- Work with the Clay Bar: Take a piece of the clay bar and flatten it into a disc shape. Gently rub it over the lubricated area using a back-and-forth motion. You will feel the clay pulling contaminants away from the surface.
- Check the Clay Bar: Regularly inspect the clay bar for dirt and contaminants. Fold it over and knead it to expose a clean surface when it becomes dirty.
- Wipe and Inspect: After working on a section, wipe it down with a microfiber towel to remove any residue. Inspect the surface for smoothness and repeat the process if necessary.
Tips for Successful Clay Bar Application:
1. Work in small sections to ensure thorough cleaning.2. Keep the surface well-lubricated to avoid scratching.3. Use a high-quality detailing spray for optimal results.4. Store the clay bar in a clean, airtight container to prevent contamination.
Using a clay bar is not only effective but also safe for your car’s paint when done correctly. Regular application can help maintain the vehicle’s finish and protect it from environmental contaminants. By incorporating this step into your car care routine, you can ensure a smooth, glossy surface that enhances the overall appearance of your vehicle.
Step 4: Polish the Surface
Polishing the surface of your car after removing overspray is a crucial step that should not be overlooked. This process not only enhances the visual appeal of your vehicle but also plays a significant role in maintaining its overall health and longevity. In this section, we will delve into the importance of polishing, the techniques involved, and the benefits it brings to your car’s finish.
Once the overspray has been effectively removed, the car’s surface may still exhibit imperfections such as swirls, scratches, or a dull appearance. Polishing serves as a remedy for these issues, helping to restore the car’s original shine and smoothness. This step is essential for achieving a professional finish and ensuring that your vehicle looks its best.
To achieve optimal results when polishing, consider the following techniques:
- Choose the Right Polish: Select a polish that is suitable for your car’s paint type. There are various formulations available, including abrasive and non-abrasive options. For light imperfections, a non-abrasive polish is often sufficient.
- Use a Dual-Action Polisher: For best results, invest in a dual-action polisher. This tool provides a smooth application and minimizes the risk of damaging the paint.
- Work in Sections: Divide the car into manageable sections when polishing. This approach allows you to focus on one area at a time, ensuring thorough coverage and attention to detail.
Polishing offers numerous advantages that extend beyond aesthetics:
- Enhanced Shine: A well-polished surface reflects light effectively, resulting in a deep and glossy finish.
- Protection: Polishing can help seal the paint and provide a protective layer against environmental contaminants, UV rays, and other damaging elements.
- Increased Resale Value: A car that looks well-maintained and shiny is more appealing to potential buyers, which can positively impact its resale value.
To maximize the effectiveness of your polishing efforts, keep these tips in mind:
- Clean the Surface: Ensure the car’s surface is free from dust and debris before polishing. A clean surface helps prevent further scratches during the polishing process.
- Apply Even Pressure: When using a polisher, apply even pressure to avoid uneven results. Let the machine do the work, and move it slowly across the surface.
- Follow Up with Wax: After polishing, consider applying a layer of wax. This step adds an extra layer of protection and enhances the shine.
In summary, polishing the surface of your car after overspray removal is a vital step in achieving a professional finish. By understanding the importance of this process, employing effective techniques, and following best practices, you can ensure that your vehicle not only looks great but is also protected against future damage.

Preventing Overspray: Tips and Techniques
When it comes to maintaining the pristine condition of your vehicle, preventing overspray is as crucial as removing it. Overspray can lead to unsightly blemishes and may require significant effort to correct. Therefore, implementing effective prevention techniques not only saves you time but also protects your car’s aesthetic appeal.
Preventing overspray is essential for several reasons. First, it helps maintain the integrity of your car’s paint job. Second, it reduces the need for extensive cleaning and restoration efforts. By taking proactive measures, you can avoid the hassle of dealing with overspray, allowing you to enjoy your vehicle without worry.
- Proper Masking Techniques: One of the most effective ways to prevent overspray is through proper masking. Use high-quality painter’s tape and plastic sheeting to cover areas that should not be painted. Ensure that the tape is applied firmly and that the edges are sealed to prevent paint from seeping underneath.
- Choose the Right Paint Environment: Selecting an appropriate location for your painting projects can significantly reduce overspray risks. Ideally, work in a controlled environment, such as a garage or a spray booth, where wind and debris are minimized.
- Utilize Windbreaks: If you must paint outdoors, consider using windbreaks to shield your vehicle from gusts that can carry paint particles. Simple barriers made of tarps or plywood can effectively reduce the risk of overspray.
- Adjust Spray Technique: The way you spray can also influence the amount of overspray. Use a consistent distance from the surface and maintain a steady hand. Spraying in thin layers can help control the amount of paint that disperses into the air.
- Invest in Quality Equipment: High-quality spray guns and nozzles can provide better control and precision, reducing the likelihood of overspray. Make sure your equipment is well-maintained and suitable for the type of paint you are using.
Environmental conditions play a significant role in overspray prevention. Humidity, temperature, and wind can all affect how paint behaves when applied. For example, painting in high humidity can cause paint to dry improperly, leading to increased overspray. Monitoring weather conditions and choosing the right time to paint can greatly enhance your results.
Knowledge is power when it comes to preventing overspray. Educate yourself on the best practices for painting and share this information with others who may be involved in the process. Workshops or online tutorials can provide valuable insights into effective techniques and tools.
Lastly, regular maintenance and inspection of your vehicle can help identify potential overspray issues before they escalate. Keeping your car clean and inspecting it after painting projects can help you catch any overspray early on, allowing for quick remediation.
By implementing these preventive measures, you can significantly reduce the risk of overspray and enjoy a flawless finish on your vehicle. Remember, taking the time to prevent overspray is a worthwhile investment that pays off in the long run.
Proper Masking Techniques
When it comes to painting projects, especially those involving vehicles, are essential to ensure a clean and professional finish. Overspray can be a significant issue, leading to unwanted paint on surfaces that should remain untouched. By applying effective masking methods, you can significantly reduce the risk of overspray and protect your vehicle from potential damage.
- Choose the Right Materials: The first step in effective masking is selecting the right materials. Use high-quality masking tape that adheres well and does not leave residue. Additionally, consider using plastic sheeting or drop cloths to cover larger areas.
- Clean the Surface: Before applying masking tape, ensure the surface is clean and dry. Dust, dirt, or grease can prevent the tape from adhering properly, leading to gaps where paint can seep through.
- Apply Tape with Precision: When applying masking tape, ensure it is pressed down firmly along the edges. This prevents paint from leaking under the tape. For curves and intricate shapes, consider using a flexible tape that can bend without breaking.
- Use Multiple Layers: In areas where overspray is a significant concern, applying multiple layers of masking tape can provide extra protection. This is particularly important for edges and corners where paint is more likely to escape.
- Cover Surrounding Areas: Don’t just mask the immediate area of the project; cover any adjacent surfaces that could be affected by overspray. This includes windows, trim, and any exposed parts of the vehicle.
- Check for Gaps: After applying the masking materials, inspect the work for any gaps or areas that may need additional coverage. A thorough inspection can save you from costly overspray issues later on.
Invest Time in Learning Effective Masking Techniques
Investing time in mastering these techniques is crucial for anyone looking to undertake painting projects. Not only does it protect your vehicle, but it also enhances the overall quality of your work. Many resources are available, including online tutorials and workshops, that can help you refine your skills.
In addition to traditional masking techniques, consider exploring advanced methods such as using spray shields or airbrush masks for more intricate projects. These tools can provide additional layers of protection and improve the precision of your paint application.
By understanding the importance of proper masking techniques and committing to learning effective methods, you can significantly reduce the risk of overspray and ensure that your painting projects yield professional results. This knowledge not only helps in maintaining your vehicle’s aesthetic appeal but also contributes to the longevity of its paint job.
In summary, proper masking is a critical component of any painting project. By following these guidelines, you can protect your vehicle effectively and achieve a flawless finish. Remember, the effort you put into masking today will pay off with stunning results tomorrow.
Choosing the Right Location for Painting
When it comes to painting, selecting the right location is crucial for achieving the best results while minimizing potential issues such as overspray. By understanding the environment in which you work, you can significantly reduce the risks associated with paint application. This guide will explore the importance of choosing an appropriate location and provide practical tips to ensure a successful painting project.
- Enclosed Spaces: Working in an enclosed area, such as a garage or a dedicated paint booth, can greatly reduce the likelihood of overspray. These spaces allow for better control over airflow and minimize external contaminants.
- Controlled Environments: If possible, opt for a controlled environment where temperature and humidity can be regulated. This not only enhances the quality of the paint application but also helps it cure properly, reducing the chances of flaws.
- Windy Conditions: Avoid painting outdoors on windy days, as the wind can carry paint particles away from the intended surface, leading to overspray on unintended areas. If you must paint outside, choose a calm day and consider using windbreaks.
Factors to Consider When Selecting a Location
When choosing a location for painting, consider the following factors:
- Lighting: Good lighting is essential for seeing imperfections and ensuring even coverage. Natural light is ideal, but if you are indoors, ensure that the area is well-lit with artificial lights.
- Ventilation: Proper ventilation is necessary to disperse harmful fumes and ensure a safe working environment. If painting indoors, open windows or use fans to improve airflow.
- Space: Ensure that you have enough space to maneuver around your project without bumping into obstacles. A clutter-free environment will help maintain focus and reduce accidents.
Preparation Steps for Your Chosen Location
Once you have selected a suitable location, take the following preparation steps to further minimize overspray risks:
1. Clear the area of any unnecessary items to prevent contamination.2. Lay down drop cloths or plastic sheeting to protect the floor and surrounding surfaces.3. Use masking tape to cover areas that should not be painted, such as windows, trim, and tires.4. Ensure all tools and materials are within reach to avoid unnecessary movement during the painting process.
By taking these precautions and choosing the right location, you can effectively minimize overspray and achieve a professional-looking finish on your painting project. Remember, the environment you work in plays a significant role in the success of your efforts. Investing time in selecting the right location can save you time, effort, and frustration in the long run.
When to Seek Professional Help
In certain situations, the removal of overspray from your vehicle can become a challenging task, requiring the expertise of professionals. Understanding when to seek assistance is crucial for protecting your car’s finish and avoiding further damage.
- Extent of the Damage: If you notice a significant amount of overspray, it may be time to consult a professional. Large areas covered in paint can be difficult to manage without specialized tools.
- Type of Paint: The type of paint that has oversprayed on your vehicle can impact the removal process. Some paints may require specific solvents or techniques that professionals are equipped to handle.
- Time Constraints: If you are pressed for time and need a quick solution, hiring a professional can save you hours of labor and ensure the job is done right.
- Restoration of Vintage Vehicles: For classic or vintage cars, professional detailing services are often essential to maintain the integrity of the original paintwork while effectively removing overspray.
Severe Overspray Cases
In cases where the overspray is extensive, you may find that DIY methods are not yielding results. Professionals have access to advanced techniques and tools such as pressure washers, specialized solvents, and high-quality polishing equipment that can effectively remove stubborn paint without harming your car’s surface.
Experience and Expertise
Professional detailers come with a wealth of experience and knowledge regarding various paint types and finishes. Their expertise allows them to assess the situation accurately and choose the best method for removal, ensuring that your vehicle is restored to its original condition without risking damage.
Restoration of Classic Cars
For classic car enthusiasts, maintaining the vehicle’s value is paramount. Professional restoration services not only remove overspray but also ensure that the original paint finish is preserved. This is crucial for collectors who understand that even minor imperfections can affect a car’s worth significantly.
Cost vs. Value
While hiring a professional may seem like an added expense, consider the potential costs associated with DIY overspray removal gone wrong. Incorrect techniques can lead to scratches, dullness, or even further paint damage, which could necessitate expensive repairs or repainting. By investing in professional help, you are safeguarding your vehicle’s aesthetic and financial value.
Conclusion
In summary, knowing when to seek professional help can save you time, effort, and money while ensuring your vehicle maintains its pristine appearance. If you find yourself in a situation where DIY methods are proving ineffective or if the overspray is severe, do not hesitate to reach out to a professional detailer. Their expertise can make all the difference in restoring your car to its former glory.
Severe Overspray Cases
When it comes to the world of automotive care, overspray can be a significant concern, especially in severe cases. Overspray occurs when paint particles unintentionally land on your vehicle, often as a result of nearby painting projects or improper masking techniques. While minor overspray can typically be managed with DIY methods, **extensive overspray** may require the expertise of a professional detailer. Understanding when to seek professional help is crucial for maintaining the integrity and appearance of your vehicle.- Understanding the Severity of Overspray: To determine whether your overspray situation is severe, assess the extent of the paint coverage on your vehicle. If you notice large areas covered in paint or if the paint has penetrated the clear coat, it may be time to consult a professional.
- Risks of DIY Removal: Attempting to remove severe overspray without the right tools or techniques can lead to further damage. Scratching the paint surface or using inappropriate solvents can worsen the situation, making it critical to know when to step back and seek expert assistance.
- Benefits of Hiring a Professional Detailer: Professional detailers possess specialized tools and expertise that can effectively remove overspray without causing damage to your vehicle’s finish. They often use advanced techniques such as paint correction and polishing to restore your car’s original look.
- Specialized Tools and Techniques: Professionals utilize tools such as heated clay bars, pressure washers, and high-quality detailing sprays that are not typically available to the average car owner. These tools can safely and effectively lift paint particles from the surface.
- Restoration of Value: For classic and high-value vehicles, preserving the original finish is essential. Professional detailers have the skills to ensure that the vehicle’s aesthetic and financial value is maintained, especially when dealing with severe overspray.
In summary, while minor overspray can sometimes be managed through DIY methods, severe cases warrant the expertise of a professional detailer. Their specialized knowledge and tools can effectively remove overspray while protecting your vehicle’s paint job. If you’re unsure about the severity of the overspray or the best course of action, consulting a professional can save you time, effort, and potential damage in the long run.
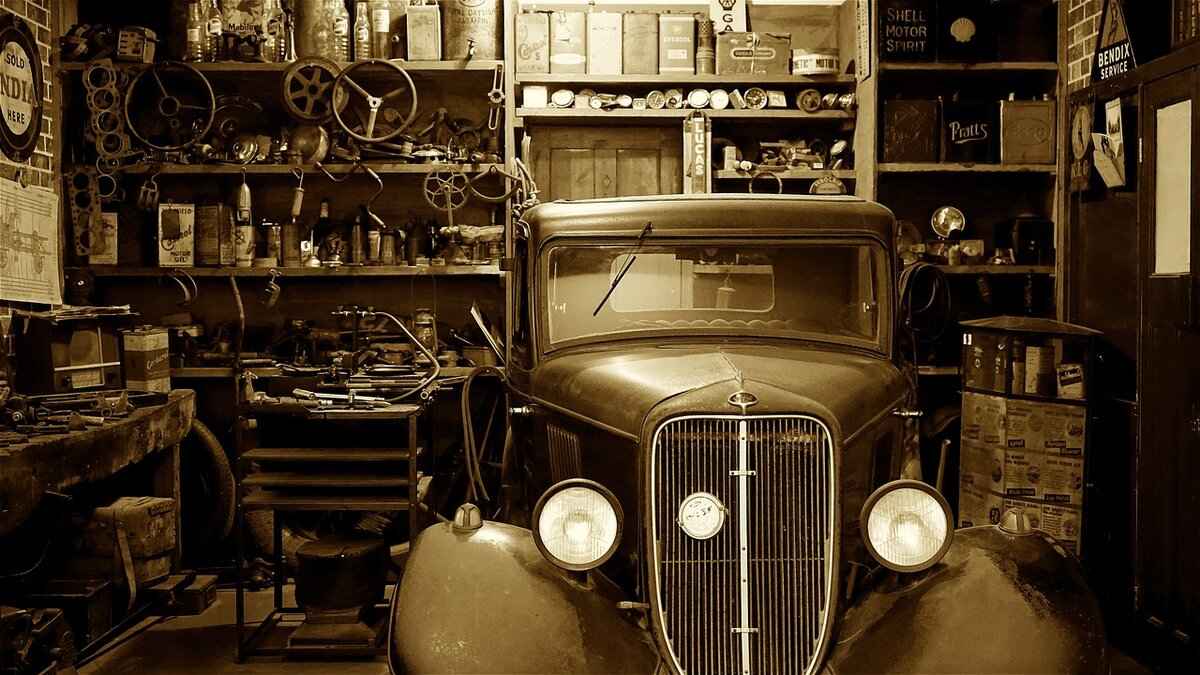
Restoration of Classic Cars
When it comes to classic cars, the **restoration process** is a labor of love that demands a meticulous approach. These vehicles are not just modes of transportation; they are pieces of history that require careful handling to preserve their value and integrity. One of the most critical aspects of restoring a classic car is ensuring that the original finish is maintained while effectively removing overspray. This task is crucial for several reasons.
Preserving Originality
Classic cars often hold significant value due to their originality. The original paint job is a key component of a car’s identity, and any alterations can diminish its worth. Professional restoration services specialize in preserving these original finishes, ensuring that the car remains as close to its factory condition as possible. They utilize advanced techniques and tools designed to remove overspray without damaging the underlying paint. This attention to detail is what sets professional restorers apart from amateur efforts.
Effective Overspray Removal Techniques
Removing overspray from classic cars requires a gentle touch. Professionals often start by assessing the extent of the overspray to determine the appropriate methods for removal. Techniques may include using a clay bar, which is effective at lifting contaminants from the surface without scratching the paint. Additionally, high-quality automotive detailing sprays are employed to lubricate the surface, making the removal process smoother and safer for the original finish.
Maintaining Value
For collectors and enthusiasts, maintaining the value of a classic car is paramount. A well-restored vehicle not only attracts attention but also commands higher prices in the market. Professional restorers understand the nuances of classic car value and work diligently to ensure that every aspect of the restoration contributes positively to the vehicle’s worth. This includes careful oversight of paintwork, ensuring that any overspray is removed without compromising the integrity of the original finish.
Expert Insights
Many classic car owners may wonder when it is appropriate to seek professional assistance. If the overspray is extensive or if the vehicle has significant historical value, it is advisable to consult with experts who specialize in classic car restoration. They possess the knowledge and experience necessary to navigate the complexities of restoring these vehicles, ensuring that every detail is attended to with care.
Conclusion
In summary, restoring classic cars is a specialized field that requires expertise, especially when it comes to maintaining the original finish and removing overspray. By enlisting professional restoration services, classic car owners can ensure that their vehicles retain their value and beauty for years to come. This commitment to quality not only enhances the car’s aesthetic appeal but also preserves its historical significance, making it a worthy investment for any enthusiast.
Frequently Asked Questions
- What is overspray and how does it happen?
Overspray is when paint unintentionally lands on surfaces, like your car, during painting projects. It often occurs due to wind carrying paint particles or improper masking techniques.
- How can I prevent overspray on my car?
To prevent overspray, use proper masking techniques when painting and choose a suitable location, like an enclosed space, to minimize the risk of paint drifting onto your vehicle.
- What tools do I need to remove overspray?
You’ll need a clay bar, automotive detailing spray, and possibly polishing compounds to effectively remove overspray without damaging your car’s paint job.
- Can I remove overspray myself?
Yes, you can remove overspray yourself by following a step-by-step process, which includes washing your car, using a clay bar, and polishing the surface for a smooth finish.
- When should I seek professional help for overspray removal?
If the overspray is extensive or if you’re dealing with a classic car where preserving the original finish is crucial, it’s best to consult a professional detailer for assistance.


