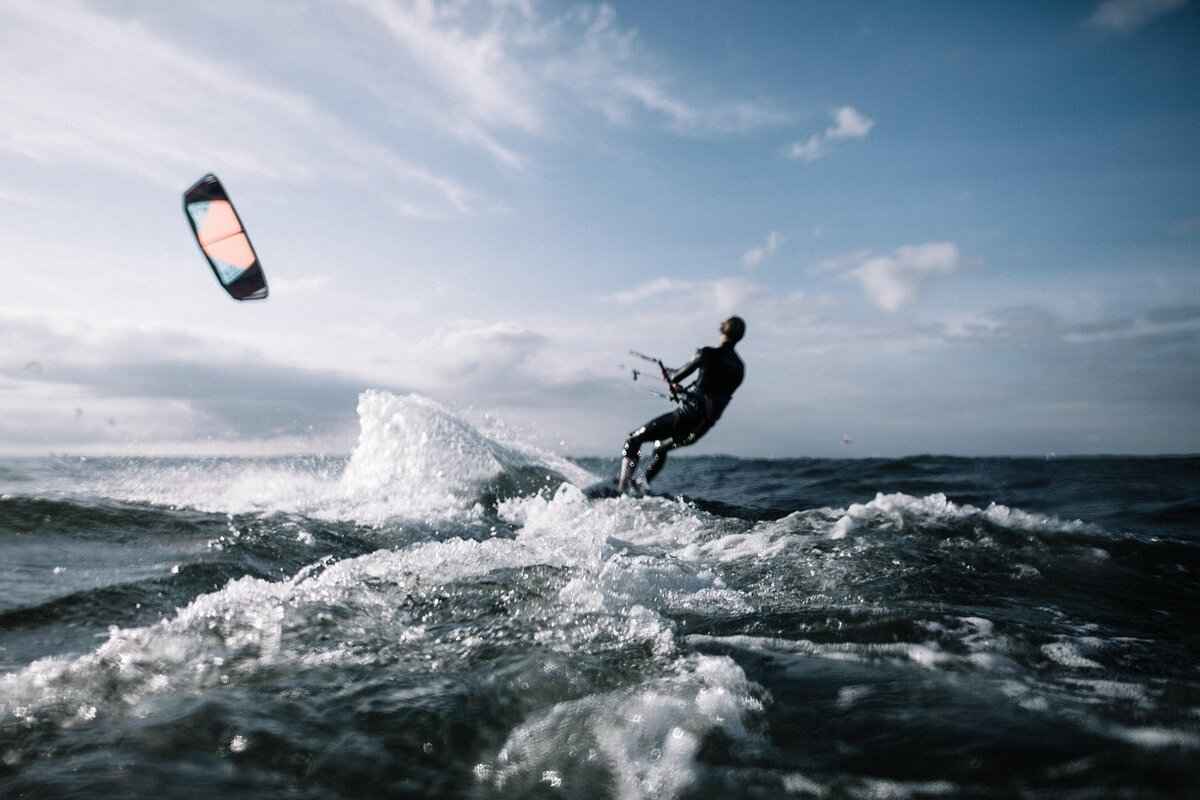
Action cameras have revolutionized the way we capture high-energy moments, but their wide-angle lenses often lead to lens distortion, particularly the fisheye effect. This article delves into effective methods to minimize this distortion, ensuring your footage looks clearer and more professional.
Understanding the root causes of lens distortion is crucial for effective correction. The primary factors include:
- Wide-angle lenses: These lenses are designed to capture expansive views but can warp straight lines.
- Camera positioning: The angle and distance from the subject can exacerbate distortion.
- Environmental influences: Elements like lighting and background can also contribute to the fisheye effect.
Recognizing fisheye distortion is the first step in correction. Look for visual indicators such as:
- Curved lines at the edges of the frame.
- Unnatural proportions of objects, especially near the corners.
- Distorted backgrounds that appear warped.
Several software solutions can effectively correct lens distortion:
- Adobe Premiere Pro: A versatile editing tool with built-in distortion correction features.
- Final Cut Pro: Offers similar capabilities tailored for Mac users.
- Lens Distortion Corrector: A specialized tool designed for precise adjustments.
Adobe Premiere Pro provides powerful tools for lens correction. Follow these steps:
1. Import your footage into Premiere Pro.2. Drag the "Lens Distortion" effect onto your clip.3. Adjust the "Curvature" settings to counteract the distortion.4. Fine-tune the "Horizontal" and "Vertical" settings as needed.5. Preview the changes and export your corrected footage.
While most corrections are done in post-production, some action cameras come equipped with real-time distortion correction. To enable this feature:
- Access the camera settings menu.
- Locate the distortion correction option and toggle it on.
- Test the settings before recording to ensure optimal results.
Camera positioning significantly impacts the degree of distortion. Consider these tips for optimal angles:
- Keep the camera level to the horizon.
- Avoid extreme close-ups to reduce distortion effects.
- Experiment with different distances to find the best perspective.
Selecting the appropriate lens is vital for reducing distortion. When purchasing an action camera, consider:
- Lens type: Look for models with less pronounced fisheye effects.
- Field of view: A narrower field of view can help minimize distortion.
- Interchangeable lenses: Some cameras allow for lens swapping, providing more flexibility.
Physical modifications, such as using lens filters or aftermarket lenses, can also help reduce distortion. Evaluate options like:
- Wide-angle lens attachments that correct distortion.
- Filters that enhance image quality and reduce glare.
Post-processing can further enhance image quality. Techniques include:
- Cropping: Removing distorted edges can improve the overall composition.
- Adjusting aspect ratios: This can help align the footage more naturally.
Different shooting modes can influence distortion levels. For instance:
- Wide-angle mode: Increases distortion but captures more of the scene.
- Linear mode: Reduces distortion, making it ideal for more natural-looking footage.
Avoiding common pitfalls can help reduce distortion. Key mistakes include:
- Improper stabilization techniques that exacerbate distortion.
- Incorrect camera settings that can lead to unwanted effects.
Regular maintenance enhances your camera’s performance and image quality. Tips include:
- Cleaning the lens regularly to prevent dirt and smudges.
- Proper storage to avoid damage and wear.
 1")
What Causes Lens Distortion in Action Cameras?
Understanding the root causes of lens distortion is crucial for effective correction, especially in action cameras where capturing high-quality footage is essential. Lens distortion can significantly impact the clarity and professionalism of your videos. In this section, we will delve into the primary factors that contribute to this phenomenon.
- Wide-Angle Lenses: One of the most significant contributors to lens distortion is the use of wide-angle lenses. These lenses are designed to capture a broader field of view, which is ideal for action shots. However, they can introduce a fisheye effect, causing straight lines to appear curved, particularly at the edges of the frame. This is especially noticeable in architectural photography or when filming landscapes.
- Camera Positioning: The way the camera is positioned can exacerbate distortion. For example, placing the camera too close to the subject can amplify the fisheye effect. To minimize distortion, it is essential to maintain an appropriate distance from the subject and to experiment with different angles. Shooting at eye level or slightly above can often yield better results.
- Environmental Influences: The environment in which you are shooting can also play a role in lens distortion. Factors such as lighting conditions, the presence of reflective surfaces, and the overall composition of the shot can affect how distortion manifests. For instance, shooting in bright light can create glare that highlights distortion, while shooting in dim conditions may not reveal it as prominently.
- Lens Quality: The quality of the lens itself can significantly impact distortion levels. Lower-quality lenses may produce more pronounced distortion due to inferior optics. Investing in high-quality lenses can help reduce these effects and improve overall image quality.
- Camera Settings: Certain camera settings can also influence distortion. For example, using a higher resolution can help mitigate some of the effects of distortion by providing more data to work with during post-processing. Additionally, adjusting the aspect ratio can help frame the shot in a way that minimizes the appearance of distortion.
In summary, understanding the various factors that contribute to lens distortion in action cameras is essential for achieving clear and professional-looking footage. By recognizing the role of wide-angle lenses, camera positioning, environmental influences, lens quality, and camera settings, you can take proactive steps to minimize distortion and enhance the quality of your recordings.
 2")
How to Identify Fisheye Distortion?
Identifying fisheye distortion is crucial for anyone using action cameras, especially when aiming for high-quality footage. Fisheye distortion occurs due to the curvature of wide-angle lenses, which can lead to unwanted visual effects that detract from the overall viewing experience. This section will provide essential insights into how to recognize these distortions effectively.
One of the primary indicators of fisheye distortion is the curvature of straight lines. When filming, observe the edges of your frame; if straight lines appear to bend or warp, this is a clear sign of distortion. For instance, when capturing a landscape, buildings or trees on the edges may seem to curve inward, creating an unnatural effect. This phenomenon is particularly noticeable in urban environments.
Another scenario where fisheye distortion is prominent is during close-up shots. When the camera is positioned too close to the subject, the distortion can amplify, making objects appear exaggerated or disproportionate. For example, if you film a person’s face from a short distance, their features may look stretched or distorted, leading to an unflattering representation.
In addition to visual indicators, lighting conditions can also affect the perception of distortion. Bright sunlight or harsh shadows can highlight the distortive effects, making them more apparent. For example, if you are filming during the golden hour, the soft light can reduce the visibility of distortion, while midday sun can intensify it.
To help users identify fisheye distortion, consider the following practical tips:
- Review Footage: Always review your footage after recording. Look for any bending lines or disproportionate objects.
- Use Grid Lines: Enable grid lines on your camera’s display to help visualize straight lines and assess distortion during shooting.
- Test Different Angles: Experiment with various camera angles and distances to find the optimal setup that minimizes distortion.
Ultimately, recognizing fisheye distortion is the first step towards achieving clearer, more professional-looking videos. By being aware of visual indicators and understanding the environments where distortion is most noticeable, users can take proactive measures to correct these issues in post-production or adjust their shooting techniques to minimize distortion from the outset.
 3")
What Are the Best Software Options for Distortion Correction?
Correcting lens distortion is essential for achieving high-quality visuals, especially when using action cameras that often produce fisheye effects. Fortunately, there are several software solutions available that can help users effectively correct these distortions. In this section, we will explore some of the best software options for distortion correction, including popular programs like Adobe Premiere Pro and Final Cut Pro, as well as specialized tools designed specifically for this purpose.
Adobe Premiere Pro is a powerful video editing software widely used by professionals and enthusiasts alike. It offers a range of features, including advanced tools for correcting lens distortion. With its user-friendly interface, users can easily apply the Lens Distortion effect to their footage, allowing for precise adjustments.
Final Cut Pro is another excellent choice for Mac users looking to correct lens distortion. This software provides a variety of built-in effects and filters that can effectively minimize fisheye effects. Users can utilize the Distortion Correction feature to make adjustments based on their specific footage, ensuring a more polished final product.
- Lens Distortion Corrector: This dedicated software is designed specifically for correcting lens distortion. It offers a straightforward interface and powerful algorithms that can automatically detect and correct distortion based on the lens profile.
- PTLens: PTLens is a popular tool that allows users to correct distortion, vignetting, and chromatic aberration. It supports a wide range of camera and lens combinations, making it a versatile choice for photographers and videographers.
- Lensfun: Lensfun is an open-source library that provides lens correction for various applications. It can be integrated with other software like GIMP and Darktable, offering users a cost-effective solution for distortion correction.
When selecting the right software for lens distortion correction, consider the following factors:
- Ease of Use: Choose software that matches your skill level. Beginners may prefer more intuitive interfaces, while advanced users might seek out more complex features.
- Compatibility: Ensure that the software is compatible with your operating system and integrates well with your existing workflow.
- Cost: Evaluate your budget. Some options are free or low-cost, while others may require a significant investment.
While these software solutions are effective, they may have limitations. For instance, some programs might not support all lens profiles, which can affect the accuracy of the correction. Additionally, complex distortions may require manual adjustments, which can be time-consuming.
In conclusion, choosing the right software for correcting lens distortion is crucial for achieving high-quality footage. Programs like Adobe Premiere Pro and Final Cut Pro offer robust features for professionals, while specialized tools provide targeted solutions for specific distortion issues. By understanding the strengths and limitations of each option, users can make informed decisions that enhance their video editing experience.
 4")
How to Use Adobe Premiere Pro for Lens Correction?
Adobe Premiere Pro is a leading video editing software that provides users with a range of powerful tools designed to enhance video quality. One of the most common challenges faced by videographers, especially those using action cameras, is lens distortion, particularly the fisheye effect. In this section, we will explore how to effectively utilize the Lens Distortion effect in Adobe Premiere Pro to achieve optimal results in your videos.
The Lens Distortion effect in Adobe Premiere Pro allows users to correct distortions caused by wide-angle lenses. This effect is essential for action camera footage, where the fisheye effect can warp straight lines and create a bubble-like appearance. Understanding how to apply this effect can significantly improve the clarity and professionalism of your videos.
- Import Your Footage: Begin by importing the video clip you wish to correct into Adobe Premiere Pro. Drag it onto the timeline.
- Access the Effects Panel: Navigate to the Effects panel, typically found on the right side of the workspace. If you don’t see it, go to Window >Effects.
- Search for Lens Distortion: In the Effects panel, type Lens Distortion into the search bar. You will see the effect appear under the Distort category.
- Apply the Effect: Drag the Lens Distortion effect onto your video clip in the timeline.
- Adjust the Settings: With the clip selected, go to the Effect Controls panel. Here, you can adjust the Curvature setting to reduce the fisheye effect. A value of -100 can often yield good results, but adjustments may vary based on the specific distortion.
- Fine-Tune the Correction: You may also want to adjust the Horizontal and Vertical Decentering settings to correct any remaining distortion. These adjustments help align the image properly.
- Preview Your Changes: Play your video in the program monitor to see how the adjustments have improved the footage. Make further tweaks as necessary.
- Use Reference Points: Look for straight lines in your footage, such as buildings or horizon lines, to gauge the effectiveness of your corrections.
- Combine Effects: If necessary, combine the Lens Distortion effect with other effects like Crop or Transform to achieve the desired framing and look.
- Consider Using Presets: Some users create and save presets for common lens distortions, making it easier to apply corrections in future projects.
By following these steps and tips, you can effectively utilize the Lens Distortion effect in Adobe Premiere Pro to enhance your action camera footage. This tool not only corrects distortion but also elevates the overall quality of your videos, making them more visually appealing and professional.
 5")
Can You Fix Distortion in Real-Time During Recording?
In the world of action cameras, capturing the perfect shot can sometimes be hindered by lens distortion, particularly the fisheye effect. Fortunately, advancements in technology have enabled some action cameras to offer real-time distortion correction features. This capability allows users to see the corrected image as they record, providing immediate feedback and enhancing the overall quality of the footage.
To enable real-time distortion correction, you first need to check if your action camera supports this feature. Many modern models, such as the GoPro HERO series or DJI Osmo Action, come equipped with built-in settings for distortion correction. Here’s how to access and activate these settings:
- Access the Camera Menu: Turn on your action camera and navigate to the settings menu. This is usually accessible via a dedicated button or touchscreen interface.
- Select Video Settings: Within the menu, locate the video settings section. This is where you will find options related to resolution, frame rate, and lens correction.
- Enable Lens Correction: Look for an option labeled ‘Lens Correction’, ‘Distortion Correction’, or something similar. Toggle this setting to ‘On’ to enable real-time correction.
- Adjust Additional Settings: Depending on your camera, you may have the option to adjust the level of correction applied. Experiment with these settings to find the best balance for your shooting style.
Once enabled, you can immediately see the difference in your viewfinder or screen. This feature is particularly useful in dynamic environments, such as sports or action-packed scenes, where every second counts. It helps you frame your shots without the worry of excessive distortion, making it easier to capture professional-looking footage.
However, there are a few considerations to keep in mind:
- Resolution Impact: Enabling distortion correction may affect your camera’s resolution settings. Some cameras may reduce the effective resolution when correction is applied, so check the specifications to ensure you’re getting the quality you desire.
- Battery Life: Real-time processing can drain your battery faster than normal recording. Be sure to monitor your battery levels, especially during extended shoots.
- Post-Production Options: While real-time correction is beneficial, it’s still advisable to familiarize yourself with post-production software that can further enhance your footage. This dual approach ensures you have the best possible results.
In conclusion, enabling real-time distortion correction can significantly improve your action camera footage, allowing for immediate visual adjustments and a more polished final product. By following the steps outlined above, you can maximize your camera’s capabilities and capture stunning, distortion-free videos on the go.
 6")
What Role Does Camera Positioning Play in Distortion?
Camera positioning is a critical factor that influences the degree of lens distortion, particularly in action cameras. Understanding how to effectively position your camera can significantly minimize the fisheye effect and enhance the overall quality of your footage. In this section, we will explore various angles and distances that can help achieve optimal results during recording.
When setting up your action camera, the first consideration should be the angle of view. Placing the camera too close to the subject can amplify distortion, especially with wide-angle lenses. To mitigate this, try to maintain a distance that allows for a more natural perspective. For instance, positioning the camera at least 3 to 5 feet away from the subject can help reduce the fisheye effect, creating a more balanced image.
Additionally, the height at which the camera is mounted plays a significant role in distortion. If the camera is too low or too high, it can skew the visual representation of the scene. Aiming for a height that is roughly at the subject’s eye level can produce a more realistic and less distorted image. This is particularly important in action shots where the viewer’s perspective is crucial for immersion.
Another important factor is the tilt angle. A tilted camera can create unintended distortion. For example, if the camera is angled upwards or downwards excessively, it can lead to a warped view of the surroundings. Keeping the camera level or only slightly tilted can help maintain the integrity of the footage.
Furthermore, consider the environment in which you are filming. Shooting in tight spaces or areas with many objects can exacerbate distortion. If possible, choose open spaces that allow for a wider range of movement and camera positioning. This not only improves the quality of the footage but also provides more flexibility in framing your shots.
Using a tripod or a stabilizing mount can also help in achieving the desired camera position. These tools allow for precise adjustments and can minimize unwanted movement that may lead to distortion. When filming action sequences, ensure that the mount is secure to avoid any shifts that could affect the angle and distance.
Ultimately, experimenting with different camera positions is key to finding what works best for your specific shooting scenario. Take the time to test various angles and distances to see how they affect the final outcome. By doing so, you can develop a better understanding of how camera positioning influences distortion and improve the overall quality of your action shots.
In summary, camera positioning is vital for reducing lens distortion in action cameras. By carefully considering the angle, distance, height, tilt, and environment, you can significantly minimize fisheye effects and produce clearer, more professional-looking footage. Remember, the goal is to create a visually appealing and realistic representation of your subject, and effective camera positioning is an essential step in achieving that.
 7")
How to Choose the Right Action Camera Lens?
When it comes to capturing stunning footage with an action camera, choosing the right lens is essential for minimizing distortion and enhancing image quality. The lens you select can significantly influence the final output, particularly in dynamic environments where action cameras are typically used. In this section, we will explore various lens options and key features to consider, ensuring you make an informed decision.
Action cameras typically come with a variety of lens options, each designed for different shooting scenarios. The most common types include:
- Wide-Angle Lenses: These lenses capture a broader field of view, making them ideal for action shots. However, they can also introduce significant fisheye distortion.
- Linear Lenses: These lenses provide a more natural perspective, reducing the fisheye effect. They are perfect for users who want to maintain a realistic look in their footage.
- Zoom Lenses: Offering versatility, zoom lenses allow you to adjust the focal length. However, be cautious as they may introduce distortion at extreme settings.
When selecting an action camera lens, consider the following features:
- Aperture Size: A larger aperture allows more light to enter, which is beneficial for low-light conditions. Look for lenses with adjustable apertures to gain flexibility.
- Lens Coating: High-quality coatings can reduce glare and enhance color accuracy. This is crucial for achieving vibrant and true-to-life images.
- Image Stabilization: Some lenses come with built-in stabilization features. This can significantly reduce shake and improve the overall quality of your footage.
Before purchasing a lens, ensure it is compatible with your specific action camera model. Different cameras have unique mounting systems and sensor sizes, which can affect how lenses perform. Always check the manufacturer’s specifications and user reviews to confirm compatibility.
Quality lenses can vary widely in price. While it may be tempting to opt for the cheapest option, investing in a higher-quality lens can pay off in the long run by providing better image quality and durability. Consider your budget and weigh it against the potential benefits of higher-end lenses.
Before making a final decision, it can be helpful to watch video reviews or read user testimonials. Many enthusiasts share their experiences with different lenses, providing insights into performance in real-world conditions. Look for footage comparisons that highlight the differences in distortion and image quality.
Choosing the right action camera lens is a crucial step in achieving high-quality footage with minimal distortion. By understanding the various lens types, key features, compatibility, and budget considerations, you can select a lens that best meets your needs. Investing time in research and testing will ultimately lead to better results in your action camera adventures.
 8")
Are There Physical Modifications to Reduce Distortion?
When it comes to capturing stunning action shots, minimizing lens distortion is crucial for achieving professional-quality footage. One effective approach is through physical modifications to your action camera. In this section, we will explore various options, including lens filters and aftermarket lenses, to help you reduce distortion effectively.
Lens filters are transparent optical devices that attach to the front of your camera lens. They can help in reducing distortion by altering the way light enters the camera. Some common types of filters include:
- Polarizing Filters: These filters reduce glare from reflective surfaces, which can help enhance color saturation and contrast, indirectly minimizing the appearance of distortion.
- Neutral Density (ND) Filters: ND filters can help control exposure and allow for slower shutter speeds, which can smooth out motion and reduce the visual impact of distortion.
Another highly effective modification is the use of aftermarket lenses. These lenses are designed to replace or enhance the existing lens on your action camera. They come in various types, including:
- Wide-Angle Lenses: While these may sound counterintuitive, some high-quality wide-angle lenses are engineered to minimize distortion compared to standard lenses.
- Fisheye Lenses: Specialized fisheye lenses can provide creative effects while allowing for distortion correction, making them a unique choice for specific shooting scenarios.
When considering physical modifications, it’s essential to evaluate their effectiveness. User reviews and expert opinions can provide valuable insights. For instance, many users report noticeable improvements in image quality and reduced distortion when using high-quality aftermarket lenses. However, the effectiveness can vary based on:
- The quality of the lens or filter used.
- The specific action camera model.
- The shooting conditions and angles.
Before purchasing any physical modifications, ensure compatibility with your action camera model. Installation is usually straightforward, but it’s wise to follow manufacturer guidelines to avoid damaging your equipment. Additionally, consider the weight and balance of your camera, as adding accessories can affect handling.
While investing in physical modifications can come with a price, the benefits often outweigh the costs. Improved image quality can enhance your content’s professionalism, making it more appealing to viewers. Additionally, with the right modifications, you can achieve a unique look that sets your footage apart from the competition.
In conclusion, physical modifications such as lens filters and aftermarket lenses can significantly reduce distortion in action cameras. By understanding how these tools work and evaluating their effectiveness, you can make informed decisions that enhance your filming experience. Whether you’re a seasoned professional or an enthusiastic hobbyist, these modifications can elevate your footage to new heights.
 9")
What Post-Processing Techniques Help Reduce Distortion?
In the world of action cameras, capturing stunning footage is just the beginning. To achieve professional-quality videos, one must also consider the importance of post-processing techniques. These methods play a crucial role in refining your footage and minimizing unwanted distortions, particularly the fisheye effect that often accompanies wide-angle lenses.
Post-processing techniques can significantly enhance the overall quality of your footage. Here are some essential methods that can help:
- Cropping: This technique involves trimming the edges of your video to eliminate distorted areas. By focusing on the central part of the frame, you can effectively reduce the fisheye effect. Cropping not only improves the aesthetic of your footage but also draws attention to the subject.
- Adjusting Aspect Ratios: Depending on the platform where you intend to share your videos, adjusting the aspect ratio can provide a more visually appealing result. For instance, switching from a wide 16:9 to a more cinematic 2.35:1 can help minimize distortion while enhancing the overall presentation.
- Lens Distortion Correction: Many video editing software programs, such as Adobe Premiere Pro and Final Cut Pro, offer built-in lens correction filters. These tools can automatically adjust the image based on the lens profile, effectively reducing distortion and improving image quality.
- Color Grading: While primarily focused on enhancing color, color grading can also help mask distortion by creating a more cohesive visual experience. By adjusting contrast, brightness, and saturation, you can draw the viewer’s eye away from distorted areas.
- Stabilization: Applying stabilization techniques can also help reduce the perception of distortion. Shaky footage can amplify fisheye effects, so using software stabilization tools can create smoother transitions and a more polished look.
In addition to these techniques, it’s essential to consider the overall composition of your footage. Maintaining proper framing and ensuring that key elements are centered can help mitigate the impact of distortion. Furthermore, experimenting with different editing styles and techniques can lead to discovering unique ways to enhance your videos.
Finally, always remember that the key to achieving the best results lies in balancing creativity and technical skills. Post-processing is not just about correcting errors; it’s also an opportunity to express your artistic vision. By incorporating these post-processing techniques, you can transform your action camera footage from ordinary to extraordinary, ensuring that your videos stand out in a crowded digital landscape.
 10")
How Do Different Shooting Modes Affect Distortion?
When it comes to capturing stunning footage, action cameras are a popular choice among adventurers and content creators alike. However, one of the challenges faced by users is lens distortion, particularly when using different shooting modes. Understanding how various modes can influence distortion levels is essential for achieving clearer and more professional-looking videos.
Many action cameras come equipped with a wide-angle mode, which is designed to capture expansive views. While this mode is excellent for showcasing landscapes or large groups, it often introduces significant fisheye distortion. This effect can warp straight lines, making them appear curved, especially at the edges of the frame. Such distortion can detract from the overall quality of the footage, particularly in scenes where precision is crucial.
In contrast, linear mode is designed to minimize distortion by providing a more natural perspective. This mode eliminates the fisheye effect, resulting in straighter lines and a more realistic representation of the scene. For users who prioritize clarity and accuracy in their footage, switching to linear mode can be a game-changer. However, it’s important to note that this mode may crop the edges of the frame, potentially losing some of the peripheral view that wide-angle mode captures.
- Standard Mode: This mode typically offers a balance between wide-angle and linear, providing a moderate field of view while reducing distortion.
- Superview Mode: Similar to wide-angle, this mode enhances the field of view but can exacerbate distortion, especially in fast-moving scenes.
- Time-Lapse and Slow Motion: These modes may also impact distortion levels based on the settings used. For instance, fast movements in time-lapse can amplify the fisheye effect.
When deciding which shooting mode to use, consider the subject matter and desired outcome. For action-packed scenes, such as sports or outdoor adventures, wide-angle may be preferable to capture the excitement. However, for more controlled environments, such as interviews or product showcases, linear mode can provide a more polished look.
It’s beneficial for users to experiment with different modes in various settings. By recording the same scene in both wide-angle and linear modes, you can visually compare the results and determine which best suits your needs. This practice not only helps in understanding the capabilities of your camera but also in developing a keen eye for the types of distortion that occur in different contexts.
In summary, understanding the impact of different shooting modes on distortion is crucial for action camera users. By carefully selecting the appropriate mode for each situation, you can significantly enhance the quality of your footage. Whether you opt for wide-angle to capture the thrill of the moment or linear for a more refined look, being aware of the potential distortion effects will empower you to create better content.
 11")
What Are Common Mistakes to Avoid When Shooting with Action Cameras?
When capturing stunning footage with action cameras, it’s essential to understand the common mistakes that can lead to lens distortion. By avoiding these pitfalls, you can achieve clearer and more professional-looking videos. Below are some frequent errors to watch out for:
- Improper Stabilization: One of the most significant mistakes is neglecting stabilization features. Without proper stabilization, even slight movements can lead to exaggerated distortion. Always enable the stabilization settings on your camera to minimize these effects.
- Incorrect Camera Settings: Using the wrong settings for your shooting environment can exacerbate distortion. For instance, shooting in wide-angle mode in tight spaces can create a fisheye effect. Make sure to adjust your settings according to the scene you are capturing.
- Inadequate Lighting Conditions: Poor lighting can lead to increased noise and distortion in your footage. Always try to shoot in well-lit environments or use additional lighting equipment to enhance the quality of your recordings.
- Poor Camera Positioning: The angle and height at which you mount your camera can significantly affect distortion levels. Avoid extreme angles that can amplify the fisheye effect. Instead, aim for a more level and stable position to achieve a natural look.
- Neglecting Lens Maintenance: Dirty lenses can cause blurriness and distortion. Regularly clean your camera lens to ensure optimal clarity. Use a microfiber cloth and lens cleaner specifically designed for camera equipment.
- Ignoring Post-Processing: Many users overlook the importance of post-processing in correcting distortion. Utilize software solutions to adjust and refine your footage after shooting. Programs like Adobe Premiere Pro offer tools specifically designed for lens correction.
- Overlooking the Importance of Composition: Failing to compose your shots correctly can lead to unintended distortion. Always consider the framing and placement of subjects within the shot to maintain a balanced and aesthetically pleasing image.
By being aware of these common mistakes and taking the necessary precautions, you can significantly reduce lens distortion in your action camera footage. Remember, the key to achieving high-quality videos lies not just in the camera you use, but also in how you operate it. With practice and attention to detail, you can capture stunning visuals that truly reflect the excitement of your adventures.
 12")
How to Maintain Your Action Camera for Optimal Performance?
Maintaining your action camera is essential for ensuring its longevity and optimal performance. Regular upkeep not only enhances the camera’s functionality but also improves the overall image quality, allowing you to capture stunning footage. In this section, we will explore various tips and techniques for cleaning, storing, and caring for your action camera.
Action cameras are often exposed to harsh environments, including water, dust, and extreme temperatures. Regular maintenance helps to prevent damage and ensures that your device operates smoothly. By keeping your camera clean and properly stored, you can significantly extend its lifespan and maintain high-quality image capture.
Cleaning your action camera is crucial for maintaining image clarity. Here are some effective cleaning tips:
- Lens Cleaning: Use a microfiber cloth to gently wipe the lens. Avoid using paper towels or rough fabrics that could scratch the surface.
- Body Care: For the camera body, use a damp cloth to remove dirt and grime. Ensure that no moisture enters the camera’s openings.
- Battery and Ports: Regularly check and clean battery contacts and ports with a dry cloth to prevent corrosion and ensure proper connectivity.
Proper storage is essential for protecting your action camera from damage:
- Use a Protective Case: Always store your camera in a padded case to shield it from impacts and environmental factors.
- Temperature Control: Avoid storing your camera in extreme temperatures, as this can affect battery performance and internal components.
- Remove Batteries: If you plan not to use your camera for an extended period, remove the batteries to prevent leakage and corrosion.
While using your action camera, consider the following care tips:
- Avoid Direct Sunlight: Prolonged exposure to sunlight can cause overheating and damage the internal components.
- Use Lens Filters: Installing a UV or polarizing filter can protect the lens from scratches and improve image quality.
- Check for Firmware Updates: Regularly update your camera’s firmware to ensure optimal performance and access new features.
Having the right tools on hand can make maintenance easier:
- Microfiber Cloth: For cleaning the lens and screen.
- Air Blower: To remove dust from hard-to-reach areas without touching the camera.
- Cleaning Solution: A gentle lens cleaning solution can help remove smudges without damaging the lens coating.
In conclusion, maintaining your action camera through regular cleaning, proper storage, and careful handling will ensure that it performs at its best. By following these tips, you can capture high-quality footage for years to come, making the most of your investment in this essential equipment.
Frequently Asked Questions
- What is lens distortion in action cameras?
Lens distortion refers to the warping or bending of images that occurs, particularly with wide-angle lenses. This is often seen as a fisheye effect, where straight lines appear curved, especially around the edges of the frame.
- How can I identify fisheye distortion in my footage?
You can recognize fisheye distortion by looking for curved lines and unnatural shapes in your videos, especially at the edges. If your footage makes objects look like they’re bulging out or bending, you’re likely seeing this distortion.
- Are there any real-time corrections available on action cameras?
Yes! Some action cameras come with built-in features that allow for real-time distortion correction. Check your camera’s settings to see if this option is available, which can help you capture better footage right from the start.
- What software can I use to correct lens distortion?
Popular software options for correcting lens distortion include Adobe Premiere Pro, Final Cut Pro, and specialized tools like Lens Distortion Corrector. These programs offer various tools to help you fix those pesky fisheye effects.
- How does camera positioning affect distortion?
Camera positioning plays a crucial role in distortion levels. Keeping your camera level and at an appropriate distance from your subject can significantly reduce the fisheye effect, leading to clearer and more professional-looking footage.


