Chia seeds have gained immense popularity in recent years, not just for their nutritional benefits but also for their potential to be grown at home. This article delves into the entire process of growing and harvesting chia seeds, offering practical tips and insights to ensure a fruitful gardening experience.
Chia seeds are tiny, nutrient-dense seeds derived from the Salvia hispanica plant. They are celebrated for their high content of omega-3 fatty acids, fiber, and antioxidants, making them a staple in health-conscious diets. Incorporating chia seeds into your meals can promote heart health, aid digestion, and provide sustained energy.
Selecting the appropriate variety of chia seeds is crucial for a successful gardening experience. Different varieties may have distinct growth requirements and flavor profiles, influencing your gardening journey.
- White vs. Black Chia Seeds: While both types are nutritionally similar, their flavor and appearance may vary, affecting your choice for planting.
- Organic vs. Non-Organic Chia Seeds: Opting for organic seeds can lead to healthier plants and better environmental practices, as non-organic seeds may be treated with chemicals.
Understanding the ideal growing conditions for chia seeds is essential for successful cultivation. Chia plants thrive in specific environments that promote optimal growth.
Chia seeds prefer well-draining soil rich in organic matter. Conducting a soil test can help you determine pH and nutrient levels, enabling you to create the perfect growing environment.
Chia plants flourish in warm climates with ample sunlight. They require at least six hours of direct sunlight daily to ensure robust growth and seed production.
Planting chia seeds correctly is vital for successful germination. Here’s a step-by-step guide to ensure your seeds take root effectively:
Start by tilling the soil and removing any weeds. This preparation creates a conducive environment for chia seeds to germinate and grow.
Proper spacing and depth are crucial for chia plants. Ensuring each seed is planted at the right depth and distance allows for adequate room to thrive.
Caring for chia plants involves consistent maintenance, including watering, fertilization, and pest control. Here are some essential tips:
Chia plants need consistent moisture without being waterlogged. Employing organic fertilizers can promote healthy growth and enhance seed production.
Early identification and management of pests and diseases are vital for protecting your chia plants. Utilizing organic pest control methods helps maintain a healthy garden.
Knowing when to harvest chia seeds is crucial for maximizing yield. Here’s what to look for:
Chia plants are ready for harvest when the flowers have dried, and the leaves start to fade. These signs indicate that the seeds have matured.
Employing the right techniques, such as cutting and drying, ensures that you collect seeds without damaging the plants. This careful approach is essential for a successful harvest.
Proper storage of harvested chia seeds is vital for maintaining their freshness and nutritional value. Here are the best practices for storage:
Store chia seeds in a cool, dry place away from sunlight. Using airtight containers can significantly enhance their shelf life.
When stored correctly, chia seeds can last for several years without losing their nutritional value, making them a great addition to your pantry.
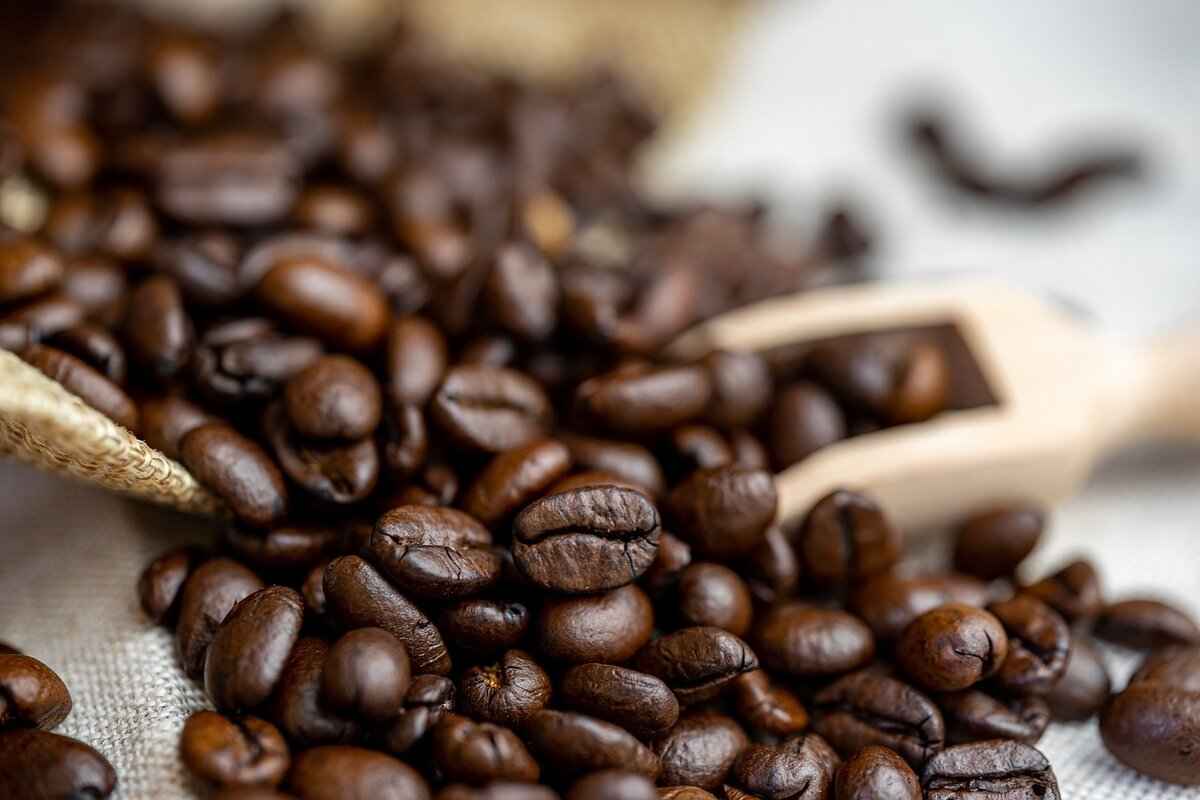
What Are Chia Seeds and Their Benefits?
Chia seeds have gained immense popularity in recent years, often labeled as a superfood due to their remarkable nutritional profile. These tiny seeds, derived from the Salvia hispanica plant, are packed with essential nutrients that can contribute significantly to a healthy diet. In this section, we will explore the numerous health benefits of chia seeds and why they are a valuable addition to your meals.
Chia seeds are small, oval-shaped seeds that come in various colors, including black and white. They are known for their high content of omega-3 fatty acids, which are crucial for heart health and reducing inflammation. In fact, chia seeds contain more omega-3s than salmon, making them an excellent plant-based source of this essential fatty acid.
In addition to omega-3s, chia seeds are also rich in dietary fiber. Just two tablespoons of chia seeds provide about 10 grams of fiber, which can aid in digestive health, promote feelings of fullness, and help in weight management. The soluble fiber in chia seeds absorbs water and expands in the stomach, which can help curb appetite and prevent overeating.
Furthermore, chia seeds are an excellent source of antioxidants. These compounds help combat oxidative stress and inflammation in the body, reducing the risk of chronic diseases such as heart disease and cancer. The antioxidants in chia seeds also contribute to their long shelf life, as they help prevent the seeds from going rancid.
Another remarkable benefit of chia seeds is their ability to stabilize blood sugar levels. The combination of fiber and healthy fats can slow down the absorption of sugar in the bloodstream, making them a suitable option for individuals with diabetes or those looking to maintain stable energy levels throughout the day.
Chia seeds are also a great source of protein. They contain all nine essential amino acids, making them a complete protein source for vegetarians and vegans. Incorporating chia seeds into your diet can help meet your protein needs, especially if you follow a plant-based diet.
For those concerned about bone health, chia seeds are rich in calcium, magnesium, and phosphorus, essential minerals that contribute to strong bones and teeth. Just one ounce of chia seeds provides about 18% of the recommended daily intake of calcium, making them a fantastic alternative to dairy products.
Incorporating chia seeds into your meals is simple and versatile. They can be added to smoothies, yogurt, oatmeal, or baked goods. You can also create chia pudding by soaking the seeds in milk or a milk alternative, allowing them to absorb the liquid and develop a gel-like consistency.
In summary, chia seeds are a nutrient-dense superfood that offers a wide array of health benefits. From heart health to digestive support, these tiny seeds can play a significant role in enhancing your overall well-being. By including chia seeds in your diet, you can tap into their powerful nutrients and enjoy a healthier lifestyle.
How to Choose the Right Chia Seed Variety?
When it comes to growing chia seeds, selecting the right variety is essential for achieving optimal results. With various chia seed types available, understanding their unique characteristics can significantly influence your gardening journey. This section explores the different chia seed varieties, their specific growth requirements, and how they can impact your overall gardening experience.
Choosing the appropriate chia seed variety is not just a matter of preference; it can affect growth rates, yield, and even the flavor of the seeds you harvest. Different varieties have distinct needs in terms of soil, sunlight, and water, which can ultimately determine the success of your gardening efforts.
- White Chia Seeds: These seeds are often considered milder in flavor and are popular among health-conscious consumers. They thrive in similar conditions as their black counterparts but may require slightly different care.
- Black Chia Seeds: Known for their robust flavor and higher antioxidant content, black chia seeds are the most commonly cultivated variety. They are also more visually appealing, making them a favorite for culinary uses.
- Organic vs. Non-Organic: Organic chia seeds are grown without synthetic fertilizers or pesticides, making them a healthier choice for both your garden and your health. Non-organic varieties may contain residues that could affect plant growth and soil health.
Each chia seed variety has its own set of growth requirements. For instance, some might prefer slightly more acidic soil, while others thrive in neutral pH levels. Understanding these nuances can help you create the ideal environment for your chia plants.
Chia seeds generally prefer well-draining soil rich in organic matter. However, specific varieties may have unique soil nutrient needs. Conducting a soil test can help you determine the right amendments.
Most chia varieties flourish in warm climates with ample sunlight. They typically require at least six hours of direct sunlight each day. However, some varieties may be more tolerant of shade or cooler temperatures, making them suitable for different growing regions.
The flavor of chia seeds can vary significantly between varieties. While both black and white chia seeds offer health benefits, their taste can influence your choice based on how you plan to use them. For example, black chia seeds have a nuttier flavor, making them ideal for smoothies and baking, while white chia seeds are often preferred for recipes requiring a more neutral taste.
When selecting chia seeds, it’s crucial to source them from reputable suppliers. Look for certifications such as organic or non-GMO labels to ensure you are getting high-quality seeds. Additionally, reading customer reviews can provide insights into the performance of specific varieties.
In summary, choosing the right chia seed variety is a critical step toward ensuring a successful growing experience. By understanding the unique characteristics of each type, you can make informed decisions that align with your gardening goals.
White vs. Black Chia Seeds
Chia seeds have gained immense popularity in recent years, and among the varieties available, white and black chia seeds are the most commonly recognized. While both types share similar nutritional profiles, there are subtle differences that may influence your choice when it comes to planting or consuming them.
Both white and black chia seeds come from the same plant, Salvia hispanica. The primary difference lies in their color and appearance. White chia seeds are slightly smaller and have a more delicate appearance compared to their black counterparts, which tend to be larger and have a more robust look. However, these visual distinctions do not significantly affect their nutritional value.
When it comes to flavor, many enthusiasts argue that there is a slight variation between the two. Black chia seeds are often considered to have a nuttier flavor, while white chia seeds are described as milder. This difference can influence your choice depending on how you plan to use the seeds in your diet. For instance, if you’re adding them to smoothies or baked goods, you might prefer the milder taste of white chia seeds.
Both varieties of chia seeds are packed with essential nutrients, including omega-3 fatty acids, fiber, protein, and antioxidants. Studies have shown that both types offer similar health benefits, such as promoting heart health, aiding digestion, and supporting weight management. Therefore, the choice between white and black chia seeds often comes down to personal preference rather than nutritional differences.
When it comes to planting, both white and black chia seeds can be grown under similar conditions. However, some gardeners prefer to plant one variety over the other based on aesthetics or market demand. If you’re looking to grow chia seeds for commercial purposes, you may want to consider the preferences of your target market. Black chia seeds tend to be more popular, which might make them a better choice for selling.
Ultimately, the decision between white and black chia seeds depends on your personal preferences and intended use. Whether you choose one over the other, rest assured that both varieties will provide you with a wealth of health benefits. Experimenting with both can also be a fun way to discover which one you enjoy more in your daily meals.
Organic vs. Non-Organic Chia Seeds
is a critical consideration for anyone looking to grow chia plants at home. The choice between organic and non-organic seeds can significantly impact not only the health of your plants but also the environment. In this section, we will explore the differences, benefits, and implications of choosing organic chia seeds over their non-organic counterparts.
Chia seeds, known for their nutritional benefits, are often praised for being a superfood. However, the method of cultivation plays a crucial role in determining their overall quality. Organic chia seeds are grown without the use of synthetic pesticides, herbicides, or fertilizers. This means that when you choose organic, you are opting for seeds that are cultivated in a way that promotes healthier plants and a more sustainable environment.
- Healthier Plants: Organic seeds tend to produce stronger and more resilient plants. This is because they grow in a natural ecosystem that fosters biodiversity and soil health.
- Environmental Benefits: Organic farming practices help maintain ecological balance. They reduce pollution, conserve water, and promote soil health, which is essential for sustainable agriculture.
- Avoiding Chemicals: Non-organic chia seeds may be treated with harmful chemicals that can linger in the soil and affect the growth and health of the plants. These chemicals can also have adverse effects on the surrounding ecosystem.
Moreover, the nutritional profile of organic chia seeds is often superior. Studies have shown that organic seeds can contain higher levels of antioxidants and essential fatty acids, making them a better choice for health-conscious consumers. The absence of chemical residues also means that you can enjoy your chia seeds without worrying about potential health risks associated with pesticides and fertilizers.
When it comes to growing chia seeds, the choice of organic seeds can lead to better germination rates and overall plant vigor. Organic seeds are often sourced from farms that prioritize soil health and biodiversity, which can result in seeds that are more adapted to local growing conditions.
In contrast, non-organic chia seeds may be mass-produced in environments that prioritize yield over quality. This can lead to seeds that are less vigorous and more susceptible to pests and diseases. As a gardener, choosing organic seeds not only aligns with healthier practices but also enhances your chances of a successful harvest.
Furthermore, supporting organic farming practices contributes to a more sustainable food system. By choosing organic chia seeds, you are supporting farmers who prioritize environmental stewardship and the health of their communities. This choice can have a ripple effect, encouraging more sustainable practices in agriculture and promoting a healthier planet.
In conclusion, the decision between organic and non-organic chia seeds is significant. By opting for organic, you are investing in healthier plants, supporting environmentally friendly practices, and ensuring that you consume seeds that are free from harmful chemicals. This choice not only benefits your garden but also contributes to a more sustainable future.
What Are the Ideal Growing Conditions for Chia Seeds?
Chia seeds are becoming increasingly popular among home gardeners due to their numerous health benefits and ease of growth. However, to successfully cultivate these tiny superfoods, it’s crucial to understand the ideal growing conditions that promote optimal growth.
Chia seeds thrive in specific environmental conditions that significantly affect their growth and yield. Here are the key factors to consider:
- Soil Quality: Chia seeds prefer well-draining soil that is rich in organic matter. A pH level between 6.0 and 8.0 is optimal. Conducting a soil test can help you determine the nutrient levels and pH, allowing you to amend the soil accordingly.
- Climate: These plants flourish in warm climates with temperatures ranging from 70°F to 90°F (21°C to 32°C). They are sensitive to frost, so it’s best to plant them after the last frost date in your area.
- Sunlight: Chia plants require at least six hours of direct sunlight daily. Adequate sunlight is essential for robust growth and seed production. If you are growing them indoors, consider placing them near a south-facing window.
- Watering Needs: While chia seeds need consistent moisture, they do not tolerate waterlogged conditions. It’s important to keep the soil moist but not soggy. Drip irrigation or soaker hoses can be effective methods for maintaining proper moisture levels.
The soil’s texture and composition play a pivotal role in the successful growth of chia seeds. Here are some aspects to consider:
- Drainage: Good drainage is essential to prevent root rot. If your soil retains too much water, consider adding sand or organic matter to improve drainage.
- Nutrients: Enriching the soil with compost or organic fertilizers can boost nutrient levels, promoting healthier plants. Chia plants benefit from nitrogen-rich fertilizers during their growth phase.
Climate is a critical factor when growing chia seeds. Here’s what to keep in mind:
- Temperature: Chia seeds germinate best at temperatures between 70°F and 90°F. If temperatures drop below 50°F (10°C), germination rates may decline.
- Humidity: High humidity can lead to disease issues, while low humidity can stress the plants. Aim for moderate humidity levels to keep your chia plants healthy.
Light is essential for the photosynthesis process, which fuels the growth of chia plants. Here are some tips to ensure your plants receive optimal light:
- Location: Choose a sunny spot in your garden or home where the plants can receive uninterrupted sunlight.
- Supplemental Lighting: If growing indoors, consider using grow lights to supplement natural sunlight, especially during shorter days.
By understanding and optimizing these growing conditions, you can significantly enhance your chances of a successful chia seed harvest. Proper soil, climate, and light conditions will not only promote healthy plants but also ensure a bountiful yield of nutritious seeds.
Soil Requirements for Chia Seeds
When it comes to growing chia seeds, understanding the soil requirements is crucial for achieving a successful harvest. Chia seeds thrive best in conditions that support their unique growth needs. In this section, we will explore the ideal soil characteristics, how to test your soil, and tips for enhancing its quality.
Chia seeds prefer well-draining soil that is rich in organic matter. This type of soil allows excess water to drain away quickly, preventing root rot and other moisture-related issues. A good balance of sand, silt, and clay can create the perfect texture for chia plants.
Testing your soil’s pH and nutrient levels is essential in creating the ideal environment for chia seed growth. Chia plants thrive in a slightly acidic to neutral pH range, ideally between 6.0 and 7.0. Soil that is too acidic or alkaline can hinder nutrient uptake and affect plant health.
- Soil Test Kits: Purchase a soil test kit from a local garden center or online. These kits typically include instructions for collecting soil samples and interpreting the results.
- Laboratory Testing: For more detailed analysis, consider sending a soil sample to a laboratory. This option can provide comprehensive information about nutrient levels and recommendations for amendments.
Once you have tested your soil, you may find it necessary to improve its quality. Here are some effective methods:
- Add Organic Matter: Incorporating compost or well-rotted manure can enhance soil fertility and improve its structure, leading to better drainage.
- Use Cover Crops: Planting cover crops, such as clover or vetch, during the off-season can help improve soil health by adding nitrogen and organic matter.
- Adjust pH Levels: If your soil is too acidic, you can add lime to raise the pH. For alkaline soil, sulfur can be used to lower the pH.
Maintaining soil health is an ongoing process. Regularly check your soil’s moisture levels and nutrient content as the chia plants grow. Implementing practices such as crop rotation and mulching can help sustain soil quality over time.
In summary, understanding and optimizing the soil requirements for chia seeds is vital for successful cultivation. By ensuring well-draining, nutrient-rich soil with the right pH, you can create an optimal environment for your chia plants, leading to a bountiful harvest.
Climate and Sunlight Needs
When it comes to cultivating chia plants, understanding their is crucial for achieving a successful harvest. These plants, known for their nutrient-rich seeds, thrive under specific environmental conditions that must be replicated in your garden.
Chia plants flourish in warm climates, typically thriving in USDA hardiness zones 9 through 11. They are native to regions with a Mediterranean climate, characterized by hot, dry summers and mild, wet winters. This means that if you live in a region where temperatures regularly exceed 70°F (21°C), you are likely to create an ideal environment for chia cultivation.
One of the most important factors in growing chia is providing sufficient sunlight. These plants require at least six hours of direct sunlight each day. This exposure is vital for robust growth and seed production. Insufficient sunlight can lead to weak plants with poor yields, so positioning your chia plants in a location that receives ample sunlight is essential.
Without adequate sunlight, chia plants may exhibit several issues:
- Stunted Growth: Insufficient light can hinder their growth, making them shorter and less vigorous.
- Poor Seed Production: A lack of sunlight can lead to fewer flowers and, consequently, fewer seeds.
- Increased Susceptibility to Pests: Weak plants are more vulnerable to pests and diseases, which can further compromise your harvest.
Chia plants are not shade-tolerant. While they can endure partial shade for short periods, prolonged exposure to low light conditions can significantly affect their health and productivity. If you’re considering planting chia in a shaded area, it’s advisable to reconsider the location to ensure they receive the necessary sunlight.
To maximize sunlight exposure for your chia plants:
- Choose the Right Location: Select a spot in your garden that receives full sun, ideally facing south or west.
- Consider Planting Time: Plant chia seeds after the last frost date in your area to take advantage of the longest days of summer.
- Remove Obstructions: Trim back any nearby trees or shrubs that may cast shadows over your chia plants.
Chia plants thrive best in temperatures ranging from 70°F to 85°F (21°C to 29°C). They can tolerate higher temperatures, but prolonged exposure to extreme heat above 100°F (38°C) can stress the plants, leading to wilting or reduced seed quality. Conversely, temperatures below 50°F (10°C) can stunt their growth and delay flowering.
In summary, providing the right climate and sunlight conditions is vital for the successful growth of chia plants. By ensuring they receive ample direct sunlight and maintaining optimal temperatures, you can cultivate a healthy and productive chia garden.
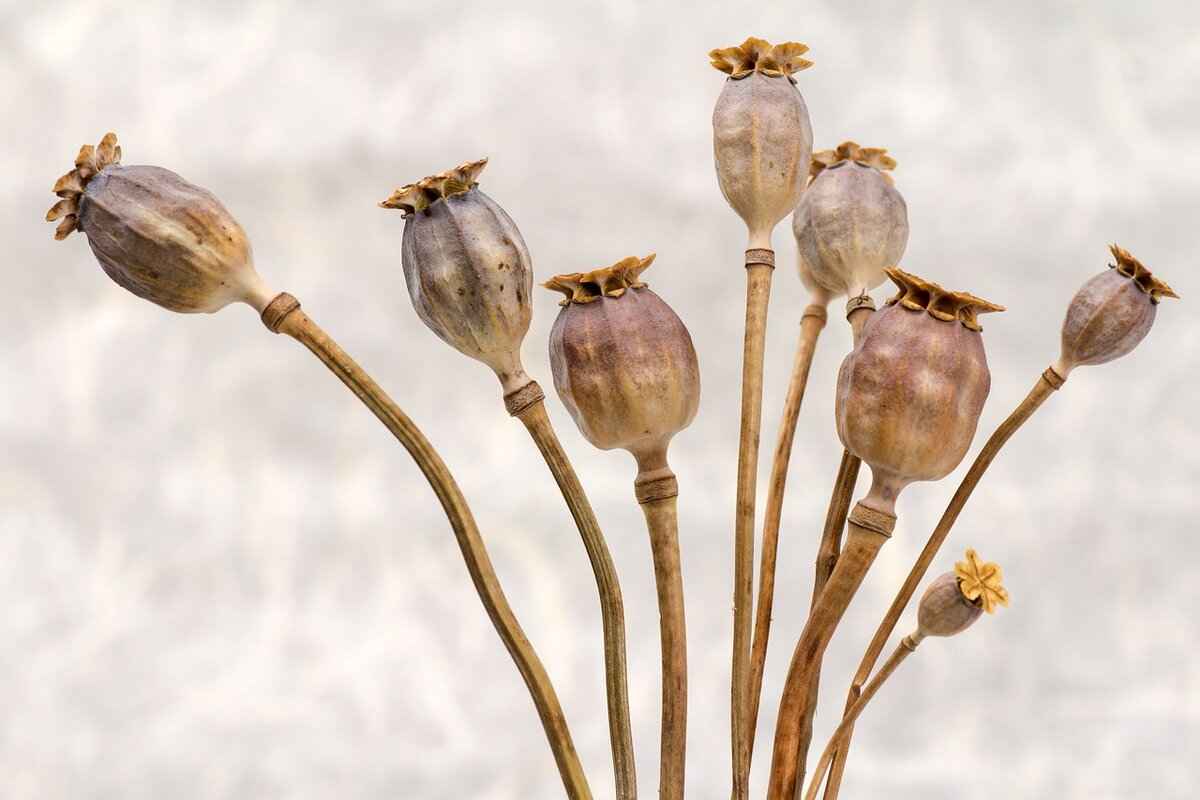
How to Plant Chia Seeds at Home?
Planting chia seeds correctly is essential for successful germination. This section outlines the step-by-step process to ensure your seeds take root effectively. Chia seeds are small but mighty, packed with nutrients and health benefits. To start your journey in growing these superfoods, follow the guidelines below.
Before planting, it’s crucial to prepare the seedbed properly. This involves:
- Tilling the Soil: Loosen the soil to a depth of about 12 inches. This promotes root penetration and improves drainage.
- Weed Removal: Clear the area of any weeds or debris that may compete for nutrients and water.
- Soil Enrichment: Mix in organic compost to enhance soil fertility, ensuring your chia seeds have the nutrients they need to thrive.
The timing of planting is vital. Chia seeds thrive in warm conditions, so consider the following:
- Ideal Temperature: Aim to plant when soil temperatures are consistently above 70°F (21°C).
- Season: Late spring to early summer is typically the best time for planting chia seeds.
Understanding proper seeding techniques can significantly impact your chia plants’ growth:
- Spacing: Plant chia seeds approximately 1 to 2 inches apart. This spacing allows each plant enough room to grow without overcrowding.
- Depth: Sow the seeds at a depth of about 1/4 inch. Chia seeds require light for germination, so avoid burying them too deep.
Watering is crucial for seed germination. Follow these tips:
- Initial Watering: Gently water the seedbed immediately after planting to ensure the soil is moist but not waterlogged.
- Consistent Moisture: Keep the soil consistently moist for the first two weeks, as this is when germination occurs.
After planting, it’s essential to monitor the growth of your chia seeds:
- Germination Time: Chia seeds typically germinate within 7 to 14 days under optimal conditions.
- Thinning: Once seedlings are about 2 inches tall, thin them out to ensure adequate spacing for healthy growth.
Chia plants require plenty of sunlight for robust growth:
- Sunlight Requirements: Ensure your chia plants receive at least 6 hours of direct sunlight daily. This is crucial for photosynthesis and overall health.
By following these steps, you can successfully plant chia seeds at home and enjoy a thriving garden filled with this nutritious superfood. Remember, patience is key, and with the right care, your chia plants will flourish!
Preparing the Seedbed
Creating a successful seedbed is a critical step in the process of growing chia seeds at home. A well-prepared seedbed not only enhances the germination rate but also supports the healthy growth of the plants. Below are essential steps and considerations for preparing your seedbed effectively.
- Tilling the Soil: Begin by tilling the soil to a depth of at least 12 inches. This process aerates the soil, allowing for better root development and water drainage. Tilling also helps to break up compacted soil, making it easier for chia seeds to penetrate the ground.
- Weed Control: It is crucial to ensure that the seedbed is free of weeds before planting. Weeds compete with chia plants for nutrients and water, which can hinder their growth. Consider using a hoe or hand-pulling to remove any existing weeds. For larger areas, a mulch layer can be added to suppress weed growth.
- Soil Enrichment: Chia seeds thrive in nutrient-rich soil. Incorporating organic matter, such as compost or well-rotted manure, can significantly improve soil fertility. This not only provides essential nutrients but also enhances soil structure, promoting better moisture retention.
- pH Level: The ideal pH level for chia seed growth is between 6.0 and 8.0. Conduct a soil test to determine the current pH, and if necessary, amend the soil using lime to raise pH or sulfur to lower it. Adjusting the pH can lead to improved nutrient availability for your chia plants.
- Moisture Management: After preparing the seedbed, it is important to maintain adequate moisture levels in the soil. Water the area lightly before planting to ensure the soil is moist but not waterlogged. Consistent moisture is key for seed germination.
Once the seedbed is prepared, you can proceed to plant your chia seeds. Proper preparation creates a conducive environment for germination and growth, setting the stage for a successful harvest.
In summary, preparing a seedbed involves a series of important steps: tilling the soil, controlling weeds, enriching the soil, checking pH levels, and managing moisture. Each of these factors plays a vital role in the overall health and productivity of your chia plants. By investing time and effort into preparing your seedbed, you lay the foundation for a thriving chia garden.
Seeding Techniques
When it comes to growing chia plants, understanding the right is crucial for achieving a thriving garden. The methods you employ for spacing and depth can have a significant impact on the overall health and productivity of your chia plants. By ensuring that each seed has the necessary room to grow, you can foster an environment where these remarkable plants can flourish.
Proper seeding techniques not only promote healthy growth but also enhance seed production. When chia seeds are planted too closely together, they compete for essential resources such as sunlight, water, and nutrients. This competition can lead to stunted growth and reduced yields. Conversely, planting seeds at the right spacing allows each plant to develop its root system effectively, leading to stronger plants that are more resilient to pests and diseases.
For optimal growth, chia seeds should be spaced approximately 12 to 24 inches apart in rows. This spacing allows for adequate air circulation and sunlight exposure, which are vital for healthy development. Additionally, maintaining this distance helps prevent fungal diseases that can arise from overcrowding.
Another critical aspect of successful seeding techniques is the depth at which you plant your chia seeds. Generally, chia seeds should be sown at a depth of about 1/4 to 1/2 inch. Planting them too deep can hinder germination, while planting them too shallow can expose them to drying out. It’s essential to find a balance to ensure that the seeds can establish their roots while still receiving the necessary moisture.
Before planting, preparing the seedbed is a vital step that should not be overlooked. This involves tilling the soil to a fine texture and removing any weeds or debris that could compete with your chia plants. A well-prepared seedbed provides a conducive environment for germination and growth, ensuring that the seeds can easily take root.
Timing is also a crucial factor in successful chia cultivation. Chia seeds thrive in warm temperatures, and it’s best to plant them in the spring when the soil temperature reaches at least 60°F (15°C). This ensures that the seeds have the best chance for germination and growth.
Incorporating companion planting techniques can further enhance the growth of chia plants. By planting them alongside compatible plants, you can improve soil health and deter pests. For instance, planting chia with legumes can help fix nitrogen in the soil, benefiting both plant species.
After planting, it’s essential to monitor the growth of your chia plants closely. If you notice any signs of overcrowding or stunted growth, consider thinning out the plants to allow for better spacing. Regularly checking the soil moisture levels is also important to ensure that the plants are receiving adequate water without becoming waterlogged.
In summary, employing the right seeding techniques, including optimal spacing and depth, is vital for cultivating healthy chia plants. By paying attention to these details, you can create a thriving garden that produces abundant chia seeds.
How to Care for Your Chia Plants?
Caring for your chia plants is essential to ensure a healthy and productive garden. With the right maintenance practices, you can maximize your yield and enjoy the benefits of this nutritious superfood. Below are key aspects to consider when caring for your chia plants.
Chia plants thrive in well-drained soil and require consistent moisture. It is vital to water them regularly, especially during dry spells. However, be cautious not to overwater, as this can lead to root rot. A good rule of thumb is to water the plants when the top inch of soil feels dry. Aim for deep watering sessions that encourage root growth, rather than shallow watering that only moistens the surface.
Chia plants benefit from organic fertilizers that provide essential nutrients. A balanced fertilizer, rich in nitrogen, phosphorus, and potassium, can promote strong growth and seed production. Applying fertilizer during the early stages of growth and again when the plants begin to flower can significantly enhance your harvest. Always follow the manufacturer’s instructions to avoid over-fertilization, which can harm the plants.
Maintaining a healthy garden involves proactive pest management. Common pests that affect chia plants include aphids and spider mites. Regularly inspect your plants for signs of infestation. If you notice pests, consider using organic pest control methods such as insecticidal soap or neem oil. Additionally, introducing beneficial insects like ladybugs can help keep pest populations in check.
Weeds compete with chia plants for nutrients and water, which can hinder their growth. Regularly check your garden for weeds and remove them promptly. Mulching around the base of your chia plants can also help suppress weed growth while retaining soil moisture.
Chia plants flourish in full sunlight, requiring at least six hours of direct sunlight each day. If you are growing them indoors, place them near a south-facing window or under grow lights to ensure they receive adequate light. Insufficient sunlight can lead to leggy plants and reduced seed production.
Chia plants prefer warm climates and are sensitive to frost. They thrive in temperatures between 70°F and 85°F (21°C to 29°C). If you live in a cooler region, consider starting your chia seeds indoors and transplanting them outside once the risk of frost has passed. This ensures they grow in optimal conditions, leading to a bountiful harvest.
Regularly monitor your chia plants for signs of stress or disease. Yellowing leaves may indicate nutrient deficiencies, while wilting can be a sign of either overwatering or underwatering. Addressing these issues promptly can prevent further damage and promote healthy growth.
In summary, caring for chia plants involves a combination of proper watering, fertilization, pest control, and environmental considerations. By paying close attention to these factors, you can cultivate a thriving chia garden that yields a rich harvest of nutritious seeds.
Watering and Fertilization Tips
When it comes to growing chia plants, understanding the nuances of watering and fertilization is essential for achieving optimal growth and seed production. These plants, known for their resilience, thrive best under specific conditions that cater to their moisture and nutrient needs.
Chia plants require consistent moisture throughout their growing season. However, it’s important to strike a balance; overwatering can lead to waterlogged soil, which can suffocate the roots and promote root rot. Ideally, the soil should be kept moist but not saturated.
- Check the soil moisture regularly by sticking your finger about an inch deep into the soil.
- Water the plants when the top inch of soil feels dry to the touch.
- Consider using a drip irrigation system to maintain consistent moisture levels without oversaturating the soil.
Fertilization plays a crucial role in promoting healthy growth and enhancing seed production in chia plants. Using organic fertilizers can be particularly beneficial, as they improve soil health and provide essential nutrients without the risks associated with chemical fertilizers.
- Apply a balanced organic fertilizer, such as compost or well-rotted manure, during the early stages of growth.
- Consider using liquid seaweed or fish emulsion as a foliar feed to provide additional nutrients.
- Avoid over-fertilizing, as this can lead to excessive foliage growth at the expense of seed production.
Recognizing the signs of underwatering and overwatering can help you adjust your care routine effectively:
- Underwatering: Leaves may appear wilted or curled, and the soil will feel dry to the touch.
- Overwatering: Yellowing leaves and a soggy soil texture are common indicators of excess moisture.
The watering and fertilization needs of chia plants can vary significantly based on the climate in which they are grown. In hotter, drier climates, more frequent watering may be necessary, while in cooler, more humid areas, less frequent watering may suffice.
- Monitor local weather conditions and adjust your watering schedule accordingly.
- During periods of heavy rainfall, reduce watering to prevent soil saturation.
By following these , you can create an optimal environment for your chia plants, leading to a successful harvest of nutrient-rich seeds. Remember, consistent care and observation are key to thriving chia plants!
Pest and Disease Management
Effective is essential for the health and productivity of your chia plants. Early identification and management of potential threats can significantly reduce the risk of infestations and infections that may compromise your crop. By employing organic pest control methods, you can maintain a thriving garden while protecting the environment.
Chia plants, like many others, are susceptible to a variety of pests and diseases. Identifying these issues early allows for swift action, minimizing damage and ensuring that your plants remain healthy. Early detection can also reduce the need for more aggressive treatments later on, which may harm beneficial insects and the overall ecosystem.
- Aphids: These small insects suck the sap from the leaves, weakening the plants.
- Spider Mites: Often found on the undersides of leaves, they can cause significant damage if not controlled.
- Whiteflies: These pests can spread diseases and weaken plants by feeding on their sap.
Being aware of the signs of pest infestation is crucial for effective management. Look for:
- Discolored or wilting leaves
- Visible insects on the plants
- Sticky residue (honeydew) on leaves, which can indicate aphid presence
Utilizing organic pest control methods is a sustainable way to keep your chia plants healthy. Here are some effective strategies:
- Neem Oil: This natural pesticide disrupts the life cycle of pests without harming beneficial insects.
- Insecticidal Soap: Effective against soft-bodied insects like aphids, this soap suffocates pests upon contact.
- Companion Planting: Planting herbs and flowers that repel pests can naturally protect your chia plants.
Alongside pest management, preventing diseases is crucial for maintaining healthy chia plants. Common diseases include:
- Powdery Mildew: This fungal disease appears as white powder on leaves and can hinder growth.
- Root Rot: Caused by overwatering, this disease can lead to plant death if not addressed promptly.
Implementing the following best practices can help prevent diseases:
- Proper Watering: Ensure that the soil is well-drained to prevent waterlogging.
- Crop Rotation: Rotating crops can disrupt the life cycles of pathogens in the soil.
- Regular Monitoring: Keep a close eye on your plants for any signs of disease.
By understanding the potential threats to your chia plants and implementing effective management strategies, you can cultivate a healthy garden that yields a bountiful harvest. Remember, the key to success lies in early detection and the use of organic methods that promote sustainability.
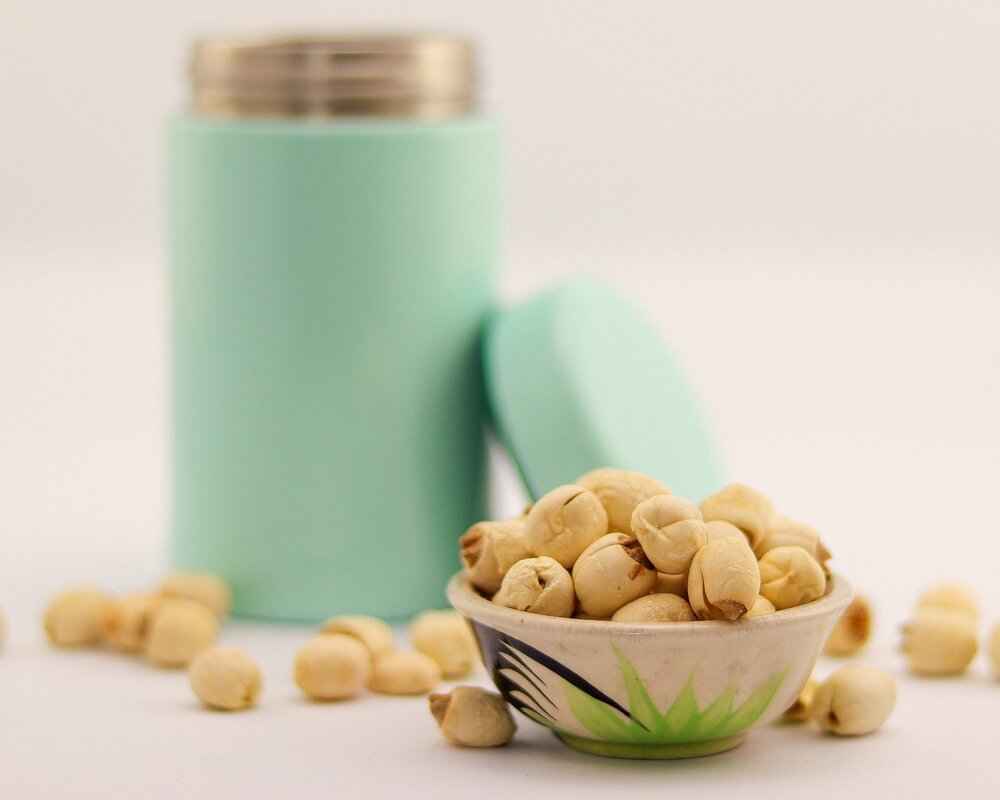
When and How to Harvest Chia Seeds?
Harvesting chia seeds at the right time is essential for maximizing your yield and ensuring the quality of the seeds. Understanding the nuances of the harvesting process can significantly impact the success of your chia gardening efforts. This section delves into the critical aspects of when and how to harvest chia seeds, providing you with the insights you need for a fruitful harvest.
Timing is everything when it comes to harvesting chia seeds. The ideal moment to harvest is when the flowers have dried, and the leaves have begun to wilt. Typically, this occurs about three to four months after planting. Here are some key indicators to look for:
- Dry Flowers: The flowering spikes should be completely dry and brittle.
- Color Change: The flowers will change from vibrant colors to a more muted, brownish hue.
- Leaf Condition: Leaves will start fading and may appear yellow or brown.
Once you’ve determined that your chia plants are ready for harvest, it’s important to employ the right techniques to avoid damaging the plants and ensure a successful collection of seeds. Here are some effective harvesting methods:
- Cutting the Stalks: Use sharp garden shears to cut the stalks just below the flowering spikes. This method minimizes damage to the plants and allows for easier seed collection.
- Drying the Stalks: After cutting, hang the stalks upside down in a dry, well-ventilated area. This allows any remaining moisture to evaporate, reducing the risk of mold.
- Collecting Seeds: Once the stalks are completely dry, gently shake them over a clean surface or container. This will help dislodge the seeds from the flowering spikes.
After harvesting, it’s essential to handle the seeds properly to maintain their quality:
- Cleaning: Remove any debris or plant material from the seeds. This can be done by sifting them through a fine mesh sieve.
- Storage: Store the cleaned seeds in an airtight container in a cool, dark place. This helps preserve their freshness and nutritional value.
- Testing for Viability: Before planting the harvested seeds in the future, consider conducting a germination test to ensure they are still viable.
By understanding the right time to harvest and employing effective techniques, you can maximize your chia seed yield and enjoy the many benefits of this nutritious superfood. Remember, patience and attention to detail are key to a successful harvest!
Signs of Maturity
Harvesting chia seeds at the right time is essential for ensuring that you obtain the best quality seeds. Understanding the in chia plants can significantly improve your harvesting efforts. This section will delve into the various indicators that suggest your chia plants are ready for harvest, ensuring you maximize your yield.
As chia plants mature, several visual cues will signal that it is time to harvest. Monitoring these signs closely can help you avoid premature or late harvesting, both of which can affect the quality and quantity of your seeds.
- Dry Flowers: One of the most apparent signs of maturity is the drying of the flowers. When the flowers turn brown and dry out, it indicates that the seeds inside are likely mature and ready for collection.
- Fading Green Leaves: Healthy green leaves gradually begin to fade to a yellowish hue as the plant reaches maturity. This color change is a natural part of the plant’s life cycle and indicates that the energy is being redirected towards seed production.
- Seed Color Change: If you observe the seed pods, a change in color from green to brown or tan suggests that the seeds are ripening. Mature seeds will often have a darker hue compared to immature ones.
- Pods Becoming Brittle: The seed pods should feel dry and brittle when touched. If they crumble easily, this is a strong indication that the seeds are ready for harvest.
Timing your harvest correctly is crucial for several reasons:
- Maximizing Yield: Harvesting at the right time ensures that you collect the maximum number of seeds from each plant. Waiting too long can lead to seeds dropping from the pods, resulting in loss.
- Quality Control: Seeds harvested at their peak maturity have better flavor and nutritional value. Early harvesting may yield immature seeds that do not store well.
- Reducing Pest Risk: Leaving seeds on the plant for too long can attract pests, which may damage the remaining seeds or plants.
Once you have identified that your chia plants are mature, it’s time to prepare for the harvesting process. Here are some practical steps:
- Gather Necessary Tools: Ensure you have sharp scissors or pruning shears, a bucket or bag for collecting seeds, and a dry, clean area for processing.
- Choose a Dry Day: Harvesting on a dry day helps prevent mold and ensures that the seeds are not damp, which can affect their storage.
- Handle with Care: When cutting the seed heads, handle them gently to avoid crushing the pods and losing seeds.
By paying attention to the signs of maturity and preparing adequately for the harvest, you can ensure a successful and fruitful chia seed collection. Remember, the key to a bountiful harvest lies in the details.
Harvesting Techniques
Harvesting chia seeds at the right time and using appropriate techniques is essential for ensuring a successful yield. The process of harvesting not only affects the quantity of seeds collected but also their quality. Therefore, understanding the various can significantly enhance your gardening experience.
Employing the right harvesting techniques ensures that you collect seeds without damaging the plants. This is crucial because damaged plants can lead to a lower yield and affect the overall health of your garden. Proper techniques help in retaining the integrity of the remaining plants, allowing them to continue thriving.
- Cutting: One of the most effective methods for harvesting chia seeds is cutting the flower stalks. This should be done when the flowers have dried but before they begin to shatter. Use sharp, clean garden shears to make a clean cut, which minimizes damage to the plant.
- Drying: Once cut, the flower stalks should be hung upside down in a dry, well-ventilated area. This allows the seeds to continue drying and prevents mold growth. Make sure to place a container underneath to catch any seeds that may fall during the drying process.
- Threshing: After the flowers are thoroughly dried, it’s time to remove the seeds. This can be done by gently rubbing the flower heads between your fingers or using a sieve to separate the seeds from the chaff. This step requires patience, as it’s essential to avoid crushing the seeds.
- Winnowing: To further clean the seeds, winnowing can be employed. This involves tossing the seeds into the air in a gentle breeze or using a fan to blow away any remaining debris. This step ensures that only the pure seeds are collected for storage.
Knowing when to harvest chia seeds is just as important as how to harvest them. The ideal time is when the flowers have turned a light brown and the leaves are starting to yellow. This indicates that the seeds are mature and ready for collection. Waiting too long can result in seeds shattering and falling to the ground, leading to a loss of your hard-earned crop.
After harvesting, it’s essential to handle the seeds with care. Store them in a cool, dry place in airtight containers to maintain their freshness. Proper storage can prolong the shelf life of chia seeds, ensuring they remain nutritious and ready for future planting or consumption.
By following these and understanding the importance of timing, you can maximize your chia seed yield while maintaining the health of your plants. This comprehensive approach not only enhances your gardening experience but also contributes to sustainable practices in seed harvesting.
How to Store Chia Seeds After Harvesting?
Proper storage of harvested chia seeds is essential for maintaining their freshness and nutritional value. Once you have successfully harvested your chia seeds, following best practices for storage ensures that they remain viable for future planting or consumption. Below are the key considerations to keep in mind when storing your chia seeds.
To preserve the quality of your chia seeds, it is crucial to store them in the right conditions. Here are some important factors to consider:
- Temperature: Chia seeds should be stored in a cool environment, ideally between 50°F to 70°F (10°C to 21°C). High temperatures can reduce their shelf life.
- Humidity: Keep the seeds in a dry place. Excess moisture can lead to mold growth and spoilage.
- Light Exposure: Store chia seeds away from direct sunlight. UV rays can degrade their quality over time.
Choosing the right container is equally important for effective storage. Here are some options:
- Airtight Containers: Use glass jars or high-quality plastic containers with tight seals. This prevents air and moisture from entering.
- Vacuum-Sealed Bags: For long-term storage, consider vacuum-sealing your chia seeds. This method removes air and helps maintain freshness.
- Opaque Containers: If possible, opt for opaque containers that block light, further protecting the seeds from degradation.
Understanding the shelf life of chia seeds is crucial for effective management. When stored properly under the conditions mentioned above, chia seeds can last for up to four to five years without significant loss of their nutritional value. However, it is advisable to check for any signs of spoilage, such as off-odors or changes in texture, before use.
If you want to extend the shelf life of your chia seeds even further, freezing is an excellent option. When frozen, chia seeds can last indefinitely. Here’s how to do it:
- Place the seeds in a vacuum-sealed bag or an airtight container.
- Label the container with the date to keep track of their storage time.
- When ready to use, thaw them at room temperature before consumption or planting.
In summary, proper storage of chia seeds is vital to ensure they remain fresh and retain their nutritional benefits. By following these guidelines on storage conditions, container options, and shelf life, you can effectively manage your chia seed stock and enjoy their health benefits for years to come.
Storage Conditions
When it comes to storing chia seeds, ensuring their longevity and quality is paramount. These tiny seeds are packed with nutrients and can provide numerous health benefits, but they can lose their potency if not stored correctly. Below, we delve into the best practices for storing chia seeds to maximize their shelf life and nutritional value.
Proper storage conditions are crucial for maintaining the freshness of chia seeds. Exposure to moisture, heat, and light can lead to rancidity and nutrient degradation. To ensure that your chia seeds remain viable for consumption, consider the following factors:
- Temperature: Chia seeds should be kept in a cool environment. Ideal storage temperatures are typically below 70°F (21°C).
- Humidity: High humidity can cause chia seeds to clump together and spoil. Keeping them in a dry place is essential.
- Light Exposure: Sunlight can degrade the quality of chia seeds over time. It is important to store them in a dark location or in opaque containers.
To enhance the shelf life of your chia seeds, follow these recommended storage practices:
- Use Airtight Containers: Storing chia seeds in airtight containers helps to prevent moisture and air from compromising their quality. Glass jars, vacuum-sealed bags, or plastic containers with tight-sealing lids are excellent options.
- Choose the Right Location: A pantry or cupboard that remains cool and dark is ideal for storing chia seeds. Avoid places near stoves, ovens, or windows where temperature fluctuations and light exposure can occur.
- Refrigeration: For those who wish to extend the shelf life even further, storing chia seeds in the refrigerator can be beneficial. Just ensure they are in a well-sealed container to prevent moisture absorption.
When stored correctly, chia seeds can last for up to five years without significant loss of nutritional value. However, it is advisable to check for any signs of spoilage, such as an off smell or changes in texture, before use. Regularly inspecting your stored seeds will help ensure that they remain safe and healthy to consume.
It’s important to be aware of the signs that indicate chia seeds may no longer be good to eat:
- Off Odor: Fresh chia seeds should have a mild, nutty aroma. If they smell rancid or sour, it’s time to discard them.
- Changes in Texture: If you notice clumping or a change in texture, this may indicate moisture has compromised the seeds.
- Discoloration: Fresh chia seeds are typically black or white. Any unusual discoloration may suggest spoilage.
By following these guidelines on storage conditions, you can ensure that your chia seeds remain fresh and nutritious for as long as possible. Proper storage not only preserves their quality but also allows you to enjoy the numerous health benefits they offer.
How Long Can You Store Chia Seeds?
Understanding the shelf life of chia seeds is essential for anyone looking to incorporate this superfood into their diet. With their rising popularity, many people are curious about how to manage their stock effectively. Properly stored chia seeds can last for several years, retaining their nutritional value and flavor.
What is the Shelf Life of Chia Seeds?
Chia seeds, when kept in the right conditions, can last up to five years or even longer. This impressive longevity is primarily due to their low moisture content and high antioxidant levels. However, the actual shelf life can vary based on several factors including storage conditions and seed quality.
How to Store Chia Seeds for Maximum Freshness?
- Cool, Dry Place: Chia seeds should be stored in a cool, dry environment to prevent moisture absorption, which can lead to spoilage.
- Airtight Containers: Utilizing airtight containers, such as glass jars or vacuum-sealed bags, can significantly enhance the shelf life by keeping air and moisture out.
- Darkness: Exposure to light can degrade the quality of chia seeds over time. Storing them in a dark cupboard or pantry is ideal.
Signs That Chia Seeds Have Gone Bad
Even with proper storage, it’s crucial to check your chia seeds periodically. Here are some signs that they may have spoiled:
- Off Odor: Fresh chia seeds have a mild, nutty smell. If they emit a rancid or off-putting odor, it’s best to discard them.
- Change in Texture: If the seeds feel sticky or clump together, this could indicate moisture absorption and potential spoilage.
- Color Change: Healthy chia seeds are typically black or white. Any discoloration may signal that they are no longer good to consume.
Can You Freeze Chia Seeds?
If you want to extend the shelf life of your chia seeds even further, consider freezing them. Freezing can help maintain their freshness for many years. Just ensure they are in a well-sealed container to prevent freezer burn.
Conclusion
By understanding the shelf life of chia seeds and implementing proper storage practices, you can enjoy this nutritious seed for years to come. Regularly checking for signs of spoilage will further ensure that your chia seeds remain a healthy addition to your diet.
Frequently Asked Questions
- What are the health benefits of chia seeds?
Chia seeds are packed with nutrients! They are high in omega-3 fatty acids, fiber, and antioxidants, making them a fantastic addition to your diet. They can help with digestion, improve heart health, and even boost energy levels!
- How do I know when to harvest my chia seeds?
Timing is everything! Look for signs of maturity, such as dry flowers and fading green leaves. When these indicators show up, it’s your green light to start harvesting!
- Can I grow chia seeds indoors?
Absolutely! As long as you can provide the right conditions, such as plenty of sunlight and well-draining soil, you can successfully grow chia seeds indoors. Just make sure they get at least six hours of direct sunlight a day!
- How should I store my harvested chia seeds?
To keep your chia seeds fresh, store them in a cool, dry place away from sunlight. Using airtight containers can also help maintain their quality for a longer time.
- Are there different varieties of chia seeds?
Yes, there are primarily two varieties: white and black chia seeds. While they are nutritionally similar, their flavors and appearances can differ, allowing you to choose based on your preference!


