This article serves as a comprehensive guide on connecting a VU meter to a recorder, detailing the necessary tools, providing step-by-step instructions, and offering troubleshooting tips to ensure accurate audio monitoring.
VU meters, or Volume Unit meters, are essential tools for audio professionals, providing visual feedback on audio levels. They function by measuring the amplitude of an audio signal, which is critical in recording and mixing environments. By displaying the average level of audio signals, VU meters help prevent distortion and ensure a balanced mix. Understanding how VU meters work and their importance can greatly enhance your audio production quality.
Selecting the appropriate VU meter is crucial for effective audio monitoring. There are various types of VU meters, including analog and digital options. Analog VU meters provide a classic aesthetic and are often preferred for their warm, natural readings. In contrast, digital VU meters offer precise measurements and are easier to read. When choosing a VU meter, consider factors such as accuracy, response time, and connectivity options to ensure it meets your recording needs.
Before connecting a VU meter to a recorder, certain tools are necessary. Ensure you have the following items on hand:
- VU meter
- Audio cables (XLR or TRS)
- Screwdriver
- Multimeter for testing
- Patch bay (optional)
Having these tools ready will facilitate a smooth setup process.
Connecting a VU meter to a recorder may seem daunting, but following these steps will simplify the process:
- Prepare the Recorder: Before connecting, ensure your recorder is powered off and unplugged. Check the user manual for specific connection points.
- Wiring the VU Meter: Connect the audio cables from the output of the recorder to the input of the VU meter. Ensure all connections are secure to avoid signal loss.
- Powering Up: Once everything is connected, power on the recorder and the VU meter. Verify that the meter lights up and is responsive.
Calibration is vital for accurate monitoring. To calibrate your VU meter:
- Set the output level of your recorder to a known reference point.
- Adjust the VU meter to ensure it reads the correct level corresponding to the output.
- Repeat this process for different frequencies to ensure consistent performance across the audio spectrum.
Sometimes, issues may arise during the connection process. Here are some common problems and their solutions:
- No Signal: Check all connections and ensure the recorder is outputting audio.
- Inaccurate Readings: Recalibrate the VU meter and verify the reference levels.
- Meter Not Lighting Up: Check the power supply and ensure the VU meter is functioning properly.
Proper maintenance extends the lifespan of your VU meter. Here are some tips:
- Keep the VU meter clean and dust-free.
- Store it in a protective case when not in use.
- Regularly check connections and cables for wear and tear.
For those looking to enhance their audio monitoring, consider these advanced techniques:
- Utilize the VU meter in conjunction with other monitoring tools for a comprehensive view of audio levels.
- Experiment with different reference levels to find the sweet spot for your recordings.
- Incorporate VU meter readings into your mixing process to achieve a balanced sound.
Understanding VU Meters
VU meters, or Volume Unit meters, are indispensable tools for audio professionals, serving as visual indicators of audio signal levels. Their primary purpose is to provide a reliable representation of audio levels during recording, mixing, and broadcasting. By understanding how these meters function, audio engineers and producers can achieve optimal sound quality and prevent distortion.
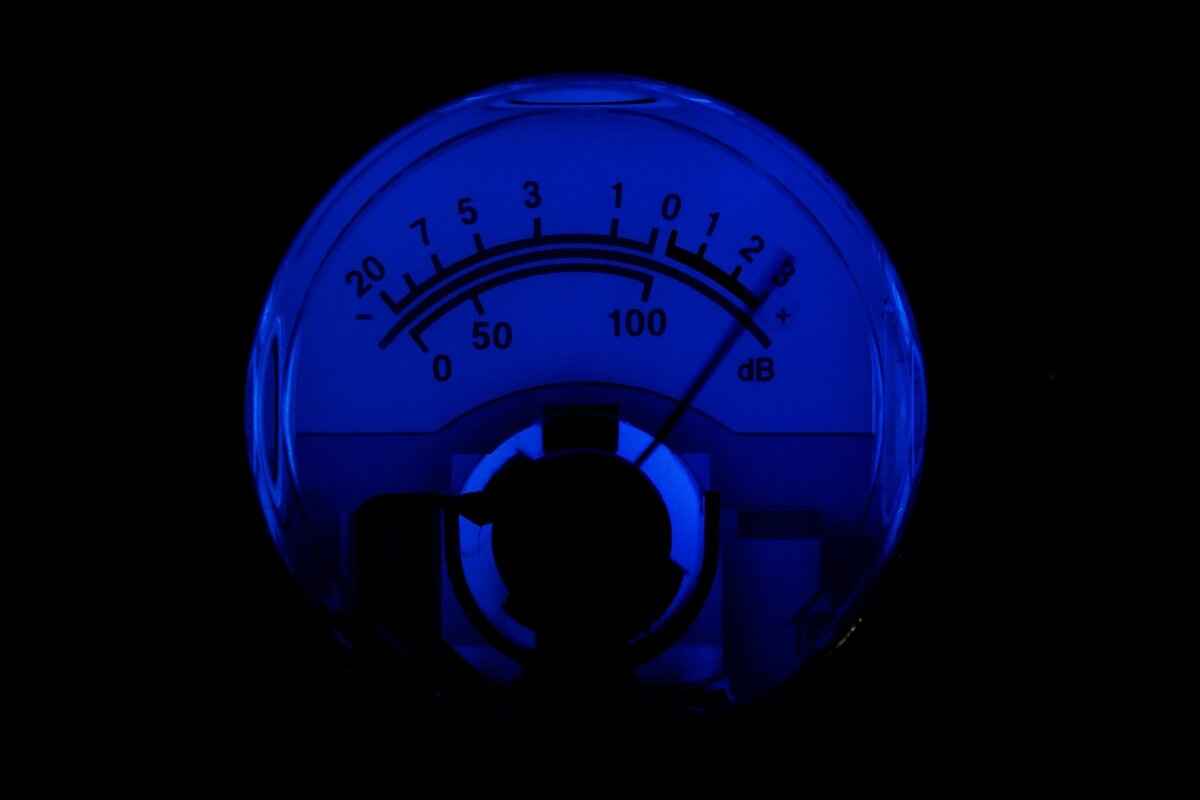
The functionality of a VU meter is based on its ability to measure the average level of audio signals. Unlike peak meters, which react to the highest levels of sound, VU meters display a more averaged representation of the signal. This characteristic makes them particularly useful for monitoring the loudness of audio tracks in a way that aligns with human hearing perception. The needle of the VU meter moves in response to audio signals, providing a visual cue that helps professionals make informed decisions about their audio levels.
In audio recording and mixing environments, VU meters are critical for several reasons:
- Prevention of Distortion: By monitoring levels accurately, audio professionals can avoid clipping and distortion that occur when signals exceed the maximum level.
- Consistency: VU meters help maintain a consistent audio level throughout the recording process, ensuring that tracks blend well together.
- Dynamic Range Management: They assist in managing the dynamic range of audio, allowing for a more polished and professional sound.
Furthermore, VU meters can be found in various formats, from analog to digital versions, each offering unique features suited for different applications. Analog VU meters, with their classic needle display, are often favored for their warm, vintage aesthetic and simplicity. In contrast, digital VU meters provide more precise readings and often come with additional features like peak level indicators and customizable settings.
To maximize the effectiveness of VU meters, it is essential to understand their calibration and how to interpret their readings accurately. Proper calibration ensures that the meter provides reliable data, which is crucial for achieving the desired audio quality. Additionally, audio professionals must be familiar with the reference levels associated with their specific projects, as different genres and formats may require varying levels of loudness.
In conclusion, VU meters are vital tools in the arsenal of audio professionals. Their ability to provide accurate and consistent audio level monitoring makes them indispensable in the recording and mixing process. By understanding their purpose and functionality, audio engineers can leverage VU meters to enhance their work, ensuring high-quality sound that resonates with audiences.

Choosing the Right VU Meter
Selecting the right VU meter is a pivotal step for anyone serious about audio recording and monitoring. VU meters, or Volume Unit meters, are instruments that provide visual representations of audio levels, helping audio professionals ensure that their recordings are neither too quiet nor too loud. This section delves into the various types of VU meters available, their unique features, and guidelines on how to choose the ideal one tailored to your specific recording needs.
- Types of VU Meters
- Analog VU Meters: These traditional meters use a needle to indicate levels. They are favored for their warm, vintage aesthetic and are often seen in classic recording studios.
- Digital VU Meters: These meters provide a numerical readout of audio levels. They are precise and often include additional features such as peak hold and averaging, making them suitable for modern recording environments.
- LED Meters: Utilizing light-emitting diodes, these meters offer a clear visual representation of audio levels. They are often found in live sound applications due to their visibility in various lighting conditions.
- Key Features to Consider
- Calibration: A good VU meter should be easily calibratable to ensure accuracy in monitoring levels.
- Response Time: Look for meters that respond quickly to changes in audio levels, especially in dynamic recording situations.
- Range: Consider the range of the meter. A wider range allows for monitoring both quiet and loud signals effectively.
- Build Quality: Durability is essential, especially for portable or live sound applications. Choose a meter that can withstand regular use.
- Matching the VU Meter to Your Needs
- Studio Use: For studio environments, analog VU meters may be preferred for their aesthetic and the warm sound they represent.
- Live Sound: Digital or LED meters are often better suited for live sound due to their visibility and quick response times.
- Budget Considerations: VU meters come in a range of prices. Determine your budget and find a meter that offers the best balance between features and cost.
When choosing a VU meter, it is essential to consider your specific recording context and personal preferences. Whether you lean towards the nostalgic charm of analog meters or the precision of digital options, the right choice will significantly enhance your audio monitoring experience. By understanding the different types and features available, you can make an informed decision that aligns with your recording needs.
In conclusion, selecting the appropriate VU meter is not just about choosing a tool; it’s about enhancing your overall audio quality and ensuring that your recordings meet professional standards. Take the time to evaluate your options, and invest in a VU meter that will serve you well in your audio endeavors.
Tools Required for Connection
Before you embark on the journey of connecting a VU meter to a recorder, it is essential to gather the right tools and equipment. This preparation ensures a seamless setup process, allowing you to focus on achieving accurate audio monitoring. Below is a comprehensive list of the necessary tools you will need:
- VU Meter: The primary tool for monitoring audio levels. Make sure to select one that suits your recording needs.
- Audio Cables: Depending on your VU meter and recorder, you may require RCA, XLR, or TRS cables. Ensure they are of good quality to prevent signal loss.
- Power Supply: Some VU meters may require an external power source. Check the specifications of your meter to ensure you have the correct power supply.
- Screwdriver Set: You may need a screwdriver for securing connections or opening up your recorder for internal wiring.
- Multimeter: Useful for testing connections and ensuring that your wiring is correct and functioning properly.
- Patch Bay: If you’re dealing with multiple audio sources, a patch bay can help organize and manage your connections effectively.
- Audio Interface: If your recorder does not have direct VU meter connections, an audio interface may be necessary to bridge the gap.
- Headphones: A good pair of headphones is essential for monitoring audio while setting up and testing your connections.
- Documentation: Keep the manuals for both your VU meter and recorder handy. They often contain valuable information regarding connections and compatibility.
Having these tools at your disposal will significantly enhance your setup experience. It is advisable to double-check that all equipment is in working order before you begin the connection process. This preparation not only saves time but also reduces the likelihood of errors during the setup.
Once you have gathered all the necessary tools, you can proceed with confidence to connect your VU meter to the recorder. This ensures you’re well-equipped to handle any challenges that may arise during the process, leading to a successful audio monitoring experience.

Step-by-Step Connection Process
Connecting a VU meter to a recorder may appear to be a complex task, but with the right guidance, it can be a straightforward process. This section provides a detailed, step-by-step guide to ensure that you can connect your VU meter to your recorder efficiently, achieving optimal performance and accuracy in your audio monitoring setup.
To successfully connect a VU meter to a recorder, follow these steps carefully:
- Gather Necessary Equipment: Before starting, ensure you have all necessary components. This includes the VU meter, audio cables, and your recording device. Check that the cables are compatible with both the VU meter and the recorder.
- Power Off the Devices: For safety, always make sure that both the VU meter and the recorder are powered off before making any connections. This helps prevent any electrical issues or damage.
- Identify Connection Points: Locate the output on your recorder and the input on your VU meter. Typically, the recorder will have a line output, while the VU meter will have a line input. Consult the user manuals if you are unsure.
- Connect the Cables: Using the appropriate audio cables, connect the output of the recorder to the input of the VU meter. Ensure that the connections are secure to avoid any signal loss.
- Check Grounding: Proper grounding is essential to prevent hum and noise in your audio signal. Make sure that both devices are properly grounded, especially if they are connected to a power source.
- Power On the Devices: Once everything is connected, power on the VU meter followed by the recorder. This ensures that the VU meter initializes correctly and can receive the audio signal.
- Adjust Settings on the VU Meter: Depending on your VU meter, you may need to adjust settings such as sensitivity or calibration. Refer to the VU meter’s manual for specific instructions.
- Test the Connection: Play a test audio signal from the recorder to ensure that the VU meter is receiving the signal correctly. Observe the meter’s response; it should reflect the audio levels accurately.
- Troubleshoot if Necessary: If the VU meter does not respond as expected, double-check all connections and settings. Ensure that the recorder is outputting audio and that the VU meter is set to the correct input.
Following these steps will help you connect your VU meter to your recorder with ease. Remember that proper connections and settings are crucial for achieving the best audio monitoring results.
In conclusion, connecting a VU meter to a recorder does not have to be a daunting task. By carefully following the steps outlined above, you can ensure a successful and efficient setup, allowing you to monitor audio levels accurately during your recording sessions. This not only enhances your audio production quality but also provides you with the confidence to make informed decisions during the recording process.
Preparing the Recorder
Before you can successfully connect a VU meter to your recorder, it is crucial to ensure that your recorder is properly prepared. This preparation not only facilitates a smoother connection but also enhances the overall functionality and accuracy of your audio monitoring system. Below are the essential steps to configure your recorder effectively.
- Check Compatibility: Ensure that your recorder is compatible with the VU meter you intend to use. This involves checking the input and output specifications of both devices. Refer to the user manuals for detailed information on compatibility.
- Gather Required Tools: Before starting the preparation process, gather all necessary tools. This may include cables, connectors, and a screwdriver, among others. Having everything on hand will streamline the setup process.
- Power Off the Recorder: Always power off your recorder before making any connections. This prevents any electrical mishaps and ensures safety during the setup process.
- Inspect Connections: Examine the input and output ports on your recorder for any dust or debris. Clean these ports gently to avoid any connectivity issues. A clean connection point is essential for accurate readings.
- Adjust Input Levels: Check the input levels on your recorder. Set them to a moderate level to avoid distortion when the VU meter is connected. This can usually be done through the recorder’s settings menu.
- Update Firmware: If applicable, ensure that your recorder has the latest firmware installed. Firmware updates can improve functionality and compatibility with external devices like VU meters.
- Consult the Manual: Refer to the user manual of your recorder for specific instructions related to external device connections. This can provide valuable insights and guidelines tailored to your specific model.
By following these preparatory steps, you will create an optimal environment for connecting your VU meter to the recorder. This not only ensures a successful connection but also enhances the accuracy and reliability of your audio monitoring setup. Taking the time to prepare your recorder properly can save you from potential issues later on, allowing you to focus on achieving the best sound quality possible.
In the next section, we will delve into the wiring process, which is equally critical for ensuring that your VU meter functions correctly with your recorder.
Wiring the VU Meter
When it comes to audio monitoring, proper wiring of the VU meter to the recorder is essential for achieving accurate readings. This section delves into the intricacies of wiring, ensuring that you have a thorough understanding of the connections needed for optimal performance.
Before you begin, it is crucial to gather the necessary tools and materials. You will typically need:
- VU meter
- Audio cables (preferably shielded)
- Screwdriver
- Wire strippers
- Multimeter (for testing connections)
- Insulation tape
Once you have your tools ready, follow these step-by-step instructions for wiring the VU meter:
- Turn Off All Equipment: Before starting, ensure that both the VU meter and the recorder are powered off. This is vital for your safety and to prevent any damage to the equipment.
- Identify Connection Points: Locate the output terminals on your recorder and the input terminals on the VU meter. Typically, you will find a positive (+) and negative (-) terminal on both devices.
- Prepare the Cables: Using wire strippers, carefully strip the ends of your audio cables to expose enough wire for a secure connection. Make sure to avoid damaging the wire strands.
- Make Connections: Connect the positive terminal of the recorder to the positive terminal of the VU meter. Repeat the process for the negative terminals. Ensure that the connections are tight and secure to avoid any signal loss.
- Insulate Connections: Once the connections are made, use insulation tape to cover any exposed wires or terminals. This step is crucial for preventing short circuits and ensuring safety.
- Double-Check Connections: Before powering on your equipment, double-check all connections to ensure they are correct and secure. This not only guarantees functionality but also enhances safety.
- Power On Equipment: Once everything is securely connected, turn on your recorder and VU meter. Observe the meter to ensure it is receiving a signal and functioning properly.
After completing the wiring process, it is advisable to test the setup. Use a multimeter to verify that the connections are intact and that the VU meter is calibrated correctly. This ensures that you will receive accurate readings during recording sessions.
In summary, the wiring of a VU meter is a straightforward yet critical process that demands attention to detail. By following these steps, you can ensure a reliable connection that will enhance your audio monitoring experience.
Calibrating the VU Meter
is an essential step in ensuring accurate audio monitoring during recording sessions. Calibration helps to establish a reliable reference point for your VU meter, allowing for consistent measurements that are crucial for achieving high-quality sound. In this section, we will explore the importance of calibration, the steps involved, and tips to ensure your VU meter functions optimally.
Calibration is vital because it aligns the VU meter’s readings with the actual audio levels being recorded. Without proper calibration, you risk misinterpreting the audio levels, which can lead to distortion or insufficient volume during playback. This is particularly important in professional audio settings where precision is key.
Steps to Calibrate Your VU Meter:
- Initial Setup: Ensure that your VU meter is correctly connected to the audio recorder. Double-check all wiring and connections to avoid any potential issues.
- Set the Reference Level: Play a test tone or a reference audio signal through the recorder. This signal should ideally be at a known level, such as 0 dB. Adjust the input level on your recorder until the VU meter indicates the correct reading.
- Adjust the Calibration Knob: Most VU meters come with a calibration knob or trim control. Use this to adjust the meter’s reading to match the reference level. Make sure that the needle points precisely to the 0 mark when the reference tone is played.
- Check for Consistency: After making adjustments, play the reference tone multiple times to ensure that the readings are consistent. If the meter fluctuates, further adjustments may be necessary.
- Document the Calibration: Once calibrated, document the settings and any changes made. This will help in future calibrations and ensure that you can return to this baseline if needed.
Tips for Effective Calibration:
- Use high-quality cables to minimize signal loss during transmission.
- Perform calibration in a quiet environment to avoid interference from background noise.
- Regularly check and recalibrate your VU meter, especially if it is frequently moved or used in different settings.
In conclusion, proper calibration of your VU meter is essential for achieving accurate audio monitoring. By following the steps outlined above and implementing the provided tips, you will ensure that your recordings are of the highest quality. Remember, consistent calibration not only enhances your audio projects but also builds your confidence as an audio professional.
Setting Reference Levels
Establishing reference levels is a crucial aspect of effective audio monitoring. Reference levels serve as a benchmark for audio signals, ensuring that the sound is neither too low nor too high, which can lead to distortion or loss of detail. Properly setting these levels on your VU meter allows for optimal performance during recording and mixing processes.
- Understanding Reference Levels: Reference levels represent the standard audio signal strength against which all other signals are measured. They are vital for maintaining consistency in audio quality across different recordings.
- Importance of Calibration: A well-calibrated VU meter provides accurate readings. This ensures that your audio levels are set correctly, which is essential for achieving a balanced mix.
To set reference levels on your VU meter, follow these steps:
- Identify the Standard Reference Level: Most audio professionals use a reference level of 0 VU, which corresponds to a specific voltage level (usually +4 dBu in professional settings). Familiarize yourself with the standard for your equipment.
- Connect Your Equipment: Ensure that your VU meter is properly connected to your recording device. This involves using the correct cables and inputs to facilitate accurate signal transmission.
- Play a Test Signal: Use a test tone or pink noise at the desired reference level. This will help you gauge how your VU meter responds and whether it accurately reflects the incoming signal.
- Adjust the VU Meter: If the meter does not peak at 0 VU with the test signal, adjust the input levels on your recording device until the meter reads correctly. This may involve tweaking gain settings or using trim controls.
- Monitor Levels During Recording: As you record, keep an eye on the VU meter. Aim to maintain levels around the reference point, avoiding peaks that may cause clipping or distortion.
In addition to these steps, consider the following tips for effective reference level management:
- Regular Calibration: Periodically recalibrate your VU meter to ensure continued accuracy. Environmental factors and equipment wear can affect performance over time.
- Use Visual Aids: Consider using visual aids, such as graphs or charts, to track your reference levels over time. This can help identify patterns and make adjustments as needed.
- Educate Your Team: If you work with a team, ensure everyone understands the importance of reference levels and how to maintain them. Consistency is key in achieving the best audio quality.
By following these guidelines, you can effectively set reference levels on your VU meter, leading to improved audio monitoring and overall recording quality. Remember, the goal is to maintain a balance that allows for the best possible sound reproduction, making your recordings clear and professional.
Testing the Connection
After successfully calibrating your VU meter, it is crucial to ensure that the connection between your VU meter and recorder is functioning correctly. This step not only verifies that your setup is accurate but also guarantees that you will achieve optimal audio monitoring during recordings. Below are the detailed steps and considerations for testing your connection effectively.
- Step 1: Visual Inspection – Begin by performing a thorough visual inspection of all connections. Ensure that the cables are securely connected to both the VU meter and the recorder. Look for any signs of wear or damage on the cables, as this could affect the signal quality.
- Step 2: Power On – Power on both the VU meter and the recorder. Ensure that the VU meter is receiving power and is functioning as expected. You should see the needle or digital display respond when the device is powered on.
- Step 3: Test Signal Input – To test the connection, send a test signal from the recorder to the VU meter. This can be done by playing back a previously recorded audio track or generating a tone signal. The VU meter should respond accordingly, with the needle moving or the display indicating the signal level.
- Step 4: Monitor Levels – While the test signal is playing, monitor the levels on the VU meter. Ensure that the readings are within the expected range. If the needle is not moving or the display is not showing any activity, this indicates a potential issue with the connection.
- Step 5: Adjust Settings – If the VU meter is not responding as anticipated, check the settings on both the recorder and the VU meter. Ensure that the input source is correctly selected on the recorder and that the VU meter is set to the appropriate mode for monitoring.
- Step 6: Check Calibration – If the connection appears to be functioning but the readings are inaccurate, revisit the calibration process. Ensure that the VU meter was calibrated correctly and that the reference levels are set appropriately.
- Step 7: Troubleshoot Issues – If problems persist, refer to the troubleshooting section of your VU meter’s manual. Common issues may include faulty cables, incorrect settings, or hardware malfunctions. Address these issues systematically to restore functionality.
By following these steps, you can confidently verify that your VU meter is connected correctly to your recorder. Regular testing of your setup not only ensures accurate monitoring but also enhances the overall quality of your audio recordings. Remember, a well-functioning VU meter is essential for achieving professional sound quality, making this step a critical part of your audio workflow.
In summary, testing the connection between your VU meter and recorder is a vital process that should not be overlooked. By conducting thorough checks and adjustments, you can ensure that your audio monitoring setup is reliable and effective, allowing for precise control over your recordings.
Troubleshooting Common Issues
When connecting a VU meter to a recorder, it is not uncommon to encounter various challenges that may hinder the process. Understanding these potential issues and their solutions can significantly enhance your experience and ensure a seamless setup. This section delves into the most frequently faced problems and offers practical solutions to help you overcome them efficiently.
The connection of a VU meter to a recorder can be straightforward, but complications may arise. Here are some common issues you might encounter:
- No Signal on the VU Meter: If your VU meter is not displaying any signal, first check the wiring connections. Ensure that the cables are securely connected to both the VU meter and the recorder. Additionally, verify that the recorder is producing an audio signal. You can test this by playing back a known audio source.
- VU Meter Reading Incorrectly: If the readings on your VU meter seem off, calibration may be required. Refer to the manufacturer’s guidelines for calibrating your specific model. It is essential to set the reference levels correctly to ensure accurate monitoring.
- Intermittent Signal Loss: Intermittent signal loss can be frustrating. Check for any loose connections or damaged cables. Sometimes, interference from other electronic devices can cause disruptions, so try to keep your setup free from potential sources of interference.
- VU Meter Lights Not Functioning: If the lights on your VU meter are not illuminating, it may indicate a power issue. Make sure that the VU meter is plugged in and that any necessary power switches are turned on. If the problem persists, consider checking the internal fuse or contacting the manufacturer for assistance.
- Inconsistent Readings: Inconsistent readings can be a sign of poor connections or a malfunctioning VU meter. Inspect the wiring and connections thoroughly. If everything appears to be in order, it may be time to test the VU meter with another device to determine if the issue lies with the meter itself.
By being aware of these common issues and their solutions, you can troubleshoot effectively and maintain a smooth operation of your VU meter and recorder setup. Remember that proper preparation and regular maintenance can prevent many of these problems from occurring in the first place.
For further assistance, consider consulting the user manual of your VU meter or reaching out to audio professionals who may offer valuable insights. Troubleshooting can sometimes be a learning experience, and understanding your equipment better will enhance your overall audio monitoring capabilities.
Maintaining Your VU Meter
Proper maintenance is crucial for extending the lifespan and ensuring the accuracy of your VU meter. By following a few essential care tips, you can keep your VU meter in excellent working condition for years to come. This guide will walk you through the necessary steps to maintain your VU meter effectively.
- Regular Cleaning: Dust and debris can accumulate on your VU meter, affecting its performance. Use a soft, lint-free cloth to gently wipe the exterior. For the glass face, a mild glass cleaner can be used, but avoid harsh chemicals that might damage the finish.
- Calibration Checks: Periodically, you should check the calibration of your VU meter. This ensures that it provides accurate readings. Use a reference tone generator to verify the meter’s response and adjust if necessary according to the manufacturer’s guidelines.
- Proper Storage: When not in use, store your VU meter in a protective case or a safe location to prevent physical damage. Avoid exposing it to extreme temperatures or humidity, which can affect its internal components.
- Inspecting Cables and Connections: Regularly check the cables and connections leading to the VU meter. Ensure that there are no frays or loose connections, as these can lead to inaccurate readings or even damage the meter.
- Battery Maintenance: If your VU meter is battery-operated, replace the batteries as needed. Use high-quality batteries to ensure optimal performance and avoid leakage that can damage the device.
In addition to these maintenance tips, it’s important to familiarize yourself with the specific requirements of your VU meter model. Always refer to the manufacturer’s manual for any particular care instructions or recommendations.
Common Issues and Solutions
While maintaining your VU meter, you may encounter some common issues. Below are a few problems and their respective solutions:
- Meter Not Responding: If your VU meter isn’t responding, check the power source and connections. Ensure that the device is properly plugged in or that the batteries are functioning.
- Inaccurate Readings: If the readings seem off, recalibrate the meter. Use a reliable audio source to check the accuracy and adjust as necessary.
- Physical Damage: If your VU meter has been dropped or damaged, inspect it for any visible issues. If internal components are affected, it may require professional servicing.
By implementing these maintenance practices, you can ensure that your VU meter remains a reliable tool in your audio recording setup. Remember, a well-maintained VU meter not only enhances your audio monitoring experience but also contributes to the overall quality of your recordings. By taking the time to care for your equipment properly, you are investing in the longevity and performance of your audio tools.
Advanced Techniques for VU Meter Usage
In the realm of audio recording and mixing, VU meters serve as invaluable tools for monitoring audio levels. While basic usage is essential, mastering advanced techniques can significantly enhance your audio monitoring capabilities. This section delves into various strategies that experienced audio professionals employ to maximize the effectiveness of VU meters in different recording scenarios.
- Understanding Dynamic Range: One of the most critical aspects of using VU meters effectively is understanding the dynamic range of your audio signals. By analyzing the peaks and troughs of your recordings, you can adjust levels to ensure that your audio remains within an optimal range, preventing distortion and ensuring clarity.
- Using VU Meters in Different Recording Environments: Different environments can affect how you use VU meters. For instance, in a live recording setting, the VU meter can help you monitor changes in levels due to audience noise or other variables. In contrast, in a studio setting, you may want to focus on maintaining consistent levels throughout multiple takes.
- Implementing Averaging Techniques: VU meters are designed to average levels over time. By utilizing this feature, you can make more informed decisions about your audio levels. For instance, if you notice that the meter frequently peaks, you may want to adjust the gain or apply compression to maintain a more consistent output.
- Utilizing VU Meters for Mixing: During the mixing process, VU meters can help ensure that all elements of your audio mix are balanced. By regularly monitoring the VU levels of each track, you can make adjustments that enhance the overall sound, ensuring that no single element overwhelms the others.
- Creating Reference Tracks: A powerful technique is to create reference tracks using VU meters. By recording a known good mix and comparing it to your current project, you can use the VU readings to guide your mixing decisions, ensuring that you stay within the desired audio levels.
- Employing Visual Aids: Many modern VU meters come with visual aids, such as LED indicators or digital displays. These can help you quickly assess levels at a glance, allowing for faster adjustments during recording sessions. Familiarizing yourself with these features can streamline your workflow and improve efficiency.
- Calibration for Specific Environments: Depending on your recording environment, it may be beneficial to calibrate your VU meter to reflect the acoustics of the space. This ensures that your meter provides accurate readings that correspond to the actual sound levels within that environment.
By incorporating these advanced techniques into your workflow, you can enhance your audio monitoring capabilities and ensure that your recordings are of the highest quality. Mastering the use of VU meters not only improves your technical skills but also elevates the overall production value of your audio projects.
Conclusion and Final Thoughts
In this article, we have explored the intricate process of connecting a VU meter to a recorder, emphasizing the significance of this connection for achieving superior audio quality. As we wrap up our discussion, it is essential to reiterate the key insights we’ve gathered throughout this guide. Understanding the functionality and importance of VU meters is critical for audio professionals and enthusiasts alike.
Key Points Recap:
- Understanding VU Meters: VU meters are vital tools that provide visual feedback on audio levels, ensuring recordings are neither too quiet nor excessively loud, which can lead to distortion.
- Choosing the Right VU Meter: Selecting a VU meter tailored to your specific needs, whether analog or digital, can greatly impact your monitoring capabilities.
- Tools Required: Having the right tools on hand, such as cables and connectors, simplifies the setup process and minimizes potential errors.
- Step-by-Step Connection Process: Following a structured approach to connect your VU meter ensures a seamless integration with your recording equipment.
- Calibration: Properly calibrating your VU meter is essential for accurate readings, allowing you to make informed adjustments during recording sessions.
- Troubleshooting: Being aware of common issues and their solutions can save time and frustration, enabling you to focus on your creative process.
- Maintenance: Regular maintenance of your VU meter guarantees longevity and reliability, ensuring it remains a trusted tool in your audio arsenal.
Moreover, connecting and utilizing VU meters correctly is pivotal for optimal audio recording results. This connection not only enhances the clarity and quality of your recordings but also fosters a deeper understanding of audio dynamics. By monitoring levels accurately, you can avoid common pitfalls such as clipping and distortion, which can detract from the overall quality of your work.
In summary, the art of audio recording is significantly improved through the adept use of VU meters. As we have discussed, the process involves careful selection, precise setup, and ongoing maintenance. By following the guidelines outlined in this article, you can ensure that your VU meter serves as an invaluable asset in your recording endeavors. Remember, the goal is not just to record sound but to capture the essence of the audio in its best form. Embrace the power of VU meters, and elevate your audio production to new heights.
Frequently Asked Questions
- What is a VU meter and why is it important?
A VU meter, or Volume Unit meter, is a tool used to measure the audio level in recording and broadcasting. It helps audio professionals monitor sound levels accurately, ensuring that recordings are neither too loud nor too soft. This is crucial for achieving high-quality audio outputs.
- How do I choose the right VU meter for my setup?
When selecting a VU meter, consider factors like the type of recordings you do, the features you need (like analog vs digital), and your budget. Look for meters that provide clear readings and are compatible with your recording equipment to ensure seamless integration.
- What tools do I need to connect a VU meter to my recorder?
You’ll need a few essential tools, such as audio cables, a soldering iron (if necessary), and a multimeter for testing connections. Having these tools on hand will make the setup process much smoother and help you avoid potential pitfalls.
- How do I calibrate my VU meter after connecting it?
Calibration involves adjusting the VU meter to ensure it accurately reflects the audio levels being recorded. You can do this by sending a known audio signal to the meter and adjusting it until the readings match the expected levels. This step is vital for reliable monitoring.
- What should I do if my VU meter isn’t working correctly?
If you encounter issues, first check all connections to ensure they are secure. If everything looks good, try recalibrating the meter. If problems persist, consult the user manual or seek support from the manufacturer for troubleshooting tips.


